Showing posts with label better then store-bought. Show all posts

Tuesday, December 13, 2016

Bone Broth


One of the best things you can prepare in your own kitchen instead of purchasing in the store is hands down homemade stocks and broth.  Sure it is convenient to grab a box of chicken or beef stock at the grocery store when your recipe calls for it, but the nutrient-dense stocks that you can cook at home with very little effort and very minimal cost outweigh any convenience!  The main ingredients to any stock or broth are water, bones from animals (chicken, turkey, beef, lamb, fish, venison, bison, pork, etc.), a few vegetables, and spices. You put all your ingredients together in a large stock pot or crock pot and allow to simmer (about 45 minutes to an hour for broth, 3-4 hours for stock and 24+ hours for bone broth), strain and then serve or store for future recipes.  And what you get in return is not only delicious and pure- no strange preservatives, MSG or additives added in like the store bought counterpart, but jam-packed with nutrition. There is a reason chicken soup is suggested to help beat a cold!  Sure it is warm, comforting and easy on a sore throat but it is so much more than just that.  It is super high in protein, full of minerals that your body craves; gelatin, calcium and potassium, all which support healthy skin, hair, nails and bones, and teeth.  It is a basically a powerhouse of nutrition!  The longer you cook your bones the more minerals and nutrients you are pulling out of the bones. If chicken stock that has been simmered for 45 minutes is thought to be good for a cold, can you imagine the dense health benefits a bone broth that has been simmered for 24 or more hours can do for your body? The stuff is pretty amazing.

Broth and stocks can be sipped as a tea, used as a base for soups, braising vegetables and meats, and to replace the water in most recipes (rice, sauces, gravies, etc.) to not only add the health benefits but also boost your flavor!  Try making a simple rice using just water and give it a taste.  Next make that same rice but replace the water with stock.  You will never want to use water again, it's a game changer!

You can purchase your bones at the butcher or the meat counter of your local grocery store for about $2 a pound.  You will then want to roast them in the oven (30 minutes at 350 degrees) to bring a richness in flavor but also to remove any bitterness the raw bones can add to the stock. But really the easiest method in my opinion is to simply reserve the leftover bones when you roast your meat- chicken, turkey, a pot roast, etc.  If I don't plan on making my bone broth within a few days I will store them in the freezer in a resealable plastic bag until I'm ready. You will almost always find a chicken carcass or two in my downstairs freezer!


Turkey carcass, vegetables, herbs and seasoning


If I am cooking a quick broth or just a simple stock that only takes 3-4 hours then I make it on my stovetop in a heavy bottomed stock pot or dutch oven.  But when I am doing a chicken or turkey bone broth that needs to cook for at least 24 hours or a beef bone broth that will go for 48 hours then I prefer to utilize my crock pot. I just feel safer going to bed or leaving the house during that time without an open flame on my gas stove.

On Thanksgiving I am just as excited to save my bones after my (very handsome!) husband carves the turkey, as I am to eat the meat itself!  Ha! Our turkey this year turned out so fantastic (thank you Alton Brown! Your Brined Thanksgiving Turkey recipe never fails!) that I knew the bone broth was going to be incredible.  So after carving, the bones went back into the roasting pan, covered and into the fridge until the following day.  For a bone broth you want to pick off the majority of the meat.  A little bit is ok, (think the meat left on the neck or the little bit that is adhering to the bones) but our focus are those beautiful bones.


Scott carving up our Thanksgiving turkey


Snow is falling, temperatures dropping and Winter is upon us. Which means one thing- cold and flu season is here.  So if you haven't started making your own bone broth and stocks now is the best time. Let's build up those powerful immunities and make staying healthy our top priority! Here's to a healthy You!


Turkey Bone Broth after 27 hours in the crock pot, before straining


Bone Broth

2 lbs or more, roasted bones (about 2-3 chicken carcasses, or 1 turkey carcass)
1 onion cut into fourths
2-3 large carrots, cut into thirds (if organic no need to peel)
2 celery stalks including the leaves, roughly chopped
2 Tablespoons apple cider vinegar
1 bay leaf
1 Tablespoon whole peppercorns
2 garlic cloves, smashed
Optional: bunch of fresh herbs (since this was thanksgiving turkey stock I wanted to go with those flavors so I used parsley and rosemary)
salt, about a teaspoon

Place roasted bones in the bottom of your crock pot. Add the vegetables, vinegar, bay leaf, peppercorns, garlic and herbs. Add enough cold water to cover the bones.  Cook on low a minimum 24 hours.

When finished cooking the bones should crumble when pressed lightly between your fingers.  This means that all the minerals and nutrients have been pulled out of the bones and into your bone broth. Turn off the crock pot and allow to cool slightly.  Strain the broth using a fine mesh sieve to remove all bits of vegetable, herbs and bones.  I like to lightly press the solids with a wooden spoon in the sieve to remove all the broth. Discard all of the bones and vegetables. Season with salt.

To skim or not to skim? You can enjoy your bone broth as is, but if you choose to have less fat in your broth, then you will need to skim the fat that accumulates at the top.  Skimming off most of the fat is more important if you’re using bones from animals that are conventionally raised, like those found at your traditional grocery store.  But fat is your friend and if you know the animals that you get your bones from are grass-fed then you can skip the skimming step. The easiest way to skim the fat is to place your bone broth into the refrigerator for several hours until a milky looking layer has formed on the top of your broth.  This is the fat.  You can then just scrape this off and discard.  

Store in fridge for up to one week or freeze.  You can freeze flat in quart-sized freezer bags, freeze in icecube trays and then transfer to freezer bags for more individual servings, or in mason jars. If using glass mason jars be sure to allow at least 2" of space to allow for expansion.  If you don't leave space and over-fill your jars they will crack and you will be left with a mess and no broth. Terribly tragic! Allow to cool completely before freezing.  Will store in the freezer for up to 6 months.


Tuesday, October 14, 2014

Raspberry Almond Brown Sugar Muffins


Wow, this pregnancy was a rough one for me in regards to wanting to do anything in the kitchen.  Just the mere thought of doing any sort of cooking or baking made my stomach turn.  I would do it because well, my family had to eat.  But it wasn't the wonderful, enjoyable hobby that I have had my whole life.  And unfortunately for that my blog posts suffered as well.  I am sorry and hope that you will all welcome me back with open arms! 
 
Now that our sweet Aaron is here, my aversion to all things "kitchen" are finally gone!  Halleluiah!  Last week as a part of International Babywearing Week we went to Rosby's Berry Farm and picked the most beautiful raspberry's!  
 
 
The harvest was bountiful and the berries sugary sweet.  I picked three quarts of them!   So today I celebrate with Raspberry Almond Brown Sugar Muffins.   These muffins are so amazing.  Seriously, they have the best of everything- sweet-tart raspberries and the crunch of the almonds and brown sugar topping make for the most perfect muffin. Being a nursing mom made it totally acceptable to have two this morning right?! 


Raspberry Almond Brown Sugar Muffins

2 cups all-purpose flour
1 teaspoon baking powder
1 teaspoon baking soda
1/4 cup shaved almonds
1/4 teaspoon salt
1 large egg
1 cup packed light-brown sugar
1/2 cup butter or margarine, melted
1 cup milk
2 teaspoons vanilla extract
1 cup raspberries (fresh or frozen)

Position the rack in the center of the oven and preheat to 400 degrees F. Lightly grease or line with paper baking cups (makes 12-18 muffins).

In a large bowl, blend together the flour, baking powder, baking soda, almonds, and salt.  In a medium bowl, beat the egg and brown sugar together until thick.  Beat in the butter, milk and vanilla extract.  Combine the two mixtures, blending until the dry ingredients are just moistened.  Gently stir in raspberries. 

Spoon the batter into the prepared muffin cups, filling each 3/4 full. Sprinkle the Streusel Topping (recipe follows) over the tops of the muffins.  Bake for 15-20 minutes, or until a cake tester or wooden toothpick come out clean.  Cool in the pan on a wire rack for 5-7 minutes.  Serve warm, or transfer to the rack to cool completely. 

For the Streusel Topping
1/2 cup all-purpose flour
1/4 cup brown sugar, packed
1/2 stick unsalted butter
1/2 teaspoon cinnamon

Combine all of the ingredients in a food processor and pulse until crumbly.  Alternately you can mash the ingredients with a fork.  Sprinkle over muffins immediately before baking.


Streusel Topping recipe courtesy about.com 

Tuesday, August 27, 2013

Cinnamon-and-Raisin Muffins


Hello friends!  Goodness it feels good to be back and writing.  I decided to take the summer off from blogging to spend some much needed quality time with my family.  But now with my oldest back in school and only one little guy at home with me now, I have been so antsy to get back in the swing of things.  Breaks sure can be nice, gives the perfect recharge to the soul!  And now I have a head FULL of recipes I cant wait to share with you all! 

When Jackson gets home from school he is absolutely famished. A full day of school is hard work!! Baking gives me wonderful quality time with Little O and I love having special treats at home for when Jackson gets off the school bus.  He is going to be thrilled to see one waiting for him on the kitchen table this afternoon!!


Cinnamon-and-Raisin Muffins
recipe slightly adapted from 1001 Muffins by Gregg R. Gillespie

makes 10 muffins

1 1/2 cups All-Purpose flour
2 teaspoons baking powder
1 1/2 teaspoons ground cinnamon
1/2 cup raisins
1/4 teaspoon salt
1/2 cup packed brown sugar
1 large egg
1/4 cup butter, melted
1/2 cup milk

Position the rack in the center of the oven and preheat to 375 degrees F.  Lightly grease or line with paper baking cups ten 2 3/4-inch muffin cups.

In a large bowl, blend together the flour, baking powder, cinnamon, raisins, and salt.  In a medium bowl, beat the sugar, egg, butter, and milk until smooth.  Combine the two mixtures, blending until the dry ingredients are just moistened. 

Spoon the batter into the prepared muffin cups, filling each about three-quarters full.  Bake for 15-20 minutes, or until a cake tester or wooden toothpick inserted into the center of a muffin comes out clean.  Cool in the pan on a wire rack for 5-7 minutes.  Serve warm, or invert onto the rack to cool completely. 

Delicious slathered with butter and a bit of jam!


My taste tester approves!  Owen gobbled his muffin up in no time and kept telling me how yummy they were.  Big hit!  He's pretty stinking cute too, huh?  :)

Tuesday, September 25, 2012

Buffalo Chicken Soup


Hot Wings.  Just thinking the word makes my juices start and there you go- Forget it.  I have a full blown taste for those delicious little guys that won't be satisfied until I have about a dozen in my belly!  They are one of my favorite foods ever!  Who doesn't love wings?  That spicy, addicting flavor is always a hit at parties.  And with Football Season upon us what a perfect time to add a new recipe to your Party Cookbook?!  It tastes exactly like Buffalo Chicken Wings only it is way less messy *grin*.  I can guarantee that this soup will be gobbled up in seconds flat, so I highly recommend making a double batch!  It is that good.  You will be the Hit of the party for sure!  If you are making it for dinner I suggest serving it alongside a garden salad topped with Blue Cheese or Ranch style salad dressing.

When making the soup, start with only a 1/4 of a cup of Franks Hot Sauce, and then go up from there.  If you aren't into spice, but love the flavor, a 1/4 of a cup will be perfect for you.  But if you like heat and spice like we do then 1/2 cup is a great amount.  You can always put the bottle on the table and people can add more to suit their own personal taste.  Don't forget, it is always easier to add more!


Buffalo Chicken Soup
recipe adapted from allrecipes

1/4 cup butter (1 stick)
3 celery stalks, chopped
1 medium onion, chopped
1/4 cup flour
3/4 cup half and half or whole milk
3 cups chicken stock
2-3 large chicken breasts, cooked and shredded (or 2- 12.5 oz. cans of chicken)
1/4-1/2 Cup Franks Hot Sauce, depending on spice preference
2 cups cheddar cheese, shredded
salt and fresh ground black pepper to taste
blue cheese crumbles and fresh flat leaf parsley for garnish

Melt the butter in a large stock pot over medium-high heat and the celery and onion and cook until tender, about 5 minutes. Add the flour and allow to cook until absorbed, about 2 minutes more.

Slowly stir the half-and-half and chicken stock into the mixture, about 1/4 cup at a time allowing the mixture to thicken before adding more. Once all the liquid is added,
stir in the chicken, Franks Hot Sauce, and Cheddar cheese. Season with salt and pepper.

Reduce heat to medium-low. Stirring occasionally, allow the soup to simmer until the the cheese has melted completely, about 10 minutes. Add up to an additional 1 cup of water or chicken stock to reach your desired soup thickness.

Ladle into soup bowls and garnish with crumbles of blue cheese and fresh flat leaf parsley. Serve with a garden salad topped with Blue Cheese or Ranch Style dressing.


Monday, January 9, 2012

Dry Onion Soup Mix


Ever in the middle of making a slow cooker pot roast or want to make a yummy chip dip and don't happen to have one of those envelopes of dry onion soup mix?  Well look no further!  Here is that wonderful mix that you can do yourself and keep on hand for those last minute recipes.  Just make it up now, seal up in an airtight container and you are ready to go.  I love mason jars for this sort of thing.  This recipe makes up well more then one envelope worth.  Be sure you shake the jar well before each use.

Onion Soup Mix
recipe courtesy Food.com

3/4 cup instant minced onion
1/3 cup beef bouillon powder
4 teaspoons onion powder
1/4 teaspoon crushed celery seed
1/4 teaspoon sugar

Combine all ingredients and store in an airtight container.

**About 5 tablespoons of mix are equal to 1 1¼-ounce package.
To make onion dip: Mix 5 tablespoons with one pint of sour cream.

Saturday, January 7, 2012

Whole Wheat Flour Tortillas


This was one of those things that every single time we had soft tacos or flour enchiladas I would think to myself "Hey, I bet I could make these".  Well last night I finally did!  And seriously, listen to me- never go out and buy them again!  This recipe couldn't be any more simple.  It is made with whole wheat which I love and no lard like in so many other recipes, making them much healthier than most store-bought versions.  The taste is light and nicely flavorful, and we all hands-down agreed that we never, ever should eat the store bought kind again.

We had a few left over so I wrapped them in foil and put them in a large re-sealable bag in the fridge.  I was a little nervous that the moisture of the fridge would turn them gummy, but the next day they were even more amazing- if you can believe that!  I tried both reheating them in the microwave sandwiched between damp paper towels and than also wrapped in foil and placed in a warm (200 degree) oven for 5 minutes.  Both ways provided delicious, pliable, rollable flour tortillas!  So not only are they great made to order, but also made ahead of time and just reheated for company the next day.

A friend told me that she heard flour tortillas were very difficult to roll out into circles.  I really didn't have much trouble.  They aren't prefect circles as you can see.  But close enough!  Honestly, I don't really like my homemade goods to look too "perfect".  I like the imperfections that tell you they were made with love at home instead of mass-produced from a store.  And I am sure that practice makes "almost" perfect, and I know that I will be making these many, many, many more times in the future.


Whole Wheat Flour Tortillas
recipe courtesy The Everything Bread Cookbook

yields 6-8 tortillas

1 cup whole wheat flour
1 cup all purpose flour
1/2 teaspoon salt
2 Tablespoons vegetable oil
1/2-3/4 cup cold water

In a large bowl, combine flours and salt.  Stir in oil, and enough water to hold dough together.  Knead until smooth, about 2-3 minutes, then let it rest for 5 minutes.

Turn dough out onto a floured work surface.  pinch off golf-ball-sized pieces of dough and roll into balls.  With floured fingers, flatten into thin disks.  Using a rolling pin, roll out disks no more than 1/4" thick.  If the dough becomes elastic and springs out of shape, allow to rest for 5 minutes, then roll again as necessary.

Preheat griddle over heat.  Cook until lightly goldne but still pliable, about 1-2 minutes per side.  Serve warm.

Don't they look so yummy?!  Why don't you go and make some tonight?

Wednesday, January 4, 2012

Honey White Bread


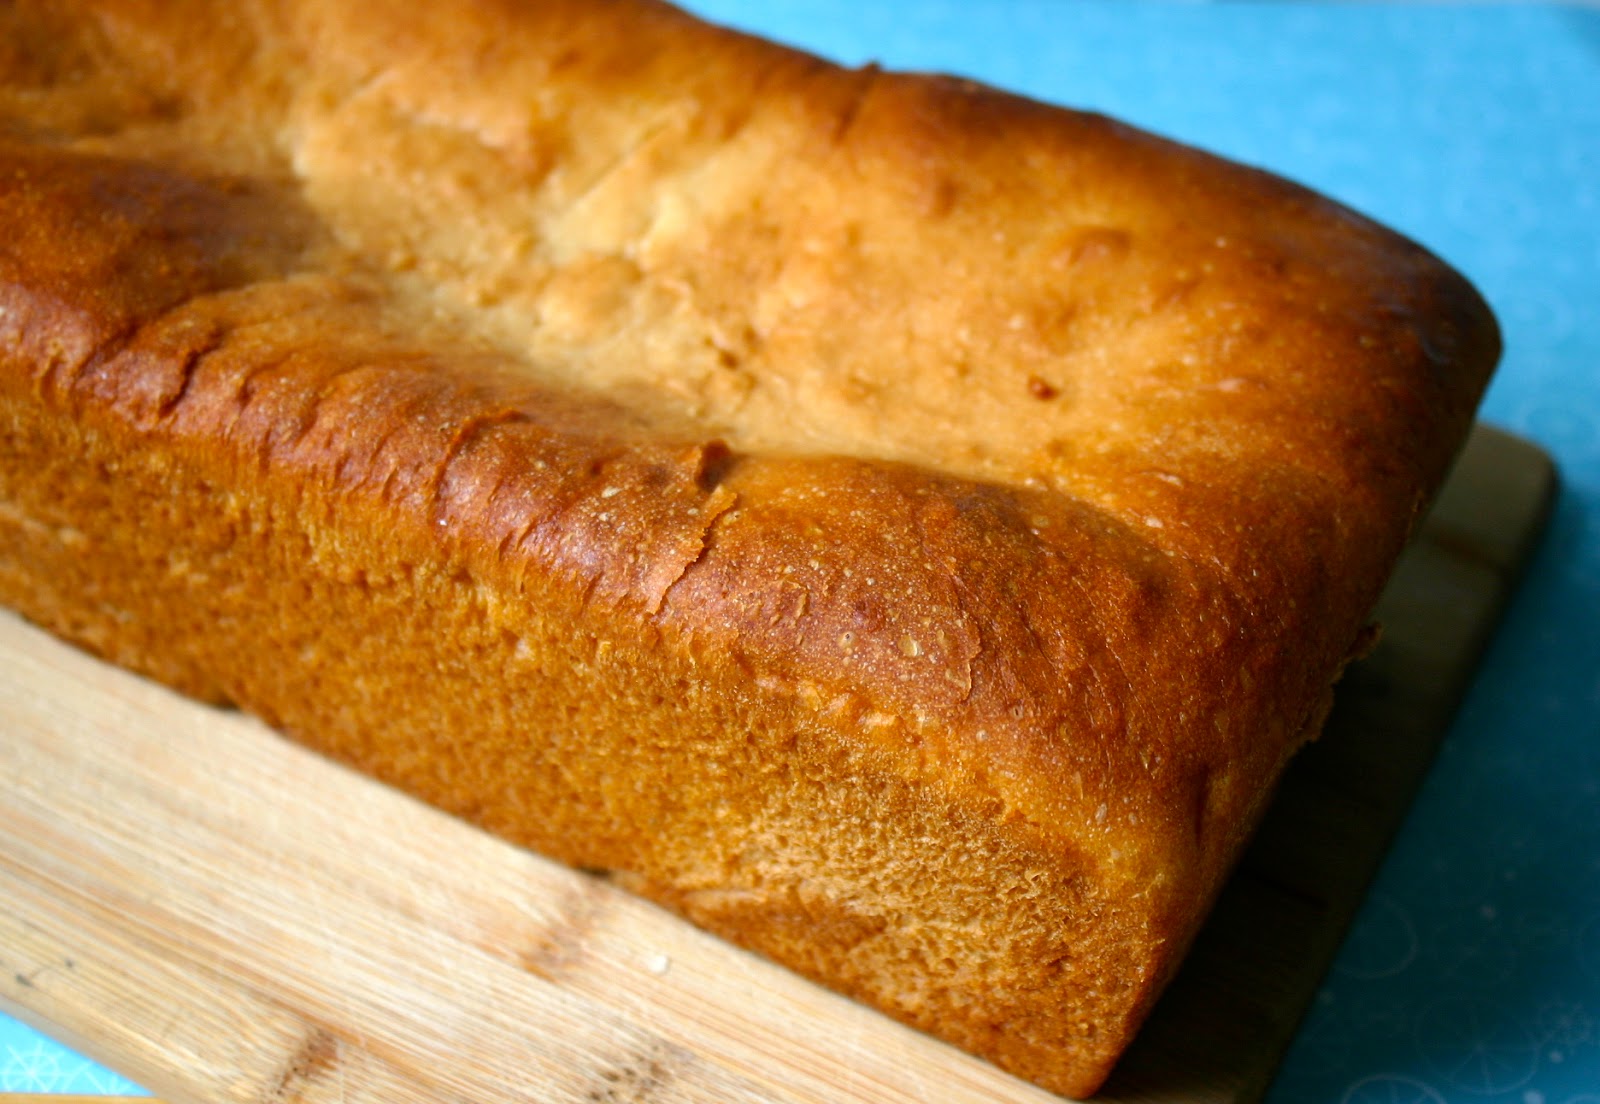
This easy bread is the perfect starter bread for all of you that are interested in bread-baking but are a little nervous of where to begin.  It comes together pretty quickly and has just the right amount of hands on baking that makes you feel proud of yourself for serving your family home-baked bread.  And let me tell you about this flavor.  Delicately sweet, with the hint of honey throughout with a slightly sticky honey-laden crust, giving even the biggest crust-hater something to love. It is my favorite part!  It has a light crumb and is very easy to slice making it a perfect sandwich bread.  I love the way the sweetness of the honey pairs with a ham or turkey sandwich- yum!  But my favorite way to eat it- lightly toasted and slathered with real, honest to goodness butter.  Perfection.


Honey White Bread
recipe from The Everything Bread Cookbook

yields 1 loaf

1 1/4 cups warm milk
3 tablespoons unsalted butter, room temperature
5 tablespoons honey
1 3/4 teaspoons active dry yeast (1 package)
3 cups all purpose flour
3/4 teaspoon kosher salt
1 teaspoon warm water

In a large bowl, combine milk, butter, 1 tablespoon honey, and yeast.  Stir to combine and let stand until foamy, about 10 minutes.

Add another 3 tablespoons honey and 1 cup of flour.  Stir to combine.  Add salt and enough remaining flour to create a firm dough.  Turn out onto a floured surface and knead 8-10 minutes.  You want the dough to be smooth and bounce back when pressed.  Lightly oil bowl with 1 tablespoon canola oil and return dough to oiled bowl.  Dust with flour, and cover loosely with plastic wrap or a damp kitchen towl (not terry cloth).  Rise at room temperature until doubled in volume, about 1 hour.

Coat a 9"x5" loaf pan with butter (don't forget the rim!) and line the bottom and short sides with a strip of parchment paper.  The honey you will brush on the bread before baking may cause the bread to stick to the pan.  This parchment will make it easy to remove.

Turn the dough onto a floured surface and shape into an oblong loaf.  Fold each end under the loaf, creating a rectangle and place into prepared pan.  Set aside to proof for 30 minutes.  Preheat oven to 350 degrees F.

Combine the remaining tablespoon of honey with a teaspoon of warm water, and brush gently over the surface of the risen dough.  Bake until golden brown and hollow  sounding when tapped, about 30-40 minutes.  Cool 10 minutes in pan, then turn out onto a cooling rack to finish cooling completely.


Saturday, July 23, 2011

Homemade "Sandwich Thin" Buns


There is nothing like the smell of homemade bread to cozy up a house. Probably 80% of the bread we eat in our home is what I have baked.  Unless I didn't realize we were out of bread in time for lunches, the only bread I buy is hamburger buns, and most often they are Sandwich Thins.  Orowheat and Arnold both have good ones.  I can't help it- I love these things!!!  They are usually around a 100 calories for an entire bun, plus they are full of fiber and whole wheat goodness.  Since they are so thin, these buns don't have the heaviness that whole wheat sandwich bread can have.

I knew there had to be a recipe out there to make these things myself, eliminating the need to buy bread all together.  This recipe from food.com is wonderful!  The Sandwich Thin buns taste just like the store bought kind- actually better if you ask us.  They have a little more substance to them but are still only 108 calories per bun!  The recipe takes a little time because you need to wait for the dough to rise.  But the hands-on time is very minimal and super, super simple.  When I first started making them I would just free-form the buns into the right shape.  But just the other day I found a Muffin Top pan at the store and had to pick it up.  This makes pretty, perfectly round buns.  But there is still something rustic and lovely with the freeform kind.   I am so excited about these things- this has probably become my favorite recipe of the year!


print this recipe

Homemade "Sandwich Thin" Buns
1 1/3 cups warm water
1/4 cup sugar
2 1/4 tsp yeast
3 cups whole wheat flour (I like to use white whole wheat flour, it has a milder flavor and texture but just the same benefits of regular whole wheat flour.)
1/2 cup wheat bran
2 Tbsp vital wheat gluten
1 tsp salt
1 egg
2 teaspoons canola oil
rolled oats for sprinkling on top

Don't be afraid of yeast! Seriously, baking bread is so easy! First you need to "proof" the yeast. Pour the warm water into the bowl of your stand mixer then add the sugar. Sprinkle the yeast on top and allow to stand for 10 minutes. This is going to be your "sponge" for the dough. (If you don't have a stand mixer, that is perfectly fine!  Just use a regular bowl and do the kneading with your hands.  A mixer isn't necessary, just makes things a little easier and faster.)

Meanwhile, mix the dry ingredients in a separate bowl.

After ten minutes are up, add the canola oil and egg to the bowl of the stand mixer. Using the dough hook, turn the mixer on low and mix.  Add in 1 1/2 cups of the dry ingredients and mix until thoroughly combined. Cover and let rest 1 hour.

Add the remaining dry ingredients and knead for 5 minutes. At tis time your flour may be way too sticky to do anything with. Add a little bit of whole wheat flour at a time up to one additional cup until you get a consistency that is able to be handled.

Line two baking sheets with parchment paper or a Silpat.

Divide dough into 16 equal portions. It is recommended to weighed the entire ball of dough to figure out the weight of each bun, but since I do not yet own a food scale, I just eyeball it.  Good enough for me!

Roll each portion of dough in your hands to form a ball, and then flatten it between your palms.
Place it on the baking sheet and press down, working the dough into a thin 5-inch round.

dough resting before going into the oven

Brush the tops with water and then sprinkle with rolled oats. Lightly press down to help them stick. Adding the oats isn't necessary, but it does make them look pretty. Sometimes I add the oats, sometimes I am just lazy and skip them.

Preheat oven to 350 degrees. Allow the buns to rest for 30 minutes on the baking sheets so they can double in bulk.  After this time you can choose to "dock" the buns.  This means poking small holes into the dough.  They actually have a special tool for this called creatively enough, a Dough Docker.  But a fork or the small end of a chop stick works just as well.  What docking does is prevents air bubbles from forming, keeping them nice and thin.  I have forgotten to dock them at times and never had any issues with bubbles.  But I must say, docking does make them look prettier! After resting, bake for 10-12 minutes.  Do NOT over bake.  You want the sandwich thins to be soft and light and only very lightly golden brown.  10 1/2 minutes of baking time is perfect for my oven.  Just be sure to keep an eye on them.

Let cool completely before slicing with a bread knife.

see how the buns are just very lightly brown- this is perfect!  

Each bun has 108 Calories; 1g Fat; 5g Protein; 20g Carbohydrate; 4g Dietary Fiber; 13mg Cholesterol.

here is a side view so you can see the thickness of the buns after baking


I shared my recipe at
 A Little Nosh
adapted from food.com

Monday, April 4, 2011

Shiny Happy People Granola Bars- Chewy AND Healthy!

It seems there are two different people in this world- crunchy granola bar people and chewy granola bar people.  I have satisfied the crunchy folks but I left all you others out in the cold.  Well here is another granola bar recipe to add to your collection.  And these ones are totally chewy.   


It is also super healthy, replacing all the oil and fat with mashed banana and applesauce.  It has extra fiber, thanks to the addition of Benefiber.  It is totally optional if you don't have any on hand.  But a great thing to note is that adding it to your cooking and baking is a perfect way to bump up your fiber intake.  Who doesn't need a little extra fiber now and then?!  These also have an almost instant gratification due to the fact that you have to cut them after five minutes vs. the 3 hours needed in cooling time with my other two recipes.  


Print this Recipe

Shiny Happy People Granola Bars
2 cups rice crispies
2 cups rolled oats
1/2 cup whole wheat flour
1/2 cup brown sugar
1 cup raisins
1 tbsp benefiber (optional)
3/4 teaspoon salt
1 teaspoon cinnamon
3/4 cup sliced almonds
3/4 cup shredded coconut
1 egg, beaten
1 ripe banana, mashed*
2/3 cup applesauce*
1/2 cup honey
1/2-1 teaspoon vanilla

*you can mix and match the applesauce and banana's.  Either use both as the recipe states, or use 1 cup applesauce and no bananas, or 2 bananas and no applesauce.

Preheat oven to 350 degrees.  Very liberally grease a 9x13 baking pan.

In a large bowl combine rice crispies, rolled oats, flour, raisins, almonds, coconut, Benefiber, salt, cinnamon and brown sugar.  Make a well in the center and set aside.

in a small mixing bowl combine throughly the mashed banana, applesauce, egg, honey, and vanilla.  Pour the wet ingredients into the well of the dry ingredients.  Combine the two until everything is very well coated.  Pour into your prepared 9x13 pan.  Pat down hard, leaving 1 1/2 inch space at the end of the pan.  This insures a chewy granola bar.  Don't worry, they won't spread out while baking.


Bake for 30-35 minutes or until the edges start to turn brown.  Do not overcook.  The center may still appear undercooked.  Cool for 5 minutes in pan and then carefully cut into bars while still warm.  Once cooled all the way, wrap individually in plastic wrap and store in an airtight container.  If you don't eat these guys within a week, move them to the fridge or freezer.  There are no preservatives so they don't last as long in the pantry as store-bought ones.

Tuesday, March 8, 2011

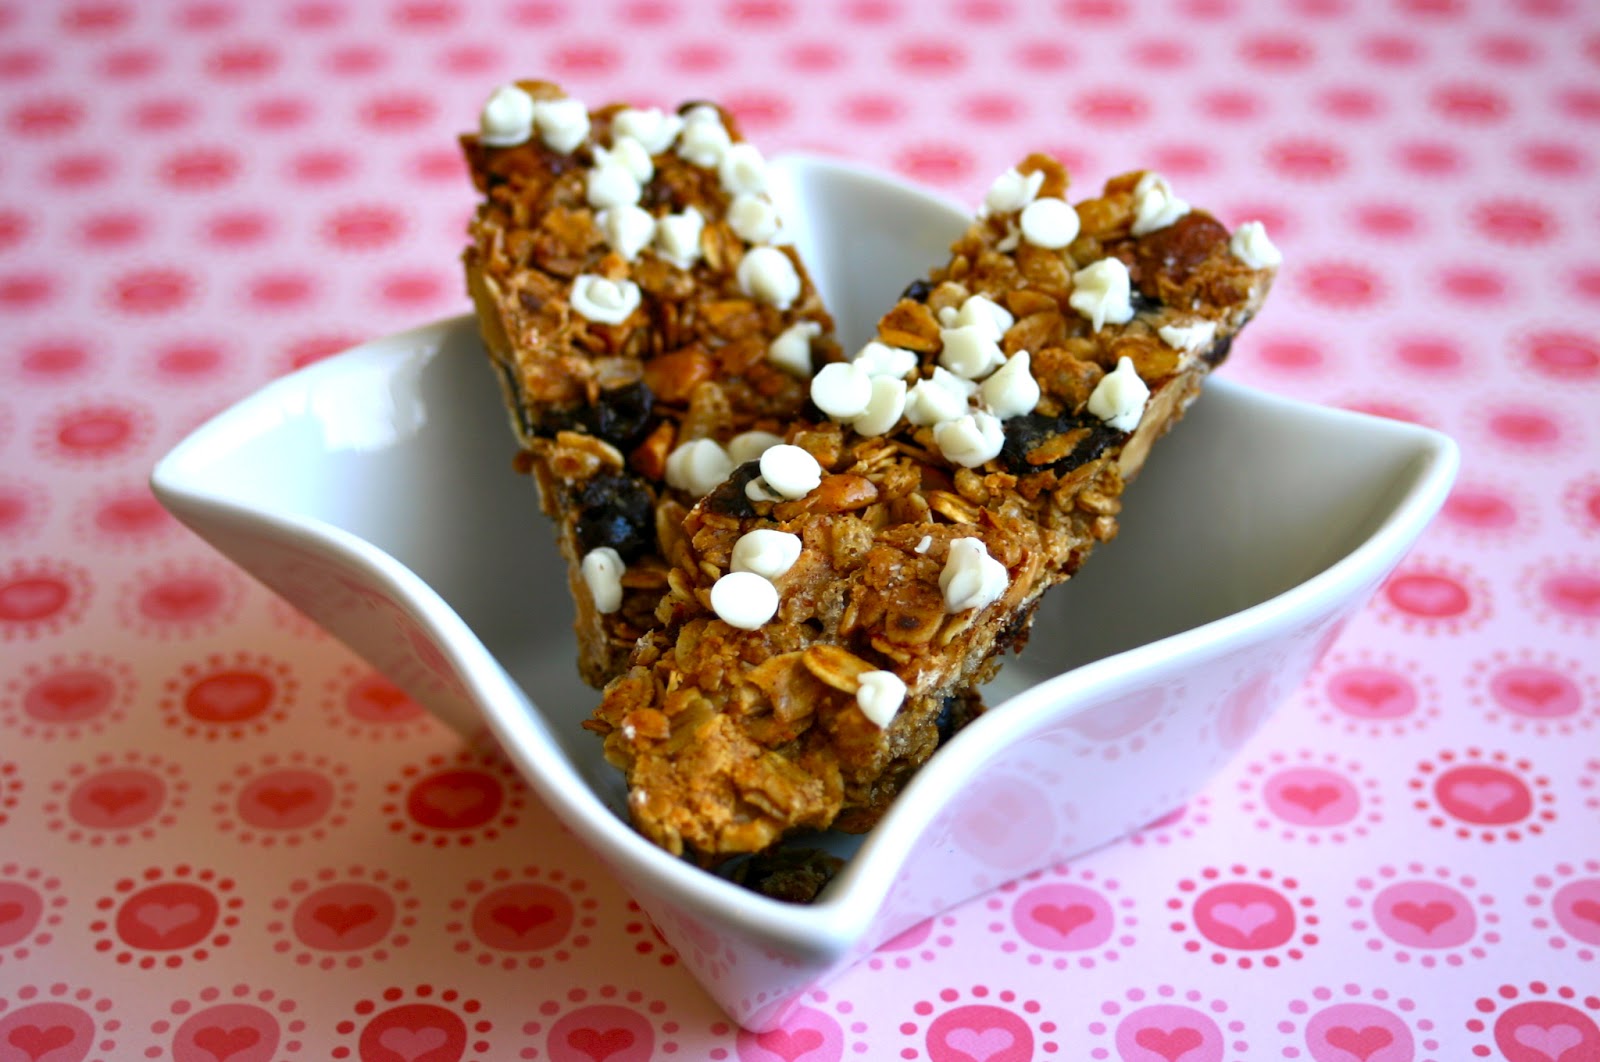
Almond, White Chocolate, Cherry Granola Bars


Almond, White Chocolate, Cherry Granola Bars
2 1/2 cups rolled oats
1 cup almonds
1 cup rice crispies
1 teaspoon sea salt
1 teaspoon cinnamon
1 teaspoon vanilla
1/4 cup honey
1/4 cup brown sugar
3 tablespoons canola oil
1 tablespoon water
1 cup dried cherries
1 cup white chocolate chips, plus more for sprinkling on top

Preheat the oven to 325. Line a square 8" baking pan with 2 crisscrossed rectangles of parchment paper, leaving a 2-inch overhang at 2 opposite ends. The overhang is what will assist you in lifting the granola out of the pan for cutting.

Combine the oats and almonds and spread them out evenly on a parchment-lined rimmed baking sheet and toast for 15 minutes. When the oat mixture has been toasting for about 10 minutes, combine the honey, brown sugar, salt, cinnamon, vanilla, oil and water in a medium sauce pan over medium-low heat, whisking to dissolve the sugar.

When the oat mixture is done toasting, transfer it to a large bowl and add the honey mixture, rice crispies, white chocolate chips and fruit; stir to incorporate. Spread evenly in bottom of pan, pressing down to create a smooth, even top.


Bake the granola mixture for 30 minutes. Remove the pan from the oven and place on a wire rack to cool. After about a half and hour, press down again super HARD to make sure everything sticks together and you can get nice, firm bars. A measuring cup works well for this. Sprinkle the rest of the white chocolate chips on top and press down lightly.

Let cool completely. Just like my last granola bar recipe- I am serious here. Resist the temptation, I know how hard it is. But if you cut them too soon they will crumble everywhere and they won't be granola bars anymore. Just granola.


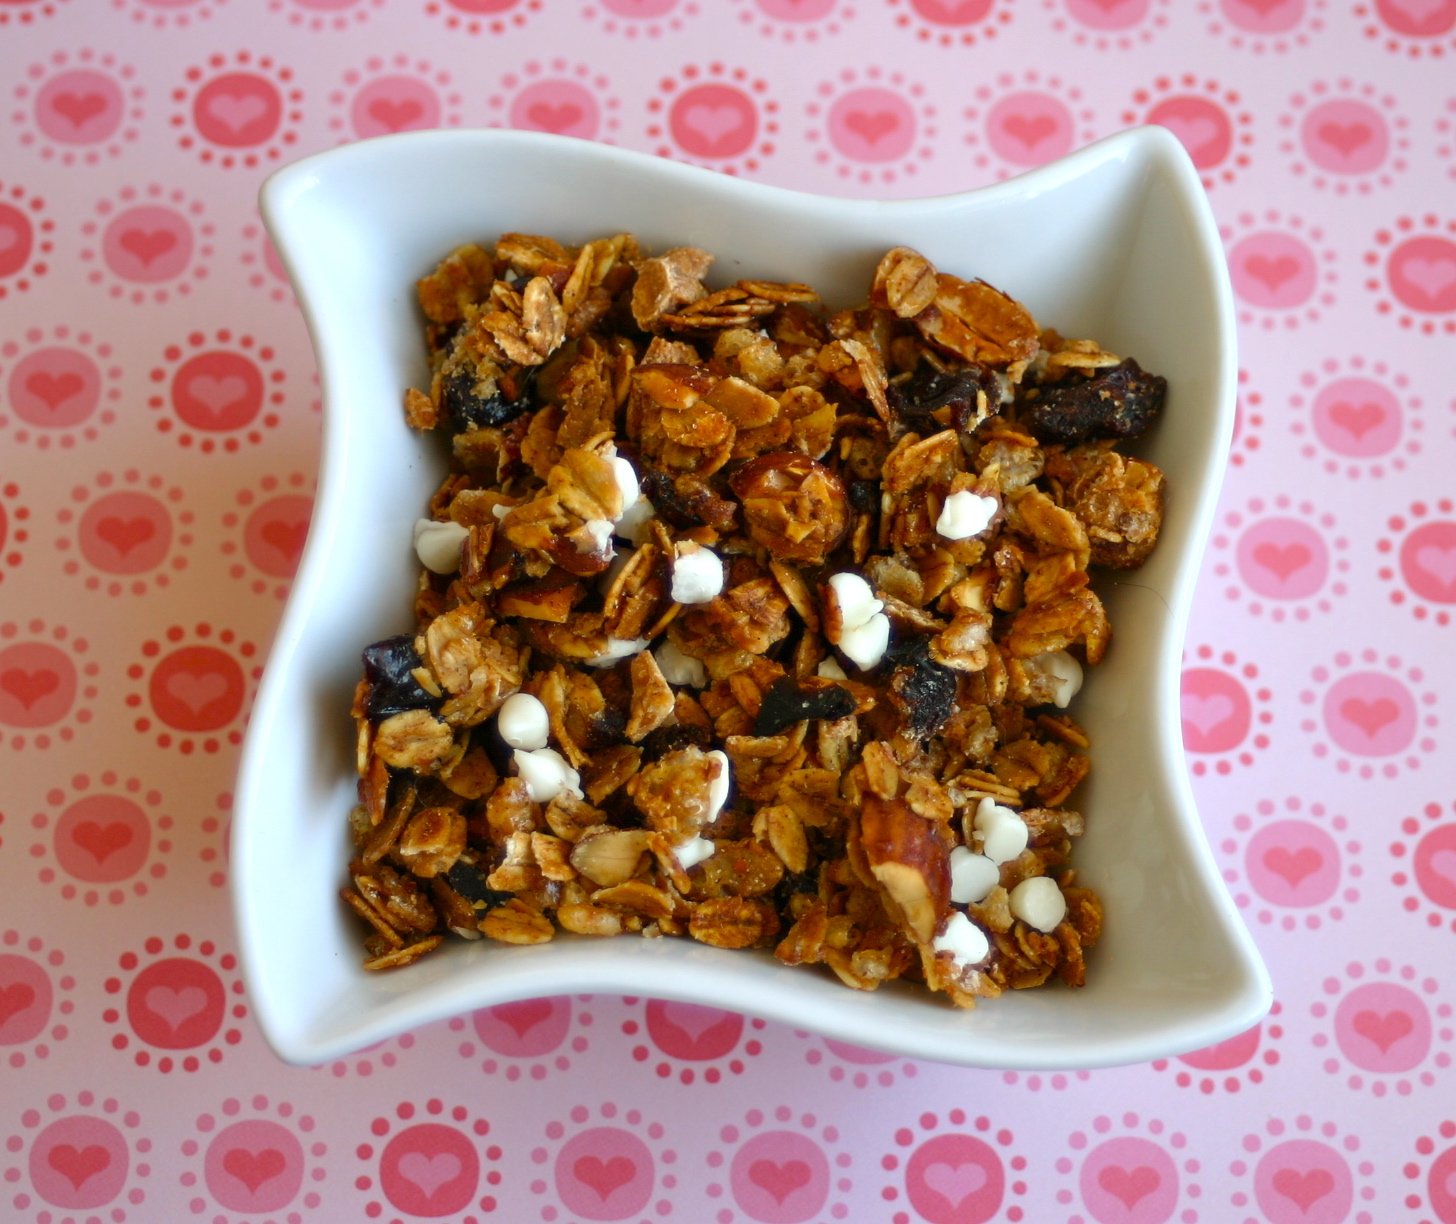
... Just like this.   Wait at least 2-3 hours before cutting.


Once cool, lift out of pan using paper as handles. Cut into one-inch wide bars with a large, sharp knife. Then, cut them again in half lengthwise. Store in an airtight container. If you aren't going to eat them all within a week, be sure to refrigerate or freeze them. There are no preservatives in these, so they won't last forever and a lifetime in your pantry like the store bought kinds.

not the prettiest bars, but goodness they  are tasty!

I waited the recommend 2-3 hours before trying to cut them apart, but I still had a lot of crumble.  I think it is because I left my almonds too large and spread them out too thin.  I love big chunky nuts in my granola bars, but with this recipe I should have made them thicker.  I used a 9x13 pan so I could have small, traditional sized granola bars.  With big nuts, I needed a smaller pan, like my 8x8.

But that's OK.  I got about 20 or so bars and with the rest I crumbled further to make granola.


I had the perfect afternoon snack, strawberry greek yogurt topped with my homemade granola.  Heavenly.


Wanna taste?


Thursday, August 12, 2010

Granola Bars


Granola bars are very popular in our household. Scott loves to grab them for a quick breakfast in the morning on his way to work and Jackson and I like them as a great afternoon snack.  But goodness, they are expensive AND probably 90% of them have gobs of ingredients I don't feel good about my family eating; high fructose corn syrup, tons of preservatives, artificial colors and flavorings....yack.  I know I can do better then that, and in turn save us some money too!

Turns out I was right- these things are delicious.  They weren't overly sweet, but just right and would be wonderful with a glass of ice cold milk or a cup of coffee.  These were my first batch, but I am already a firm believer.  I won't be buying store bought boxed granola bars ever again.  You can alter this recipe using whatever mix-ins you happen to have on hand.  I can't wait to try out different combinations to get fun, new flavors.  Be creative!


Print this Recipe

Granola Bars
2 1/2 cups rolled oats
1/2 cup shredded coconut (we LOVED this in them!)
1 cup sunflower seeds
4 Tablspoons sesame seeds
1 cup nuts of your choice (I somehow had no nuts in my house, so I went without. I would have loved to put almonds in here. oh well, next time!)
1 teaspoon sea salt
1 teaspoon cinnamon
1 teaspoon vanilla
1/4 cup honey or 100% pure maple syrup (I used honey this time)
1/4 cup natural peanut butter
1/4 cup brown sugar
3 tablespoons canola oil
1 tablespoon water
1 cup dried fruit (I used a combination of cranberries, strawberries, blueberries raisins and dates)
1 cup chocolate chips (I used mini)

Preheat the oven to 325.  Line a square 8" baking pan with 2 crisscrossed rectangles of parchment paper, leaving a 2-inch overhang at 2 opposite ends. The overhang is what will assist you in lifting the granola out of the pan for cutting.

Combine the oats, coconut, seeds and nuts and spread them out evenly on a parchment-lined rimmed baking sheet and toast for 15 minutes. When the oat mixture has been toasting for about 10 minutes, combine the honey, peanut butter, brown sugar, salt, cinnamon, vanilla, oil and water in a medium sauce pan over medium-low heat, whisking to dissolve the sugar.

When the oat mixture is done toasting, transfer it to a large bowl and add the honey mixture and fruit; stir to incorporate. Spread evenly in bottom of pan, pressing down to create a smooth, even top.


Bake the granola mixture for 30 minutes. Remove the pan from the oven and place on a wire rack to cool.  After about a half and hour, press down again super HARD to make sure everything sticks together and you can get nice, firm bars.  A measuring cup works well for this.

Let cool completely.  I am serious here.  I know it is insanely tempting, but if you cut them too soon they will crumble everywhere and they won't be granola bars anymore.  Just granola.  I waited a full 5 hours before cutting them.   Since I had to work this evening, I held off until I came home.  You don't need to wait that long, but I would recommend waiting at least 2-3 hours before trying to cut them apart.


Once cool, lift out of pan using paper as handles.  Cut into one-inch wide bars with a large, sharp knife. Then, cut them again in half lengthwise. Store in an airtight container.  If you aren't going to eat them all within a week, be sure to refrigerate or freeze them.  There are no preservatives in these, so they won't last forever and a lifetime in your pantry like the store bought kinds.

LinkWithin

Related Posts with Thumbnails