Showing posts with label cinnamon. Show all posts

Tuesday, August 27, 2013

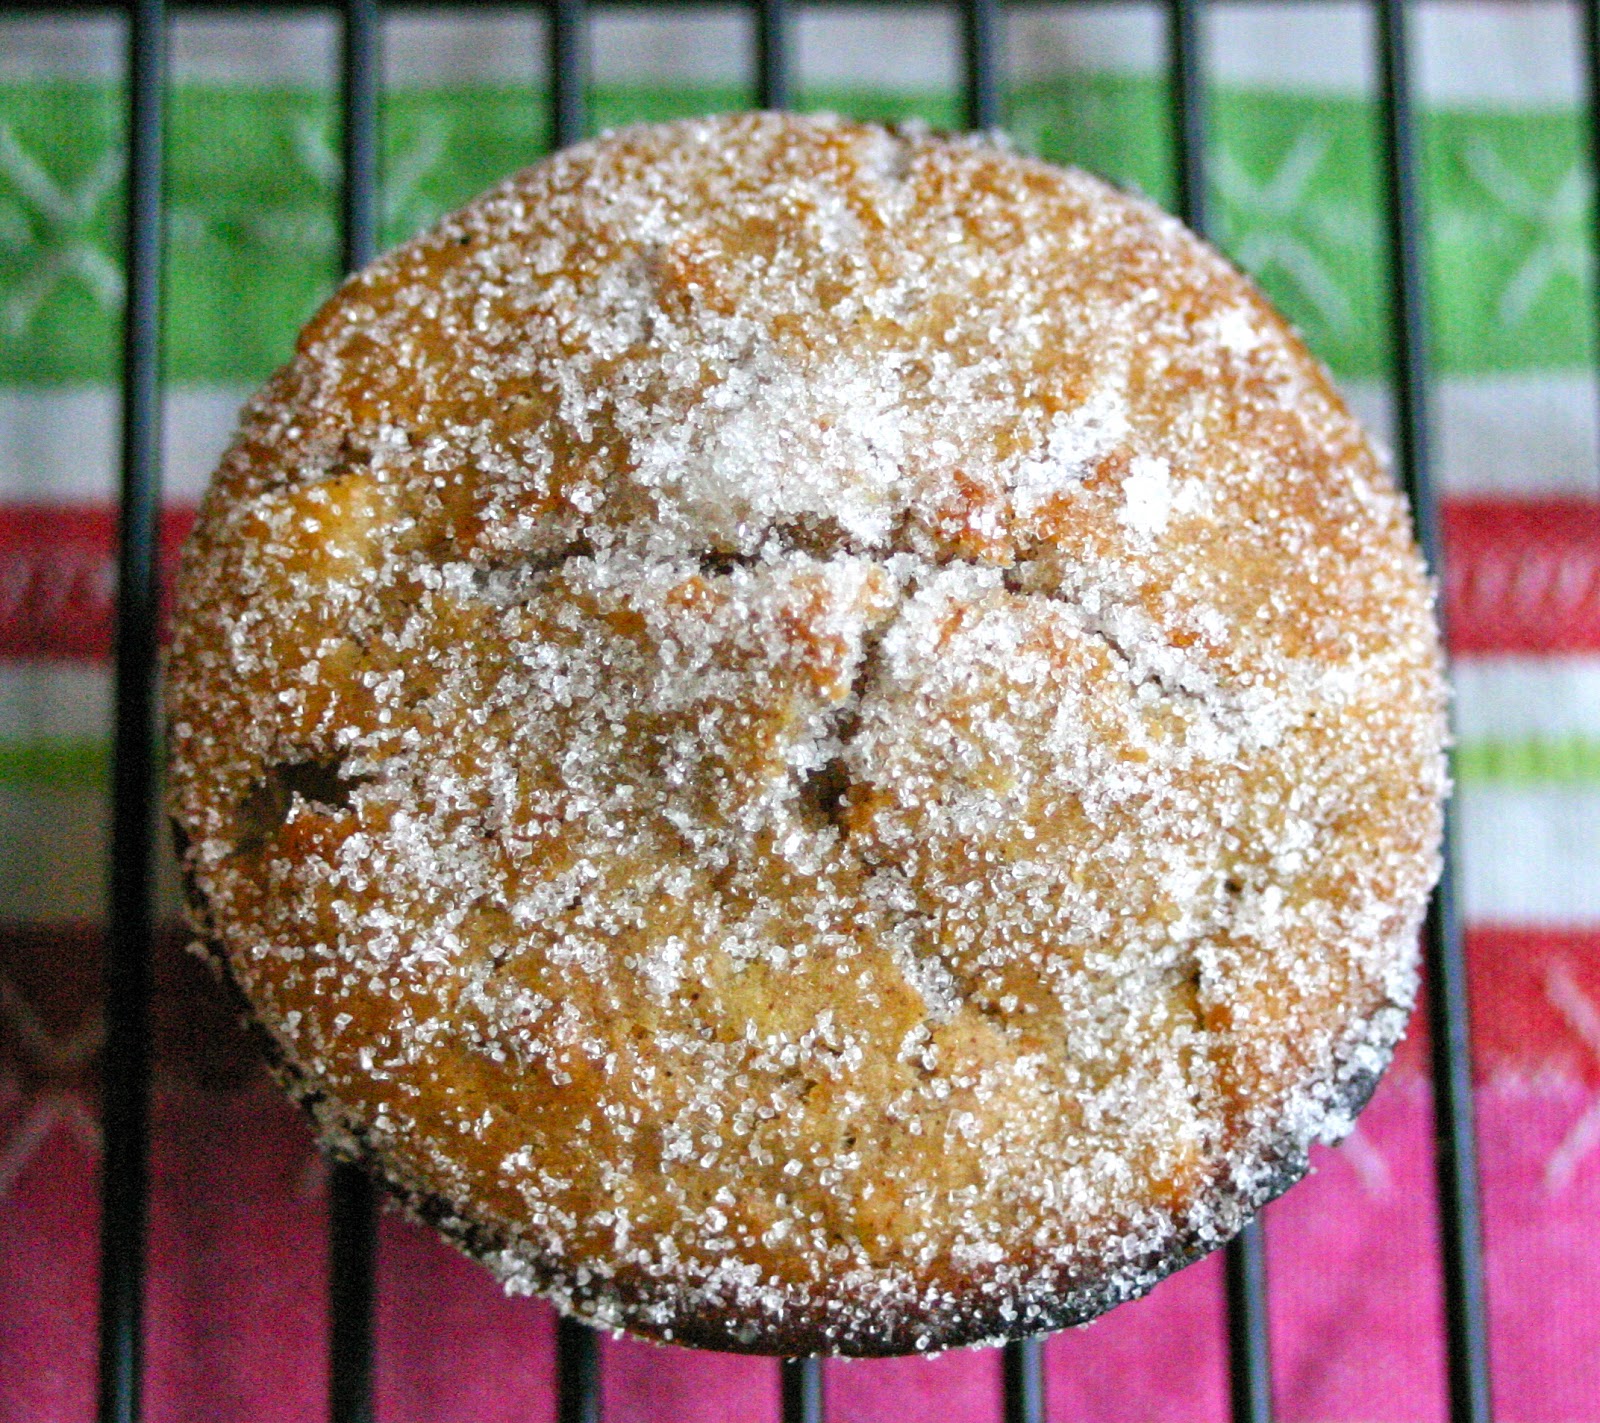
Cinnamon-and-Raisin Muffins


Hello friends!  Goodness it feels good to be back and writing.  I decided to take the summer off from blogging to spend some much needed quality time with my family.  But now with my oldest back in school and only one little guy at home with me now, I have been so antsy to get back in the swing of things.  Breaks sure can be nice, gives the perfect recharge to the soul!  And now I have a head FULL of recipes I cant wait to share with you all! 

When Jackson gets home from school he is absolutely famished. A full day of school is hard work!! Baking gives me wonderful quality time with Little O and I love having special treats at home for when Jackson gets off the school bus.  He is going to be thrilled to see one waiting for him on the kitchen table this afternoon!!


Cinnamon-and-Raisin Muffins
recipe slightly adapted from 1001 Muffins by Gregg R. Gillespie

makes 10 muffins

1 1/2 cups All-Purpose flour
2 teaspoons baking powder
1 1/2 teaspoons ground cinnamon
1/2 cup raisins
1/4 teaspoon salt
1/2 cup packed brown sugar
1 large egg
1/4 cup butter, melted
1/2 cup milk

Position the rack in the center of the oven and preheat to 375 degrees F.  Lightly grease or line with paper baking cups ten 2 3/4-inch muffin cups.

In a large bowl, blend together the flour, baking powder, cinnamon, raisins, and salt.  In a medium bowl, beat the sugar, egg, butter, and milk until smooth.  Combine the two mixtures, blending until the dry ingredients are just moistened. 

Spoon the batter into the prepared muffin cups, filling each about three-quarters full.  Bake for 15-20 minutes, or until a cake tester or wooden toothpick inserted into the center of a muffin comes out clean.  Cool in the pan on a wire rack for 5-7 minutes.  Serve warm, or invert onto the rack to cool completely. 

Delicious slathered with butter and a bit of jam!


My taste tester approves!  Owen gobbled his muffin up in no time and kept telling me how yummy they were.  Big hit!  He's pretty stinking cute too, huh?  :)

Tuesday, October 23, 2012

Fall Harvest Recipe Round-Up!

Are you on a hunt for some wonderful Autumn treats for this Hauntingly Fun Halloween Weekend?!  I have assembled for you some of my most favorites, that will definitely be a hit at any party- and especially at your own dinner table!


Roasted Pumpkin Seeds
Both a Savory and a Sweet Version!


Pumpkin Favorites
From Left to Right, Top to Bottom:
Kolokithopita- Savory Greek Pumpkin Pie
Low Carb Spiced Pumpkin Bread
Yum Yum Brownie Muffins
Caramelized Onion Pumpkin and Ricotta Tortellini's with a Walnut and Sage Brown Butter Sauce


Apple Treats 
From Left to Right, Top to Bottom:
Apple Cream Cheese Quick Bread
Apple Dapple Cake
Traditional Apple Crisp
Apple Muffins with Cinnamon Sugar


Owl and Bat Cupcakes
And just incase you are looking for some fun ways to decorate your cupcakes for the Halloween Party, these are always a huge party hit!

Wednesday, August 29, 2012

Zucchini Bread


When overloaded with zucchini, what's a person to do- bake zucchini bread of course!!

If you haven't noticed already from here, we are huge fans of quick breads.  First of all, well, they are quick! You get an almost instant gratification- stir a bunch of ingredients in a bowl, dump into pans, bake, cool and eat.  No special equipment required and they are perfect for little helpers in the kitchen because they can almost do the entire thing themselves!

This  recipe is one I borrowed from my Mother-in-law, Judy.  Every summer along with an armful of ripped zucchini's she also brings over a wonderful loaf of this delicious bread.  It never lasts long in our house!  It is so, so good!  It is lightly sweetened and studded with lots of raisins which is how we love bread in our house. We aren't big nut-in-bakery people in our house.  But of course you can go either way.  This year I asked if I could share the recipe with all of you, and you lucky people- She said yes!  Thank you Judy!


Zucchini Bread
3 cups All Purpose Flour
3 eggs
2 cups sugar
1 cup vegetable oil
1 teaspoon vanilla
2 cups grated zucchini
1 teaspoon cinnamon
1 cup nuts or raisins (optional)
1 teaspoon salt
1 teaspoon baking soda
1/4 teaspoon baking powder
1/2 cup sour cream

Preheat oven to 350 degrees F.

Grease and flour just the bottom of two loaf pans.

Sift flour into a large bowl and add all dry ingredients and set aside. In a medium sized bowl cream eggs and sugar and then add all of the wet ingredients. Add the wet ingredients to the dry and mix together well. Pour into the two prepared loaf pans.

Bake 1 hour and some minutes, (at least an hour, but the minutes will depend on your oven. Judy's cooks in exactly 1 hour while her sister's oven takes a bit longer) or until a toothpick comes out clean. Keep an eye on it.

Cool in loaf pans for 15 minutes. Turn out onto wire rack and allow to cool completely. Store in fridge or wrap well and freeze.


Friday, January 27, 2012

Traditional Apple Crisp


For dessert on Girls Night, Bonnie made a classic Apple Crisp. Oh how I love fruit crisps- probably one of my most favorite desserts. It is simple to throw together, but the smell it sends through the house while baking is soooo comforting and wonderful.  I am usually a If It Isn't Chocolate, I Don't Want It kind of girl when it comes to dessert.  But NOT when apples are involved.  They are my absolute favorite dessert fruit.  The crisp sweetness when raw turns into a lovely warm, caramelized flavor that is like no other.  Pair it with a little cinnamon and sugar and even better throw in rollled oats and of course butter and you've got me for sure! Delicious, homey and one dessert everyone needs to learn how to do.

with whip or without, either way this dessert is a win!

Traditional Apple Crisp
recipe courtesy Family Fun

6 apples (or 6 cups of apple slices)
1 1/2 cups rolled oats
3/4 cup brown sugar
1/4 cup all-purpose flour
1 teaspoon cinnamon
1/4 teaspoon nutmeg
1/4 teaspoon salt
1/2 cup butter (1 stick), softened
Whipped cream or ice cream (optional for serving)

To peel an apple safely, your child should hold the fruit in one hand, grip a vegetable peeler in the other, and push the peeler away from himself.

Heat oven to 375 degrees and lightly butter an 8 or 9-inch-square baking pan. Peel, core, and slice the apples and arrange them evenly in the prepared pan.

Place the oats, brown sugar, flour, spices, and salt in a sealable plastic bag, close, and shake until combined. Cut the softened butter into 1-inch pieces and add to the oat mixture. Close the bag again and knead or squeeze until the mixture holds together. Instead of using a bowl to mix the crumb topping, use a sealable plastic bag. This will cut back on dirty dishes and let young bakers--even preschoolers--lend a hand.

Open the bag and crumble the topping evenly over the apples. Bake the apple crisp for 40 to 45 minutes or until the topping is golden brown and the juices begin to bubble around the edges.

Cool slightly, then serve with whipped cream or ice cream.


My favorite parts: the crispy, gooey edge bits 
and when the whipped cream melts into the warm crisp just right


Do you ever read that little box on my sidebar over there -->
Labeled "Daily Inspirations.  Quotes Amie Likes"?
It is a fun box that rotates a new famous quote with each push of the refresh button.

Well I love looking at it and being inspired throughout my day.  Just as I was writing this entry I saw a quote that really struck to me for it was so fitting to my beautiful friends Bonnie and Dawn.....

"Each friend represents a world in us, a world possibly not born until they arrive, and it is only by this meeting that a new world is born." —Anaïs Nin

I love you my sweet friends.

Monday, October 24, 2011

Roasted Pumpkin Seeds- Two Ways, Savory and Sweet


Roasted Pumpkin Seeds are one of my favorite snacks this time of year.  One taste makes all the work of separating seeds from the pulp completely worth it.  I have tried lots of recipes over the years, but this is probably my favorite.  A bit salty, a bit garlicky, and with just a hint of heat from the Worcestershire sauce and seriously so, so good.  They are awesome just by the handful, but also taste yummy sprinkled on soups and salads or anywhere you would like a bit of a crunch.

I have also added a nice Cinnamon Sugar version.  You soak the seeds in apple cider, bringing out the sweetness of the pumpkin flavor.  By tossing it with a buttery, cinnamon sugar topping, the heat from the oven makes the sugars caramelize, giving them an almost candy coating.  I love salty and sweet snacks together, so if you have enough seeds to make both flavors do it and serve them side by side.


Roasted Pumpkin Seeds
2 cups pumpkin seeds, cleaned and rinsed
1 1/2 tablespoons melted butter OR olive oil
1/2 teaspoon salt (I like using corse salt)
1/2 teaspoon garlic salt
1/8 teaspoon garlic powder
2 teaspoons Worcestershire Sauce
1/8 teaspoon cracked black pepper (about 20 grinds from the pepper mill)

Preheat oven to 275 degrees.

Seperate the seeds from the pulp of the pumpkin.  Don't worry about getting all of the pumpkin strands off, it adds extra flavor to the roasted seeds.  I just love when I get a seed with pumpkin still attached- yum!  You just want the seeds clean enough so you can easily toss them.  Once rinsed, lightly dry and set aside.

In a large mixing bowl, add the melted butter, Worcestershire Sauce, salt, pepper, garlic salt, and garlic powder and whisk until well blended.  Add the pumpkin seeds and toss, throughly coating in the butter mixture.  Spread pumpkin seeds in a single layer onto a silpat or parchment paper lined baking sheet.  Bake for 1 hour, checking them often and tossing occasionally, until butter topping has dried and the pumpkin seeds are golden brown.

Remove from the oven and allow to cool and dry-out the rest of the way on the cookie sheet on top of the stove.  Store in an airtight container.


Cinnamon-Sugar Apple Cider Pumpkin Seeds
2 cups pumpkin seeds, cleaned and rinsed
1 1/2 cups apple cider
1 1/2 tablespoons melted butter OR olive oil
1/8 teaspoon salt
1 tablespoon brown sugar
1 teaspoon cinnamon
1/8 teaspoon nutmeg

Preheat oven to 275 degrees.

Pour the apple cider in a medium sauce pan and bring to a boil.  Add the pumpkin seeds and boil on medium heat for 10 minutes. Drain the seeds and pour them in a large mixing bowl.

Pour the melted butter or olive oil into the bowl, along with the salt, brown sugar, cinnamon, and nutmeg.  Mix well to coat and spread pumpkin seed in a single layer onto a silpat or parchment paper lined baking sheet.  Bake for 1 hour, checking them often and tossing occasionally, until butter topping has dried and the pumpkin seeds are golden brown.

Remove from the oven and allow to cool and dry-out the rest of the way on the cookie sheet on top of the stove.  Enjoy!

Store in an air-tight container.


Saturday, October 22, 2011

Cinnamon Bun Muffins (Gluten Free, Low Carb)


I have been getting lots of requests for more Special Diet recipes (low carb, gluten free, vegan, etc.)  So this one is for you!  This recipe is low carb and gluten free due to the use of the almond meal.  The use of honey or maple syrup makes it low on the glycemic index as well, meaning that your body will break it down faster instead of storing the sugars like when using granulated white sugar does. 

But most importantly, they are SO, SO yummy!  These muffins have tons of cinnamon, making your home smell like heaven while baking.  The almond meal gives a nice nutty flavor that blends everything together beautifully.  Even if you aren't concerned about any special diets, you would still fully enjoy these muffins. Our whole family just loved them.  Thank you Comfy Belly for introducing us to this great recipe!


Cinnamon Bun Muffins (Gluten Free, Low Carb)
recipe courtesy Comfy Belly

1/2 cup of yogurt
1/4 cup of honey (or maple syrup)
2 eggs
2 1/2 cups of blanched almond flour
1/4 teaspoon of sea salt
1/2 teaspoon of baking soda

Cinnamon Topping Ingredients 
2 tablespoons of ground cinnamon
4 tablespoons of honey (or maple syrup)
2 tablespoons of unsalted butter, melted (ghee or coconut butter will work too)
1/4 cup of chopped walnuts (optional; or other nut)

Preheat oven to 310 degrees F.

Combine all the wet muffin ingredients into a bowl and blend well with a spoon. Add the dry muffin ingredients and blend well with a spoon. Place cupcake liners in a baking pan, and fill the liners halfway with batter.

Blend all the topping ingredients well. Add about a tablespoon of topping to the center of each muffin. Now put another scoop of batter on top of each muffin until the batter just about reaches the top. Add nuts now if your adding them to the top of the muffin. Evenly distribute the remaining topping over the top of each muffin. Optionally, use a toothpick to poke at the top of each muffin to allow some topping to drip into the batter.

Bake for about 25 minutes, or until a toothpick placed in the center of a muffin comes out clean and the tops are starting to brown. Cool and enjoy!

Store for a few days covered, or in the refrigerator for 2 weeks.


Don't forget to enter my 
by Avery Office Supplies for one lucky winner!  

click on the link to make your entry and to read all the details for this great prize!


I linked up on Sweets For a Saturday #43. Come find some other delicious sweet things :)

Wednesday, August 31, 2011

Low Carb Spiced Pumpkin Bread


I know I have been MIA for a little while. I really am sorry about that. But if you follow me on facebook you know that I have been trying to loose that last bit of pregnancy weight by following the South Beach Diet.  I am super happy to say that it is working awesome, the last few pounds are falling off and I am having a blast "shopping" in my attic for clothing I haven't been able to wear in a long time.  The only downside, is that I have not been very creative in the kitchen.  My mom leant me a few South Beach cookbooks and the blog Kalyn's Kitchen have both been wonderful with keeping the diet exciting, food wise (as much as you can be without eating very many-if any carbs).  But since I was trying to follow the diet as perfectly as possible in Phase One, I didn't feel confidant creating my own recipes.

Now that I am in Phase Two, I am allowed to start incorporating "good carbs" back into my diet.  Knowing my love of sweets and bakery, you can't be all that surprised to hear I was dying to find some "acceptable" baked goods.  Combine that with the wonderful cooler weather we have been having here in Ohio- beautifully sunny and breezy mid 70's. Heaven.  So of course pumpkin comes to mind.  It is super high on the healthy scale and so, so delicious.  I just knew that I could find a low carb pumpkin bread recipe to satisfy my cravings.  This recipe from the online low carb magazine, The Low Carb Luxury is so, so wonderful!!!!  I have found that sometimes low carb bread can have a strange, rubbery consistency that I find rather off-putting.  This recipe isn't like that AT ALL.  If you weren't told this quick bread was low carb you would have no idea.  The whole family loves it, and I will be making it again and again.  I mean, for only 3.8 grams of carbs per slice, you can't beat it!  Oh how I love guilt-free bakery.  This recipe was 100% worth sharing.

Now this recipe uses some unique flours, which is what makes it low carb.  Almond Flour/Meal is simply just very, very finely ground almonds!  You can make it yourself by grinding raw or blanched almonds in your food processor at home, but I decided to save some time and just buy it premade.  I found Bob's Red Mill brand and really loved it.  I found it at Marc's (if you are local to Cleveland, OH area) and I also have seen it at our Super Wal-Mart.  If you have been making those yummy Sandwich Thin Buns, then you are familiar with the Vital Wheat Gluten Flour and the Wheat Bran.  Yay for another place to use them!  Go on out, stock your pantry and most importantly- have fun playing with some new ingredients!


Low Carb Spiced Pumpkin Bread

1 (15 ounce) can pumpkin puree
4 eggs
1 cup canola oil
1/2 cup water
2 cups Splenda
1 1/2 cups Vital Wheat Gluten flour
1/4 cup whey protein powder (I used vanilla flavored because that is what I had on hand)
3/4 cup almond flour
1 cup oat flour
2 teaspoons baking soda
1 1/2 teaspoons salt
1 teaspoon ground cinnamon
1 teaspoon ground nutmeg
1/2 teaspoon ground cloves
1/4 teaspoon ground ginger
Wheat Bran (or whole wheat flour) for dusting pan

Preheat oven to 350°F.

Spray bread pans with nonstick cooking spray. Sprinkle wheat bran into the pans and tap around to "flour" the pans. This will prevent sticking. Whole wheat or all purpose flour can also be used, but the wheat bran packs in extra healthy goodness.

Using a wire wisk or a hand mixer beat eggs. Add the water, oil, and pumpkin and beat until well combined. Sift together all flours, baking soda, salt and spices in a separate bowl. Add Splenda to pumpkin mixture and mix very well. Add the pumpkin mixture to the flour mixture and blend until wet and fully combined.

Pour into greased and wheat bran (or whole wheat) floured pans and bake for about 40-50 minutes. If you bake in the small loaf pans, be sure to keep an eye on them.  They will bake faster then the large loaves.  Breads are done when toothpick inserted in center comes out clean.

Makes (2) 8.5" loaves or (4) 5.75x3" loaves- slice into 12 slices per loaf.
Each large loaf contains 46 grams of carbs — 3.8 carbs per slice. (or you can have two small slices for the same amount)


Thursday, May 5, 2011

Apple Muffins with Cinnamon and Sugar

These muffins are wonderfully light, and despite the sugar topping, they are the perfect sweetness.  Not too sweet- just right.  You will love these.  I promise.  


Apple Muffins with Cinnamon and Sugar
makes 6 3-inch muffins or 24 mini muffins

3/4 Cup all-purpose flour
1 cup whole wheat flour
2 tablespoons granulated sugar, plus more for sugarcoating the muffins
2 teaspoons baking powder
1/2 teaspoon salt
1 1/4 teaspoons ground cinnamon
1/2 teaspoon ground nutmeg
1 large egg
1 cup skim milk
6 tablespoons canola oil
1/2 cup frozen apple-juice concentrate, thawed
1/4 teaspoon lemon extract
1 large apple, peeled, cored and finely chopped

Position rack in the center of oven and preheat to 400 degrees F.  Lightly grease or line with paper baking cups six 3-inch muffin cups.

In a large bowl, blend together the two flours, 2 tablespoons sugar, baking powder, salt, cinnamon, and nutmeg.  In a medium bowl, beat the egg, milk, oil, apple juice, and lemon extract until smooth.  Stir in the apples.  Combine the two mixtures, blending until the dry ingredients are just moistened.

Spoon the batter into the prepared muffin cups, filling each about 3/4 full.  Bake for 20-25 minutes, or until the tops are golden and a cake tester or wooden toothpick inserted into the center of a muffin comes out clean. Cool in the pan on a wire rack for 5-7 minutes.

Serve warm, or invert onto the rack to cool completely.  While still warm, coat the muffins with sugar.


I doubled the recipe and made a batch of mini muffins as well as regular sized. I LOVE the mini muffins! These are the perfect flavors for a little bite-sized treat. I definitely recommend making them tiny like this. Isn't anything more fun when they are small?  Plus, this way you can have more then one and not feel guilty....


Tuesday, September 7, 2010

Cinnamon Applesauce Muffins

Well, it has been a while since I was on my muffin kick so I thought it was time to try out a new recipe.  These are a nice, basic muffin.  Wonderfully moist and full of flavor.  They are delicious as-is, but also are lovely slathered in butter or spread with your favorite preserves.  I can easily see these being a staple in our house.


Print this Recipe

Cinnamon Applesauce Muffins
makes 7-9 muffins

1 1/2 cups all-purpose flour
1/2 cup granulated sugar
2 teaspoons baking powder
1/2 teaspoon ground cinnamon
1/4 teaspoon salt
2 large eggs
1/2 cup applesauce
1/2 cup milk
Cinnamon sugar blend for sprinkling on top

Position rack in the center of the oven and preheat to 375 degrees.  Lightly grease or line a muffin tin with paper baking cups.

In a large bowl, blend together the flour, sugar, baking powder, cinnamon and salt.  In a medium bowl, beat together the eggs,  applesauce, and milk until smooth.  (I used my homemade chunky applesauce so I didn't try and get the apples smooth, just the batter.)  Combine the two mixtures, blending until just moistened.  Do not over-mix for it will make for a tough muffin.

Spoon the batter in the prepared muffin cups, filling each one about 3/4 full.  Sprinkle with cinnamon sugar over each muffin.  Bake for 15-20 minutes , or until a wooden toothpick inserted comes out clean. Cool in pan for 5-7 minutes.  Serve warm or invert onto the rack to cool completely.


*Muffin Baking Tip: fill one or two empty muffin cups with water before baking.  The steam from the water will insure a nice, moist muffin every time.


Serve warm or let cool completely before storing in an airtight container.


I love how there are nice chunks of apples in my muffins since I used my homemade chunky applesauce.  You can buy a good quality applesauce or use my homemade recipe {here}.

Wednesday, August 25, 2010

Homemade Applesauce

Last night I was overjoyed to see that I had apples on my tree just ready for picking!  Autumn is on its way and I couldn't be happier!  Of course I had to get them right then and there because I have pesky deer that will undoubtedly beat me to it if I leave them even a day.   As cute as deer are, I don't like to share my homegrown food with them!  They can have the ones that fall to the ground, that is as nice as I get when it comes to my produce. Otherwise- stand clear!  

With my fight against deer, every year I end up picking so many apples at one time I have a race to see how many recipes I can find to use them all up.  My number one stand-by is easily applesauce.  It is quick, delicious, and you can control how much sugar goes into it when you make it at home.  Applesauce is one of those things that you really should never buy from the store.  It is that simple. With having a three year old, we eat A LOT of applesauce in our house and I love knowing I have a freezer full of it whenever we want it! And applesauce isn't only for kids. You've heard of applesauce with pork chops, right? Match made in heaven.  But it is also delicious warm with vanilla ice cream or vanilla yogurt.  Kinda tastes like apple pie this way.  Mmmmmmm.  


Homemade Applesauce
3 to 4 lbs of peeled, cored, and quartered apples. (Make sure you use a good cooking apple like Golden Delicious, Granny Smith, Fuji, Jonathan, Mcintosh, or Gravenstein.)
4 strips of lemon peel (a vegetable peeler works nicely to cut your strips)
1- 1 1/2 tablespoons fresh lemon juice, depending on tartness of apples
1 large cinnamon stick
1/4 cup of dark brown sugar*
up to 1/4 cup of white sugar*
1 cup of apple cider or apple juice

optional ingredients:
1/2 to 1 teaspoon ground ginger
1/2 teaspoon ground mace
1/2 teaspoon ground nutmeg

Place the apples, apple cider, lemon juice, lemon peel and cinnamon stick into a pot and bring to a boil. Reduce heat to low, cover and simmer, stirring often until tender, about 20-30 minutes. Stir in the sugars, nutmeg and any of the optional ingredients. Cook, stirring, until the sugars are dissolved and blended, about 1 minute. Remove from heat and remove the lemon peel and cinnamon stick.

For a chunky applesauce, mash with a potato masher. For a smooth applesauce, run it through a food mill or a coarse sieve. Serve warm or chilled.

*the sugar measurements are just a guideline.  Add a little at a time, tasting to achieve the right sweetness you desire.  My homegrown apples are very tart so I like a good balance between the sweet and tart.

Freezes easily, lasts up to one year in freezer.  I like to freeze them flat in ziplock storage bags.  When you are ready to eat you can easily break off the amount of applesauce you need.

LinkWithin

Related Posts with Thumbnails