Showing posts with label Breakfast. Show all posts

Tuesday, October 14, 2014

Raspberry Almond Brown Sugar Muffins


Wow, this pregnancy was a rough one for me in regards to wanting to do anything in the kitchen.  Just the mere thought of doing any sort of cooking or baking made my stomach turn.  I would do it because well, my family had to eat.  But it wasn't the wonderful, enjoyable hobby that I have had my whole life.  And unfortunately for that my blog posts suffered as well.  I am sorry and hope that you will all welcome me back with open arms! 
 
Now that our sweet Aaron is here, my aversion to all things "kitchen" are finally gone!  Halleluiah!  Last week as a part of International Babywearing Week we went to Rosby's Berry Farm and picked the most beautiful raspberry's!  
 
 
The harvest was bountiful and the berries sugary sweet.  I picked three quarts of them!   So today I celebrate with Raspberry Almond Brown Sugar Muffins.   These muffins are so amazing.  Seriously, they have the best of everything- sweet-tart raspberries and the crunch of the almonds and brown sugar topping make for the most perfect muffin. Being a nursing mom made it totally acceptable to have two this morning right?! 


Raspberry Almond Brown Sugar Muffins

2 cups all-purpose flour
1 teaspoon baking powder
1 teaspoon baking soda
1/4 cup shaved almonds
1/4 teaspoon salt
1 large egg
1 cup packed light-brown sugar
1/2 cup butter or margarine, melted
1 cup milk
2 teaspoons vanilla extract
1 cup raspberries (fresh or frozen)

Position the rack in the center of the oven and preheat to 400 degrees F. Lightly grease or line with paper baking cups (makes 12-18 muffins).

In a large bowl, blend together the flour, baking powder, baking soda, almonds, and salt.  In a medium bowl, beat the egg and brown sugar together until thick.  Beat in the butter, milk and vanilla extract.  Combine the two mixtures, blending until the dry ingredients are just moistened.  Gently stir in raspberries. 

Spoon the batter into the prepared muffin cups, filling each 3/4 full. Sprinkle the Streusel Topping (recipe follows) over the tops of the muffins.  Bake for 15-20 minutes, or until a cake tester or wooden toothpick come out clean.  Cool in the pan on a wire rack for 5-7 minutes.  Serve warm, or transfer to the rack to cool completely. 

For the Streusel Topping
1/2 cup all-purpose flour
1/4 cup brown sugar, packed
1/2 stick unsalted butter
1/2 teaspoon cinnamon

Combine all of the ingredients in a food processor and pulse until crumbly.  Alternately you can mash the ingredients with a fork.  Sprinkle over muffins immediately before baking.


Streusel Topping recipe courtesy about.com 

Friday, March 28, 2014

New Day Cleveland Apperance- Good Morning Idaho!

Yesterday was back in the studio for my 8th time- can you believe it?!  I'm not exactly sure how I scored such an awesome little gig, but I am loving it!  New Day Cleveland is a lovely show, and has seriously the nicest people. 
 
For my segment yesterday we were planning for Lent- Meatless Meal for a Family of 4 for under $20.  Challenge taken!  Breakfast for Dinner is an awesome way to stretch the bank, and who doesn't love it?!  My boys would eat it every night if it was up to them. Good Morning Idaho is a recipe that takes a fun twist on the traditional eggs and hash brown breakfast. 
 
Here I am prepping for the show- we go live in half an hour! 
 
 
My sister came along for some moral support and to help me out getting things together before the show.  She is one of my favorite people in all the world and I am so lucky to have her not only as my sister but also best friend favorite Partner in Crime!  Here we are hanging out in the Green Room backstage waiting for the show to begin.  Perfect opportunity for a Sister Selfie! 


Here is a link to my clip, if you were unable to watch live!  Aside from a stubborn potato that refused to come off my cast iron skillet, everything went incredibly smooth.  I think I am beginning to get the hang of this....

Oh, and at the 5:21 mark you get to see a perfect shot of my very pregnant belly :)  So now I have two children that have made an appearance with me! lol.  Love it.


Wednesday, March 26, 2014

I get to be a TV Star tomorrow!

Set your DVR's, I am back on New Day Cleveland tomorrow morning at 10:00am (I will be the first one up, so tune into the very beginning!) This week they gave me a new challenge for Lent- Meatless Meal for 4 for under $20. Our family LOVES breakfast for dinner and I am sharing a favorite of ours- "Good Morning Idaho", which is eggs baked in a potato! It is a fun twist and not to mention completely delicious! See you tomorrow on Fox 8 News!

Tuesday, August 27, 2013

Cinnamon-and-Raisin Muffins


Hello friends!  Goodness it feels good to be back and writing.  I decided to take the summer off from blogging to spend some much needed quality time with my family.  But now with my oldest back in school and only one little guy at home with me now, I have been so antsy to get back in the swing of things.  Breaks sure can be nice, gives the perfect recharge to the soul!  And now I have a head FULL of recipes I cant wait to share with you all! 

When Jackson gets home from school he is absolutely famished. A full day of school is hard work!! Baking gives me wonderful quality time with Little O and I love having special treats at home for when Jackson gets off the school bus.  He is going to be thrilled to see one waiting for him on the kitchen table this afternoon!!


Cinnamon-and-Raisin Muffins
recipe slightly adapted from 1001 Muffins by Gregg R. Gillespie

makes 10 muffins

1 1/2 cups All-Purpose flour
2 teaspoons baking powder
1 1/2 teaspoons ground cinnamon
1/2 cup raisins
1/4 teaspoon salt
1/2 cup packed brown sugar
1 large egg
1/4 cup butter, melted
1/2 cup milk

Position the rack in the center of the oven and preheat to 375 degrees F.  Lightly grease or line with paper baking cups ten 2 3/4-inch muffin cups.

In a large bowl, blend together the flour, baking powder, cinnamon, raisins, and salt.  In a medium bowl, beat the sugar, egg, butter, and milk until smooth.  Combine the two mixtures, blending until the dry ingredients are just moistened. 

Spoon the batter into the prepared muffin cups, filling each about three-quarters full.  Bake for 15-20 minutes, or until a cake tester or wooden toothpick inserted into the center of a muffin comes out clean.  Cool in the pan on a wire rack for 5-7 minutes.  Serve warm, or invert onto the rack to cool completely. 

Delicious slathered with butter and a bit of jam!


My taste tester approves!  Owen gobbled his muffin up in no time and kept telling me how yummy they were.  Big hit!  He's pretty stinking cute too, huh?  :)

Monday, July 23, 2012

Blueberry Quick Bread


This weekend my sister and I gathered the troops and headed up to Vermilion, Ohio to do some blueberry picking at Baumhart Berry Farm.   Bonnie had been here once before and raved about it, so this was my first time.  What a treasure to find!  The aisles are huge, easily accommodating our two large strollers, the bushes are tall enough that you aren't bending over giving yourself a backache and most importantly, the berries are HUGE and sinfully sugar sweet!!  I couldn't get over how easy it was to pick them, just grazing your hands over the plump fruits would drop them into your bucket.  The kids never tired of the picking and our buckets soon became full.  It was a fun afternoon, and even after all our snacking we still came home with more blueberries then one knows what to do with.  Don't worry, your tummies will know exactly what to do with them!

Let me help you with this lovely Blueberry Quick Bread.  It is overflowing with blueberries in ever single bite. The the bread itself has just the right sweetness and tastes heavenly with some soft butter smeared all over it. Try it with a slice of shaved ham on top.  Super yummy!


Blueberry Quick Bread
recipe courtesy allrecipes

5 cups all-purpose flour
1 1/2 cups sugar
2 tablespoons baking powder
1 teaspoon salt
3/4 cup cold butter or margarine
1 1/2 cups chopped walnuts (optional)
4 eggs
2 cups cold milk
2 teaspoons vanilla extract
3 cups fresh or frozen blueberries
Directions

In a large bowl, combine flour, sugar, baking powder and salt. Cut in butter until mixture resembles coarse crumbs. Stir in walnuts.

In a small bowl, beat eggs, milk and vanilla; stir into dry ingredients just until moistened. Gently fold in blueberries.

Pour into two 9-in. x 5-in. x 3-in. loaf pans. Bake at 350 degrees F for 65-75 minutes or until bread tests done. Cool in pan 10 minutes before removing to a wire rack.


This recipe is featured on This and That and  http://www.foodiefriendsfriday.com Linky Party

Thursday, July 19, 2012

Toad in a Hole- Midwestern Style


I know that Toad in a Hole means something completely different to people over in Europe where this recipe consists of sausages cooked in Yorkshire Pudding. But to most of us here in the Midwestern United States, Toad in a Hole is an egg that has been sautéed inside a slice of bread where a hole was removed from the center.  It is a simple dish, giving you that perfect dunking bread already there and waiting to be slathered in the runny yoke the moment a tine of your fork hits the egg.  It takes no time to make and is, well, wonderfully delicious.  Plus kids and adults always seem to get a kick out of it!

Toad in a Hole- Midwestern Style
2 slices bread per person
2 eggs per person
butter
salt and fresh ground black pepper to taste
fresh chives to garnish

Using a shot glass or a small biscuit cutter, cut a hole in the center of each slice of bread.  Butter both sides of bread as you would for a grilled cheese sandwich.  Be sure to butter the circles you just removed from the breads, they are great dippers for the runny eggs!

Place the bread into a nonstick pan  and "grill" at medium low heat until just golden.  Flip bread and very carefully break the egg into the hole.  The yoke should fill it nicely.  Season each egg with salt and fresh ground pepper to taste.  Allow to cook until you get the eggs to your preferred doneness.  I like to lightly cover my pan with foil to set the yoke just a bit more.  If you don't like a runny egg at all, just leave the foil on the pan to your perfection.  Carefully remove the Egg's in a Hole to each person's plate, garnish and enjoy!  Serve along side some fresh fruit and crispy bacon.


I  know there are all sorts of other names for this fun dish.  What do you call it in your neck of the woods?!

Tuesday, April 3, 2012

Fruit Pulp Muffins


My sister has become completely into juicing.  About a month or so ago she bought a Juicer and has been having a blast making up all these amazing fruit and vegetable juices for her whole family to enjoy.  A little spinach here, carrots, cantalope, mango, watermelon, kale, apples there.... whatever you happen to pick up at the market, give it a whirl!  The skies the limit really.

I myself do not own a juicer.  I do like making up smoothies and whatnot in my blender, but that is a bit different.  With juicing, it separates the fibrous pulp from the juice, giving you just what is needed for a healthy, balanced, highly nutritious drink.  The only thing is that then you are left with all of that beautiful, full of fiber fruit pulp. You don't want to throw it out; it is also incredibly good for you.  So what to do?  There are lots of recipes out there: salsas, dips, sorbets, even your own fruit leathers.  Today Bonnie wanted to share with you all a recipe for Fruit Pulp Muffins.  So if you happen to have a juicer or know someone who does- try these out! They taste amazing!!!


Create Your Own Juice Pulp Muffins
recipe courtesy All About Juicing!

Use any combination of fruit pulp you have on hand to make your own muffins. You really can't go wrong!

4 cups of any fruit pulp
1 cup of sesame or olive oil
3 eggs
1 cup of honey
3 cups of whole grain flour
1 tbsp baking soda
1 tsp of nutmeg, cinnamon or spice of choice(optional)
1 tsp of vanilla


Mix the fruit pulp with the honey, eggs, vanilla, oil and mix. Add the dry ingredients. Pour into muffin cups or greased muffin tins. Bake for 45 minutes at 350 degrees.


Thursday, February 9, 2012

Oven Roasted Bananas- Traditional and also with Cinnamon and Chocolate

Or how to impress your kids and make your husband fall in love with you all over again.  This recipe is so dang easy your children can do it almost entirely on their own (except for needing a smidge of help with the hot oven).  It also works as a great summertime campfire trick.  They are wonderful plain, in their beautiful perfect banana state.  Or my personal favorite, sprinkled with cinnamon, stuffed with chocolate chips and dotted with butter...mmmmmmmm.

These make a lovely dessert, it would even empress guests at a dinner party.  But it also works perfectly for a breakfast with a dollop of yogurt, or to curb that mid day sweet tooth.  It turns a plain banana into something truly special.  It tastes so much like the famous dessert Banana's Foster, but it isn't!  A simple banana with nothing else tastes like it is so much more.  If you've never tried this recipe before you will be amazed on the lovely flavors it changes into.


Oven Roasted Bananas

Traditional Oven Roasted Banana
1 banana per person (and this is absolutely all you need if you want to go the plain route, which trust me, tastes anything but "plain")

preheat oven to 400 degrees F.

Place whole banana, as is, uncut on a baking sheet.  Place in hot oven and bake for 15 minutes or until the banana peel turns black.  That is when you know it is done!  Place on a plate and carefully split the peel with a sharp knife and eat with a spoon.

The warmth of the banana paired with a scoop of vanilla ice cream is heavenly.


Oven Roasted Bananas with Cinnamon and Chocolate

1 banana per person
a sprinkling of cinnamon
a sprinkling of chocolate chips, I used mini above, but large are just as great!
a few small pats of butter, optional

Preheat oven to 400 degrees F.

Slice banana lengthwise and place on a foil lined baking sheet.  Sprinkle with cinnamon and chocolate chips and top with a few pats of butter, if using.  Bake for 15 minutes or until banana peel turns black.  Carefully remove from oven and eat directly out of the peel with a spoon.  Enjoy as is, or serve along side ice cream, yogurt, sprinkle with granola, drizzle with honey or chocolate sauce- whatever your heart desires.  After you've had these once, trust me, you will want to try them every way possible!


Don't forget to tun in or set your DVR's to watch 
Amie, from My Retro Kitchen cooking on 
Tuesday, February 21, 2012
10:00 am


I linked up my recipe at Sweets for a Saturday!

Friday, January 6, 2012

Apple Cream Cheese Quick Bread


Do you love cheese danishes as much as we do?!  If so, then you will LOVE this recipe! It is a quick bread (think simple and easy!) But has all the amazing flavors of a cheese danish, minus the extra work involved. And with the addition of grated apples you get the tangy sweetness of the fruit as well.

I made a loaf last night and already over half of our bread is gone! Jackson can't keep his little hands out of it. Last night while I was slicing, he kept sneaking little bites and this morning he says to me "Mommy, can I have a piece of your bread now and another piece at breakfast? I love it!" Now, mind you this was just at 7:30am while I was in the middle of scrambling his egg for breakfast.  I guess it is a winner! We even bought more apples today to make more this weekend. Yeah, it's that good.

Just be sure to grease and flour your pans really, really well. As you will see in the pictures, parts of my crust stuck to the pan.  Jackson told me that it was ok, he would just eat those good bitzky bites for me that stuck. Good thing I don't have finicky eaters in this house :)  I apologize for the not so beautiful pictures, but you get the point.  We were all too much in a hurry to eat!


Apple Cream Cheese Bread
recipe courtesy of Tomato Kumato

for the apple cake
2 apples
1/2 cup vegetable oil
1 cup sugar
2 eggs
1 tsp. vanilla
1 1/3 cup flour
1 tsp. baking soda
1/2 tsp. salt
1 tsp. cinnamon
1 pinch nutmeg

for the cream cheese swirled topping
6 oz. cream cheese
1/2 cup sugar
1 egg

Preheat oven to 350 degrees F.

Grate the apples (skin and all) into a large mixing bowl. Add the oil, cup of sugar, eggs and vanilla and mix well to combine. Without mixing, add the flour, baking soda, salt, cinnamon and nutmeg. Carefully fold the dry ingredients into the wet, and pour into the prepared loaf pan.

Combine the cream cheese, sugar and egg with a fork. Pour over the top of the batter, and use a knife to swirl the two layers together.

Bake loosely covered with foil for 30 minutes. Then remove the foil and continue to bake an additional 15-20 minutes (mine took at least 20 additional minutes, and I have an oven that runs hot), until a toothpick inserted into the cake comes out clean with a few crumbs attached. Allow to cool fully before slicing.  This is very important.  I know it will be tempting to cut into it right away, but the bread needs to set up some, otherwise it will fall apart if sliced too soon.


Here is close-up of all that wonderful swirly goodness.  Caramelized sugar, cinnamon, sweetened cream cheese, bits of apple......

Saturday, October 22, 2011

Cinnamon Bun Muffins (Gluten Free, Low Carb)


I have been getting lots of requests for more Special Diet recipes (low carb, gluten free, vegan, etc.)  So this one is for you!  This recipe is low carb and gluten free due to the use of the almond meal.  The use of honey or maple syrup makes it low on the glycemic index as well, meaning that your body will break it down faster instead of storing the sugars like when using granulated white sugar does. 

But most importantly, they are SO, SO yummy!  These muffins have tons of cinnamon, making your home smell like heaven while baking.  The almond meal gives a nice nutty flavor that blends everything together beautifully.  Even if you aren't concerned about any special diets, you would still fully enjoy these muffins. Our whole family just loved them.  Thank you Comfy Belly for introducing us to this great recipe!


Cinnamon Bun Muffins (Gluten Free, Low Carb)
recipe courtesy Comfy Belly

1/2 cup of yogurt
1/4 cup of honey (or maple syrup)
2 eggs
2 1/2 cups of blanched almond flour
1/4 teaspoon of sea salt
1/2 teaspoon of baking soda

Cinnamon Topping Ingredients 
2 tablespoons of ground cinnamon
4 tablespoons of honey (or maple syrup)
2 tablespoons of unsalted butter, melted (ghee or coconut butter will work too)
1/4 cup of chopped walnuts (optional; or other nut)

Preheat oven to 310 degrees F.

Combine all the wet muffin ingredients into a bowl and blend well with a spoon. Add the dry muffin ingredients and blend well with a spoon. Place cupcake liners in a baking pan, and fill the liners halfway with batter.

Blend all the topping ingredients well. Add about a tablespoon of topping to the center of each muffin. Now put another scoop of batter on top of each muffin until the batter just about reaches the top. Add nuts now if your adding them to the top of the muffin. Evenly distribute the remaining topping over the top of each muffin. Optionally, use a toothpick to poke at the top of each muffin to allow some topping to drip into the batter.

Bake for about 25 minutes, or until a toothpick placed in the center of a muffin comes out clean and the tops are starting to brown. Cool and enjoy!

Store for a few days covered, or in the refrigerator for 2 weeks.


Don't forget to enter my 
by Avery Office Supplies for one lucky winner!  

click on the link to make your entry and to read all the details for this great prize!


I linked up on Sweets For a Saturday #43. Come find some other delicious sweet things :)

Wednesday, September 7, 2011

Caramelized Onion Egg Scramble

Is there any smell more mouth watering then sauteed onions in butter? .... Mmmmmm.  Now take those little guys a bit farther and caramelize them.   Caramelized onions stirred into cheesy eggs.... ok, now this is crazy good!  If you are an onion lover like me, then you will go crazy for this egg scramble!  The slow cooking of the onions adds such a lovely sweetness to the eggs, making them completely addictive.  This isn't just for breakfast!  I feel like the time and love it takes to caramelize onions, also makes this special enough for a perfect "Breakfast for Dinner". 


Caramelized Onion Egg Scramble
4 eggs
4 tablespoons milk
1 tablespoon butter or margarine
1 small onion, diced
1 green onion, sliced
2 slices Sharp American Cheese, torn up
salt and fresh ground pepper, to taste
2 parsley sprigs, chopped for garnish

In a medium sized nonstick skillet over medium heat, melt the butter.  Add the diced onions and a pinch of salt.  Sauté until just beginning to turn brown.  Turn down heat to low and allow the onions to continue to caramelize, stirring occasionally.  

Wisk the eggs and milk together for two minutes, until frothy and even colored.  Turn the heat up to medium low, add eggs to skillet. Do not scramble right away. Just as they are beginning to set, using a spatula or a flat wooden spoon, push eggs toward center while tilting skillet to distribute the runny parts. When eggs are almost done, add the green onions and sharp American cheese.  Season with salt and pepper. Cook until the cheese is melted.  Garnish with parsley.  Serve with toast points and if you are like me, a little hot sauce to spice things up!


Saturday, August 13, 2011

A Perfect Taste of Summer- Garden Tomato and Basil Sandwich


Garden Tomato and Basil Sandwich
1 tomato
a hand-full of basil leaves
a smear of either mayo or a bit of a Laughing Cow wedge (my favorite is the Light Creamy Swiss)
4 slices Bread of your choice
Corse kosher salt and fresh ground black pepper

Smear a bit of mayo or some of the Laughing Cow cheese onto your bread.  Top with a few nice, thick slices of fresh garden tomatoes.  Add a sprinkling of salt (it brings out the sweetness in the tomatoes) and a grind or two of fresh black pepper.  Top with a few leaves of fresh basil and enjoy.  Seriously you can't beat this sandwich.  So, so good!  I have this alllll the time for breakfast.  And lunch.  And snack.  When tomatoes are in season, it is seriously addictive.


Also I have to apologize for being MIA for so long!!  Our charger cable to the computer broke two and a half weeks ago.  We ordered one, and just our luck, it got lost in the mail. I was seriously so, so mad.  The post office has no idea where it is and we have to wait a full 30 days until we can even make a claim. Who knows how much longer we would have to wait until everything got resolved.  So we ordered another one, and luckily that got to us nice and fast.  So if the post office ever does find the missing charger, well I guess we will just have a back up.  Incase you were wondering, two and a half weeks without a computer is NO FUN!

Thursday, July 14, 2011

60 Second Egg Sandwich

Breakfast is the single most important meal of the day!  You've heard it before, you know it's true. But how often are you running out the door thinking "I just don't have time!" You either end up going with out anything at all or you make that (usually) bad decision to grab a bite on the road.  But "Fast Food" doesn't have to be "bad for you food"!  What if I told you that you could have an amazingly delicious egg sandwich, full of protein, low in carbohydrates and only takes you 60 Seconds to make?!  It's true!


print this recipe

60 Second Egg Sandwich
1 egg
1 slice cheese
1 slice tomato
a few leaves fresh basil
a smear of low fat mayo
1 sandwich thin
salt and fresh ground black pepper
nonstick cooking spray

Break one egg into a ramekin that has been sprayed with nonstick cooking spray.  Lightly give the yoke a little whisk with a fork.  You need to break the yoke slightly, otherwise it can explode in your microwave- you don't want that!  Season egg with salt and pepper and microwave on high for 60 seconds.  Now microwave times may vary, so depending on how "hot" your oven cooks and how firm you like your egg you may wish to decrease the time slightly.  I found in my microwave 45 seconds is perfect.  Remove ramekin with pot holders- these little guys get hot!


With the tip of your butter knife slide the egg out of the ramekin.


Smear half of your lightly toasted Sandwich Thin with a little mayo, top with tomato, fresh basil, egg and a slice of cheese.  And there you have it.  60 seconds (or less if you have a microwave like mine!) to a delicious, perfect egg sandwich.  There is absolutely no reason not to have time for breakfast again!


Be sure you play around with this!  Swap out the Sandwich Thin for an english muffin and the tomato and basil for a slice of Canadian Bacon and you've got yourself a 60 Second Egg McMuffin!  These guys are fast, fun and super versatile.

And if you are as crazy about these wonderful 100 Calorie Sandwich Thins as I am then be sure you come back on Saturday where I will share with you a fantastic recipe so you can make them yourself at home.  It's awesome!

Thursday, June 9, 2011

Eggy Sandwich topped with a Spicy Black Bean and Tomato Guacamole


OMG. I just had one of the most delicious egg sandwiches. Ever. Scrambled egg topped with a spicy black bean and tomato guacamole, a slice of mild cheddar cheese, served on lightly toasted Italian bread. This was one of the best ideas I've had in a long time. I SO had to share!!  Go make this tonight- it will make a fantastic dinner!


Eggy Sandwich topped with a Spicy Black Bean and Tomato Guacamole
Makes 4 sandwiches

For the sandwich:
6 eggs
6 tablespoons milk
salt and fresh ground black pepper to taste
4 slices mild cheddar cheese
8 slices Italian bread, or any other soft yet crusty bread
freshly prepared spicy black bean and tomato guacamole (recipe follows)
1 tablespoon butter, plus a bit more to spread on toasted bread

In a large mixing bowl, vigorously whisk the eggs and milk together for about 2 minutes. This will make sure your eggs are light, fluffy and super yummy. The American Egg Board describes well beaten eggs as being "frothy and evenly colored". It takes about 2 minutes to get them like this. Everyone will ask you how you got your eggs so fluffy and pretty looking!

In a nonstick frying pan melt 1 tablespoon butter until the very last of it is just liquifying. Pour in the eggs. Do not scramble right away. Just as they are beginning to set, using a spatula or a flat wooden spoon, push eggs toward center while tilting skillet to distribute the runny parts. Season with salt and pepper. Once cooked remove from heat.

While eggs are cooking, toast and butter your bread. Evenly distribute the eggs across 4 slices of buttered bread. Add one slice of cheese to the top of each egg. Dollop with a good amount of guacamole (I LOVE guacamole, so I used a lot. It was messy, but sooooo good!) Add the remaining slices of toasted bread, slice in half and enjoy!


Spicy Black Bean and Tomato Guacamole
1 Haas Avocado, roughly mashed
1 tomato, chopped
1 jalapeno, diced
1/2 medium red onion, chopped
the juice of half of one lime
1/2 can of black beans, drained and rinsed
a few dashes Tobasco Sauce
sea salt and freshly ground black pepper to taste

Combine all ingredients except the black beans and with a fork, roughly mash to combine.  Stir in the black beans.  Squeeze a little more lime juice on top to stop the oxidation process and keep the beautiful bright green color.

tip: If tomatoes aren't in season and are looking a little too "pink" for your liking, a can of diced tomatoes with green chili's is a great substitute for the tomato and jalapeno pepper (I really like the Ro*tel brand). You may wish to omit the Tobasco Sauce as well , as these can have a god kick to them . Be sure to taste the guac first to get the spiciness it to your liking.

Thursday, May 5, 2011

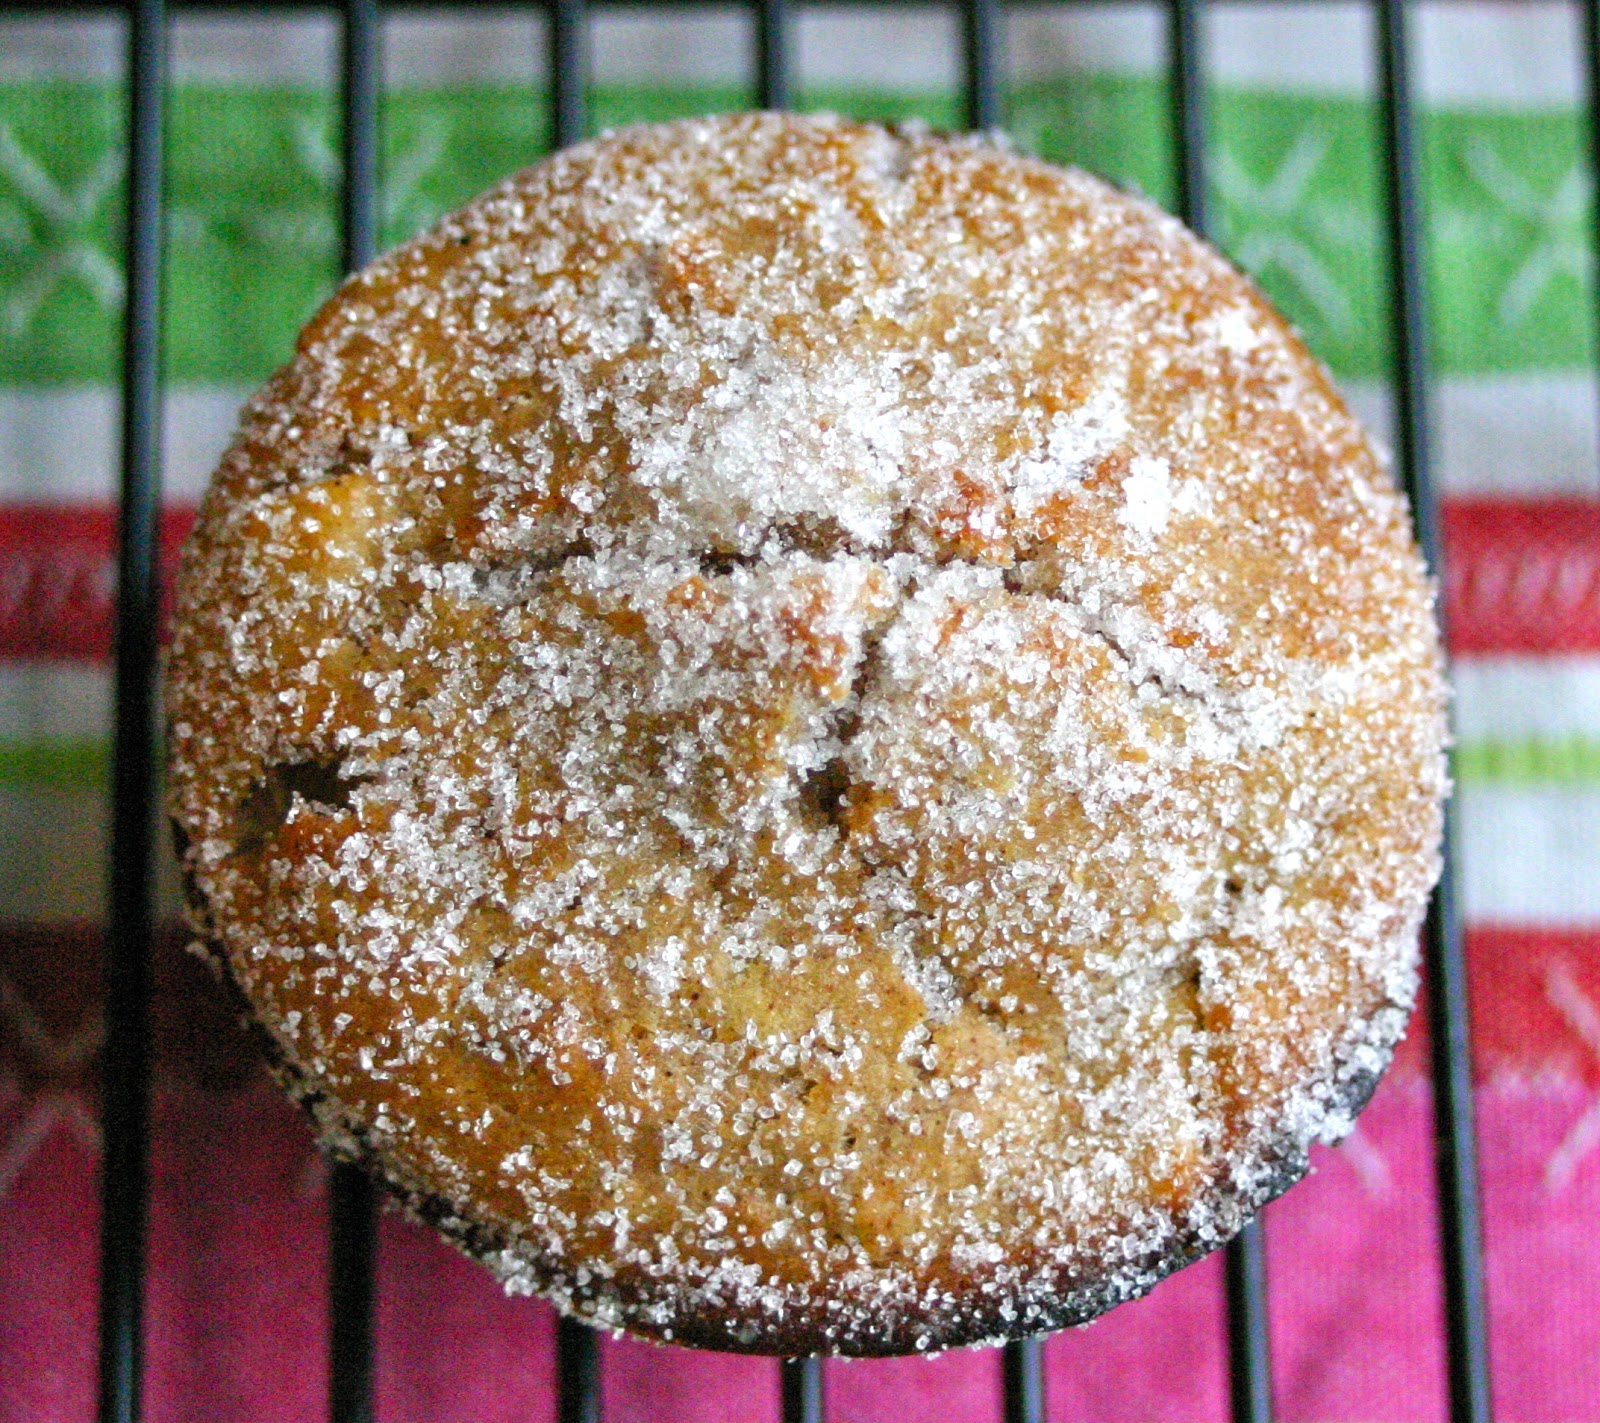
Apple Muffins with Cinnamon and Sugar

These muffins are wonderfully light, and despite the sugar topping, they are the perfect sweetness.  Not too sweet- just right.  You will love these.  I promise.  


Apple Muffins with Cinnamon and Sugar
makes 6 3-inch muffins or 24 mini muffins

3/4 Cup all-purpose flour
1 cup whole wheat flour
2 tablespoons granulated sugar, plus more for sugarcoating the muffins
2 teaspoons baking powder
1/2 teaspoon salt
1 1/4 teaspoons ground cinnamon
1/2 teaspoon ground nutmeg
1 large egg
1 cup skim milk
6 tablespoons canola oil
1/2 cup frozen apple-juice concentrate, thawed
1/4 teaspoon lemon extract
1 large apple, peeled, cored and finely chopped

Position rack in the center of oven and preheat to 400 degrees F.  Lightly grease or line with paper baking cups six 3-inch muffin cups.

In a large bowl, blend together the two flours, 2 tablespoons sugar, baking powder, salt, cinnamon, and nutmeg.  In a medium bowl, beat the egg, milk, oil, apple juice, and lemon extract until smooth.  Stir in the apples.  Combine the two mixtures, blending until the dry ingredients are just moistened.

Spoon the batter into the prepared muffin cups, filling each about 3/4 full.  Bake for 20-25 minutes, or until the tops are golden and a cake tester or wooden toothpick inserted into the center of a muffin comes out clean. Cool in the pan on a wire rack for 5-7 minutes.

Serve warm, or invert onto the rack to cool completely.  While still warm, coat the muffins with sugar.


I doubled the recipe and made a batch of mini muffins as well as regular sized. I LOVE the mini muffins! These are the perfect flavors for a little bite-sized treat. I definitely recommend making them tiny like this. Isn't anything more fun when they are small?  Plus, this way you can have more then one and not feel guilty....


Sunday, April 10, 2011

Mini German Pancakes


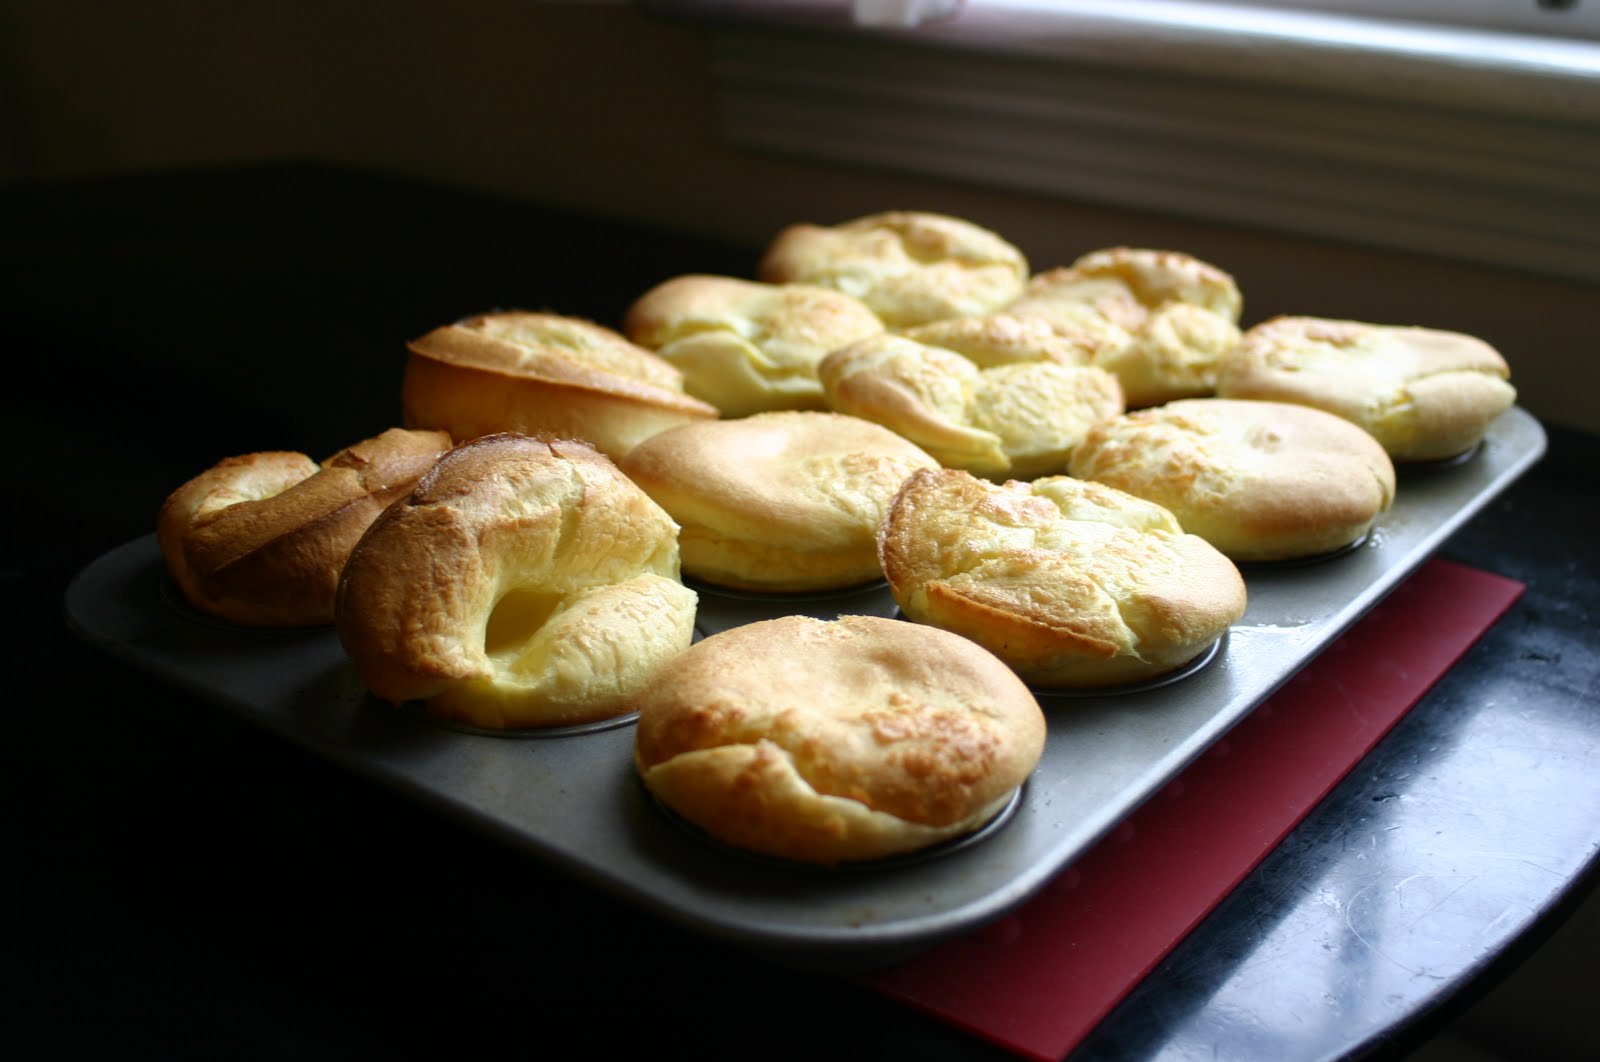
Have you ever heard of these things? I hadn't until just recently.  I was playing on www.stumbleupon.com and a website popped up with these amazing creations.  I was immediately intrigued.  So off to google I ran for a bit of research.  German Pancakes, Dutch Babies, Pop-Up Pancakes, Hootenannies, High-Rise Pancakes, Pfannekuchen... so many names for such a neat dish.  It only took a few pictures and a little browsing of recipes for me to know I just HAD to make these things!  They pop up crazy huge while they are baking, puffing and rising in all wild directions. They are a hoot to watch baking; I got just as much of a kick watching them as my four year old did.


The traditional way of making them is in a large 9x13 cake pan or a jelly roll pan.  But a few recipes showed making them in muffin cups for individual little popover-like "pancakes".  Since I have a Little Man that LOVES muffins and pancakes, I thought this would be a fun way to make breakfast for him.  Well I gotta tell you- I don't think I could ever eat a regular pancake again.  These are way too good! You can't help but love these guys just looking at them.  German Pancakes rise looking very Soufflé-like.  But the taste and texture is quite different.  They are flakey and lightly crisp on the outside, but very creamy and custardy on the inside. They sort of reminding me of the flavor of a crepe. They are unique, and OH SO FUN!


Just blending 5 ingredients, it honestly couldn't be simpler.  Instead of carefully pouring your batter onto a hot skillet into perfect disks, watching them closely making sure they don't burn, flip, do all over again.... etc. etc. With these, just pour the batter into very well greased muffin pans, bake for 15 minutes and then enjoy!  I can easily see these becoming a Saturday morning tradition.  

The traditional way of serving them is with freshly squeezed lemons and powdered sugar.  Since I didn't have either, we went with fresh bananas, pure maple syrup and mini chocolate chips.  I also had one with bananas and a sprinkling of cinnamon.  Both were pure bliss.  I am also picturing a warm strawberry syrup, or cinnamon sugar apples would be beautiful toppings.  Or Nutella.... Mmmmm.  Well, the only way around this dilemma is making them again.  And again.  And again.....


Mini German Pancakes
1 cup milk
1 cup flour
1/4 cup melted butter
6 eggs
pinch of salt

Preheat oven to 400 degrees. Combine all ingredients in a blender (you can also use a whisk or a hand mixer) and mix until completely smooth and liquified. Pour into very well greased muffin cups (or one 9x13 pan) and bake for 15 minutes or until golden brown and very well puffed. They will deflate some after being removed from the oven, creating little "cups". Top with add-ons of your choice and enjoy.

Print this Recipe

check out that lovely, creamy center!

LinkWithin

Related Posts with Thumbnails