Showing posts with label Breads. Show all posts

Tuesday, August 27, 2013

Cinnamon-and-Raisin Muffins


Hello friends!  Goodness it feels good to be back and writing.  I decided to take the summer off from blogging to spend some much needed quality time with my family.  But now with my oldest back in school and only one little guy at home with me now, I have been so antsy to get back in the swing of things.  Breaks sure can be nice, gives the perfect recharge to the soul!  And now I have a head FULL of recipes I cant wait to share with you all! 

When Jackson gets home from school he is absolutely famished. A full day of school is hard work!! Baking gives me wonderful quality time with Little O and I love having special treats at home for when Jackson gets off the school bus.  He is going to be thrilled to see one waiting for him on the kitchen table this afternoon!!


Cinnamon-and-Raisin Muffins
recipe slightly adapted from 1001 Muffins by Gregg R. Gillespie

makes 10 muffins

1 1/2 cups All-Purpose flour
2 teaspoons baking powder
1 1/2 teaspoons ground cinnamon
1/2 cup raisins
1/4 teaspoon salt
1/2 cup packed brown sugar
1 large egg
1/4 cup butter, melted
1/2 cup milk

Position the rack in the center of the oven and preheat to 375 degrees F.  Lightly grease or line with paper baking cups ten 2 3/4-inch muffin cups.

In a large bowl, blend together the flour, baking powder, cinnamon, raisins, and salt.  In a medium bowl, beat the sugar, egg, butter, and milk until smooth.  Combine the two mixtures, blending until the dry ingredients are just moistened. 

Spoon the batter into the prepared muffin cups, filling each about three-quarters full.  Bake for 15-20 minutes, or until a cake tester or wooden toothpick inserted into the center of a muffin comes out clean.  Cool in the pan on a wire rack for 5-7 minutes.  Serve warm, or invert onto the rack to cool completely. 

Delicious slathered with butter and a bit of jam!


My taste tester approves!  Owen gobbled his muffin up in no time and kept telling me how yummy they were.  Big hit!  He's pretty stinking cute too, huh?  :)

Tuesday, October 16, 2012

Cinnamon Raisin Bread (Bread Machine)


Bread Machines are so perfect for those "I am in the mood for Cinnamon Raisin Bread moods" but you have loads of laundry to do, kids to play with, bed linens changed and a million and one other items on your To-Do List making it impossible to devote the time to baking.  Very much like a crock pots, you add the ingredients, turn it on and walk away!  3 hours later you have homemade bread!  I love mine and use it all the time- I am all about making my life easier from time to time!  If you don't have one, you can usually find them at garage sales and Salvation Army's for cheap.  Or you can do like I did and ask around and see if anyone has one sitting around unused taking up space they want to free up!  (They have no idea what they are missing out on!!) Here is a terrific recipe for Cinnamon Raisin Bread.  It doesn't have a "swirl" of cinnamon, but instead the cinnamon is infused throughout the entire loaf.  It is yummy and makes the house smell amazing.


Cinnamon Raisin Bread (Bread Machine)  
1 egg + water to equal 1 1/4 cups
2 Tablespoons powdered milk
1 1/4 teaspoon salt
2 Tablespoons brown sugar
2 Tablespoons butter
3 2/3 Cups All Purpose white flour
1 teaspoon cinnamon
1 1/4 teaspoons yeast

add ingredients:
1/2 cup Raisins (although I added 1 cup!  I like a lot of raisins in mine!)

1. Measure first 8 ingredients in the order listed into Baking Pan
2. Insert Baking Pan into oven chamber, twist to secure and close lid
3. Select: Sweet Bread Setting
4. Select "Regular" or "Dark" crust (I always choose the "regular" crust, I find the "dark" way too dark for my taste)
5. Press Start- there will be a 15 minute preheat delay before mixing begins
6. Add raisins when the "Add Ingredient" signal beeps
7. Using oven mits, remove bread when completion beep sounds.
8. Cool on a wire rack before slicing

Baking time: 3:50 hours and Makes a 2.0 lb loaf


Wednesday, August 29, 2012

Zucchini Bread


When overloaded with zucchini, what's a person to do- bake zucchini bread of course!!

If you haven't noticed already from here, we are huge fans of quick breads.  First of all, well, they are quick! You get an almost instant gratification- stir a bunch of ingredients in a bowl, dump into pans, bake, cool and eat.  No special equipment required and they are perfect for little helpers in the kitchen because they can almost do the entire thing themselves!

This  recipe is one I borrowed from my Mother-in-law, Judy.  Every summer along with an armful of ripped zucchini's she also brings over a wonderful loaf of this delicious bread.  It never lasts long in our house!  It is so, so good!  It is lightly sweetened and studded with lots of raisins which is how we love bread in our house. We aren't big nut-in-bakery people in our house.  But of course you can go either way.  This year I asked if I could share the recipe with all of you, and you lucky people- She said yes!  Thank you Judy!


Zucchini Bread
3 cups All Purpose Flour
3 eggs
2 cups sugar
1 cup vegetable oil
1 teaspoon vanilla
2 cups grated zucchini
1 teaspoon cinnamon
1 cup nuts or raisins (optional)
1 teaspoon salt
1 teaspoon baking soda
1/4 teaspoon baking powder
1/2 cup sour cream

Preheat oven to 350 degrees F.

Grease and flour just the bottom of two loaf pans.

Sift flour into a large bowl and add all dry ingredients and set aside. In a medium sized bowl cream eggs and sugar and then add all of the wet ingredients. Add the wet ingredients to the dry and mix together well. Pour into the two prepared loaf pans.

Bake 1 hour and some minutes, (at least an hour, but the minutes will depend on your oven. Judy's cooks in exactly 1 hour while her sister's oven takes a bit longer) or until a toothpick comes out clean. Keep an eye on it.

Cool in loaf pans for 15 minutes. Turn out onto wire rack and allow to cool completely. Store in fridge or wrap well and freeze.


Monday, July 23, 2012

Blueberry Quick Bread


This weekend my sister and I gathered the troops and headed up to Vermilion, Ohio to do some blueberry picking at Baumhart Berry Farm.   Bonnie had been here once before and raved about it, so this was my first time.  What a treasure to find!  The aisles are huge, easily accommodating our two large strollers, the bushes are tall enough that you aren't bending over giving yourself a backache and most importantly, the berries are HUGE and sinfully sugar sweet!!  I couldn't get over how easy it was to pick them, just grazing your hands over the plump fruits would drop them into your bucket.  The kids never tired of the picking and our buckets soon became full.  It was a fun afternoon, and even after all our snacking we still came home with more blueberries then one knows what to do with.  Don't worry, your tummies will know exactly what to do with them!

Let me help you with this lovely Blueberry Quick Bread.  It is overflowing with blueberries in ever single bite. The the bread itself has just the right sweetness and tastes heavenly with some soft butter smeared all over it. Try it with a slice of shaved ham on top.  Super yummy!


Blueberry Quick Bread
recipe courtesy allrecipes

5 cups all-purpose flour
1 1/2 cups sugar
2 tablespoons baking powder
1 teaspoon salt
3/4 cup cold butter or margarine
1 1/2 cups chopped walnuts (optional)
4 eggs
2 cups cold milk
2 teaspoons vanilla extract
3 cups fresh or frozen blueberries
Directions

In a large bowl, combine flour, sugar, baking powder and salt. Cut in butter until mixture resembles coarse crumbs. Stir in walnuts.

In a small bowl, beat eggs, milk and vanilla; stir into dry ingredients just until moistened. Gently fold in blueberries.

Pour into two 9-in. x 5-in. x 3-in. loaf pans. Bake at 350 degrees F for 65-75 minutes or until bread tests done. Cool in pan 10 minutes before removing to a wire rack.


This recipe is featured on This and That and  http://www.foodiefriendsfriday.com Linky Party

Thursday, July 19, 2012

Toad in a Hole- Midwestern Style


I know that Toad in a Hole means something completely different to people over in Europe where this recipe consists of sausages cooked in Yorkshire Pudding. But to most of us here in the Midwestern United States, Toad in a Hole is an egg that has been sautéed inside a slice of bread where a hole was removed from the center.  It is a simple dish, giving you that perfect dunking bread already there and waiting to be slathered in the runny yoke the moment a tine of your fork hits the egg.  It takes no time to make and is, well, wonderfully delicious.  Plus kids and adults always seem to get a kick out of it!

Toad in a Hole- Midwestern Style
2 slices bread per person
2 eggs per person
butter
salt and fresh ground black pepper to taste
fresh chives to garnish

Using a shot glass or a small biscuit cutter, cut a hole in the center of each slice of bread.  Butter both sides of bread as you would for a grilled cheese sandwich.  Be sure to butter the circles you just removed from the breads, they are great dippers for the runny eggs!

Place the bread into a nonstick pan  and "grill" at medium low heat until just golden.  Flip bread and very carefully break the egg into the hole.  The yoke should fill it nicely.  Season each egg with salt and fresh ground pepper to taste.  Allow to cook until you get the eggs to your preferred doneness.  I like to lightly cover my pan with foil to set the yoke just a bit more.  If you don't like a runny egg at all, just leave the foil on the pan to your perfection.  Carefully remove the Egg's in a Hole to each person's plate, garnish and enjoy!  Serve along side some fresh fruit and crispy bacon.


I  know there are all sorts of other names for this fun dish.  What do you call it in your neck of the woods?!

Saturday, January 7, 2012

Whole Wheat Flour Tortillas


This was one of those things that every single time we had soft tacos or flour enchiladas I would think to myself "Hey, I bet I could make these".  Well last night I finally did!  And seriously, listen to me- never go out and buy them again!  This recipe couldn't be any more simple.  It is made with whole wheat which I love and no lard like in so many other recipes, making them much healthier than most store-bought versions.  The taste is light and nicely flavorful, and we all hands-down agreed that we never, ever should eat the store bought kind again.

We had a few left over so I wrapped them in foil and put them in a large re-sealable bag in the fridge.  I was a little nervous that the moisture of the fridge would turn them gummy, but the next day they were even more amazing- if you can believe that!  I tried both reheating them in the microwave sandwiched between damp paper towels and than also wrapped in foil and placed in a warm (200 degree) oven for 5 minutes.  Both ways provided delicious, pliable, rollable flour tortillas!  So not only are they great made to order, but also made ahead of time and just reheated for company the next day.

A friend told me that she heard flour tortillas were very difficult to roll out into circles.  I really didn't have much trouble.  They aren't prefect circles as you can see.  But close enough!  Honestly, I don't really like my homemade goods to look too "perfect".  I like the imperfections that tell you they were made with love at home instead of mass-produced from a store.  And I am sure that practice makes "almost" perfect, and I know that I will be making these many, many, many more times in the future.


Whole Wheat Flour Tortillas
recipe courtesy The Everything Bread Cookbook

yields 6-8 tortillas

1 cup whole wheat flour
1 cup all purpose flour
1/2 teaspoon salt
2 Tablespoons vegetable oil
1/2-3/4 cup cold water

In a large bowl, combine flours and salt.  Stir in oil, and enough water to hold dough together.  Knead until smooth, about 2-3 minutes, then let it rest for 5 minutes.

Turn dough out onto a floured work surface.  pinch off golf-ball-sized pieces of dough and roll into balls.  With floured fingers, flatten into thin disks.  Using a rolling pin, roll out disks no more than 1/4" thick.  If the dough becomes elastic and springs out of shape, allow to rest for 5 minutes, then roll again as necessary.

Preheat griddle over heat.  Cook until lightly goldne but still pliable, about 1-2 minutes per side.  Serve warm.

Don't they look so yummy?!  Why don't you go and make some tonight?

Wednesday, January 4, 2012

Honey White Bread


This easy bread is the perfect starter bread for all of you that are interested in bread-baking but are a little nervous of where to begin.  It comes together pretty quickly and has just the right amount of hands on baking that makes you feel proud of yourself for serving your family home-baked bread.  And let me tell you about this flavor.  Delicately sweet, with the hint of honey throughout with a slightly sticky honey-laden crust, giving even the biggest crust-hater something to love. It is my favorite part!  It has a light crumb and is very easy to slice making it a perfect sandwich bread.  I love the way the sweetness of the honey pairs with a ham or turkey sandwich- yum!  But my favorite way to eat it- lightly toasted and slathered with real, honest to goodness butter.  Perfection.


Honey White Bread
recipe from The Everything Bread Cookbook

yields 1 loaf

1 1/4 cups warm milk
3 tablespoons unsalted butter, room temperature
5 tablespoons honey
1 3/4 teaspoons active dry yeast (1 package)
3 cups all purpose flour
3/4 teaspoon kosher salt
1 teaspoon warm water

In a large bowl, combine milk, butter, 1 tablespoon honey, and yeast.  Stir to combine and let stand until foamy, about 10 minutes.

Add another 3 tablespoons honey and 1 cup of flour.  Stir to combine.  Add salt and enough remaining flour to create a firm dough.  Turn out onto a floured surface and knead 8-10 minutes.  You want the dough to be smooth and bounce back when pressed.  Lightly oil bowl with 1 tablespoon canola oil and return dough to oiled bowl.  Dust with flour, and cover loosely with plastic wrap or a damp kitchen towl (not terry cloth).  Rise at room temperature until doubled in volume, about 1 hour.

Coat a 9"x5" loaf pan with butter (don't forget the rim!) and line the bottom and short sides with a strip of parchment paper.  The honey you will brush on the bread before baking may cause the bread to stick to the pan.  This parchment will make it easy to remove.

Turn the dough onto a floured surface and shape into an oblong loaf.  Fold each end under the loaf, creating a rectangle and place into prepared pan.  Set aside to proof for 30 minutes.  Preheat oven to 350 degrees F.

Combine the remaining tablespoon of honey with a teaspoon of warm water, and brush gently over the surface of the risen dough.  Bake until golden brown and hollow  sounding when tapped, about 30-40 minutes.  Cool 10 minutes in pan, then turn out onto a cooling rack to finish cooling completely.


Friday, November 11, 2011

Honey Oatmeal Flax Bread


This sandwich bread recipe is just wonderful.  You want to bookmark this one!  Aside from the Homemade Sandwich Thin Buns this has absolutely become my most favorite bread recipe.  It has everything you want in a perfect bread-  it is soft and light, has a very mild flavor, and tastes awesome both as toast and for sandwiches- even for kids.   But guess what?!  It is super healthy!  Seriously!  It has the slight nuttiness from the flax seeds, wonderful wholesomeness from the whole wheat flour and oatmeal and just a hint of sweetness from the honey.  But unlike many other whole wheat breads, it isn't dense, tough or too "rugged" if you know what I mean.  It is a nice healthful alternative for all white bread lovers everywhere.  It is basically a white bread dressed up in Wholesome Wheat Bread clothing.   You get the texture and flavor of a nice soft white bread, but all the goodness of a whole grain one.  Honestly, it can't be beat!  It makes a perfect PB&J (kid tested!) and also a fantastic loaded sandwich with lots of meat, cheese and veggies.  It can hold up to a lot while remaining soft and light.   Love, love, love this recipe and you will too!


Honey Oatmeal Flax Bread
recipe courtesy Mostly Foodstuffs originally adapted from Rose Levy Beranbaum
yields 1 loaf

1 1/4 cups + 2 Tbsp (11.5 oz) warm water
1/2 (1.3 oz) cups rolled oats
1/4 cup (1.3 oz) cracked flax seeds (you can buy a packaged flaxseed meal like this, or else take whole flax seeds and blitz them in a coffee or spice grinder)
2 cups (11.3 oz) bread flour
3/4 cup (4 oz) whole wheat flour
2 Tbsp vital wheat gluten
1 Tbsp powdered milk
1 1/8 tsp instant yeast (or a scant 1 1/2 tsp active dry yeast)
2 Tbsp (1.5 oz) honey
2 1/2 Tbsp (1.2 oz) neutral oil, like canola
2 tsp salt

Place the water, oatmeal and flax seeds in your mixing bowl, and let soak at least 15 minutes to hydrate. Sift together the flours, gluten, and milk powder (if using), and set aside.

After 15 minutes, sprinkle in the yeast (if using active dry yeast, let soften for a minute or two, but if using instant proceed to next step). Stir in the honey and oil, and then add the flour mixture. Knead for 3 minutes, then let rest for 20 minutes. Sprinkle on the salt, and knead an additional 4 minutes. The dough will be quite moist and sticky, but will clear the sides of the bowl.

Scrape the dough into a lightly oiled bowl, swish around to distribute the oil on the bottom of the dough, then flip it over so the oiled portion is on top. Cover your container, and let rise until doubled.  This will take about 1 1/4 hours in a warm setting (inside an oven with the oven light turned on creates the perfect temperature for rising dough), longer in cooler settings.

When the dough has doubled, turn it out onto a lightly floured surface, shape into a rectangle, and let rest, covered (I like to use plastic wrap or a tea towel), for 15-20 minutes to let the gluten relax. Shape into a loaf (there's a nice pictorial here),and place into an oiled loaf pan.

The pictures of my bread here, I shaped into a braid.  This looks oh so pretty and rose beautifully.  It is very easy to do: separate your dough into three pretty equal pieces.  Roll into "worms" as my 4 year old calls it, and lay them side by side.  Now gently braid the dough, just as you would a child's hair.  Tuck the ends under and pinch to seal.  You can now bake free-form, just as is on a baking sheet, or carefully fit the braid into your bread pan for a nice sized sandwich bread (which is what I did here). If doing it the second way,  it will be a little under an inch shy of the top of the pan. Cover the loaf (Mostly Foodstuffs recommended placing it inside a plastic bag, never heard of this idea before, but it works great!), and let rise again in a warm spot until the dough is over an inch higher than the top of the pan, ~1 1/4 hours.

When the dough is about 40 minutes away from being fully risen, preheat the oven to 400 degrees, and place a baking pan on the rack under where the bread will be. Slash the top of the loaf if you like that look, or leave plain. Mist the loaf with water, place in the oven, and toss a few ice cubes in your preheated pan to create steam , this creates a sustained moist cooking environment. Quickly shut the oven door, and lower the heat to 375. Bake for 20 minutes, rotate the loaf, and bake another 15-20 minutes, until golden brown.  If the top of your loaf starts to become too dark too soon, just lightly cover it with a piece of tin foil.  This will stop it from darkening any further.

Remove the loaf from the oven, and tip out of the pan onto a rack to cool. The bread will continue to cook internally, so resist cutting it open until it is fairly cool.


Wednesday, August 31, 2011

Low Carb Spiced Pumpkin Bread


I know I have been MIA for a little while. I really am sorry about that. But if you follow me on facebook you know that I have been trying to loose that last bit of pregnancy weight by following the South Beach Diet.  I am super happy to say that it is working awesome, the last few pounds are falling off and I am having a blast "shopping" in my attic for clothing I haven't been able to wear in a long time.  The only downside, is that I have not been very creative in the kitchen.  My mom leant me a few South Beach cookbooks and the blog Kalyn's Kitchen have both been wonderful with keeping the diet exciting, food wise (as much as you can be without eating very many-if any carbs).  But since I was trying to follow the diet as perfectly as possible in Phase One, I didn't feel confidant creating my own recipes.

Now that I am in Phase Two, I am allowed to start incorporating "good carbs" back into my diet.  Knowing my love of sweets and bakery, you can't be all that surprised to hear I was dying to find some "acceptable" baked goods.  Combine that with the wonderful cooler weather we have been having here in Ohio- beautifully sunny and breezy mid 70's. Heaven.  So of course pumpkin comes to mind.  It is super high on the healthy scale and so, so delicious.  I just knew that I could find a low carb pumpkin bread recipe to satisfy my cravings.  This recipe from the online low carb magazine, The Low Carb Luxury is so, so wonderful!!!!  I have found that sometimes low carb bread can have a strange, rubbery consistency that I find rather off-putting.  This recipe isn't like that AT ALL.  If you weren't told this quick bread was low carb you would have no idea.  The whole family loves it, and I will be making it again and again.  I mean, for only 3.8 grams of carbs per slice, you can't beat it!  Oh how I love guilt-free bakery.  This recipe was 100% worth sharing.

Now this recipe uses some unique flours, which is what makes it low carb.  Almond Flour/Meal is simply just very, very finely ground almonds!  You can make it yourself by grinding raw or blanched almonds in your food processor at home, but I decided to save some time and just buy it premade.  I found Bob's Red Mill brand and really loved it.  I found it at Marc's (if you are local to Cleveland, OH area) and I also have seen it at our Super Wal-Mart.  If you have been making those yummy Sandwich Thin Buns, then you are familiar with the Vital Wheat Gluten Flour and the Wheat Bran.  Yay for another place to use them!  Go on out, stock your pantry and most importantly- have fun playing with some new ingredients!


Low Carb Spiced Pumpkin Bread

1 (15 ounce) can pumpkin puree
4 eggs
1 cup canola oil
1/2 cup water
2 cups Splenda
1 1/2 cups Vital Wheat Gluten flour
1/4 cup whey protein powder (I used vanilla flavored because that is what I had on hand)
3/4 cup almond flour
1 cup oat flour
2 teaspoons baking soda
1 1/2 teaspoons salt
1 teaspoon ground cinnamon
1 teaspoon ground nutmeg
1/2 teaspoon ground cloves
1/4 teaspoon ground ginger
Wheat Bran (or whole wheat flour) for dusting pan

Preheat oven to 350°F.

Spray bread pans with nonstick cooking spray. Sprinkle wheat bran into the pans and tap around to "flour" the pans. This will prevent sticking. Whole wheat or all purpose flour can also be used, but the wheat bran packs in extra healthy goodness.

Using a wire wisk or a hand mixer beat eggs. Add the water, oil, and pumpkin and beat until well combined. Sift together all flours, baking soda, salt and spices in a separate bowl. Add Splenda to pumpkin mixture and mix very well. Add the pumpkin mixture to the flour mixture and blend until wet and fully combined.

Pour into greased and wheat bran (or whole wheat) floured pans and bake for about 40-50 minutes. If you bake in the small loaf pans, be sure to keep an eye on them.  They will bake faster then the large loaves.  Breads are done when toothpick inserted in center comes out clean.

Makes (2) 8.5" loaves or (4) 5.75x3" loaves- slice into 12 slices per loaf.
Each large loaf contains 46 grams of carbs — 3.8 carbs per slice. (or you can have two small slices for the same amount)


Saturday, July 23, 2011

Homemade "Sandwich Thin" Buns


There is nothing like the smell of homemade bread to cozy up a house. Probably 80% of the bread we eat in our home is what I have baked.  Unless I didn't realize we were out of bread in time for lunches, the only bread I buy is hamburger buns, and most often they are Sandwich Thins.  Orowheat and Arnold both have good ones.  I can't help it- I love these things!!!  They are usually around a 100 calories for an entire bun, plus they are full of fiber and whole wheat goodness.  Since they are so thin, these buns don't have the heaviness that whole wheat sandwich bread can have.

I knew there had to be a recipe out there to make these things myself, eliminating the need to buy bread all together.  This recipe from food.com is wonderful!  The Sandwich Thin buns taste just like the store bought kind- actually better if you ask us.  They have a little more substance to them but are still only 108 calories per bun!  The recipe takes a little time because you need to wait for the dough to rise.  But the hands-on time is very minimal and super, super simple.  When I first started making them I would just free-form the buns into the right shape.  But just the other day I found a Muffin Top pan at the store and had to pick it up.  This makes pretty, perfectly round buns.  But there is still something rustic and lovely with the freeform kind.   I am so excited about these things- this has probably become my favorite recipe of the year!


print this recipe

Homemade "Sandwich Thin" Buns
1 1/3 cups warm water
1/4 cup sugar
2 1/4 tsp yeast
3 cups whole wheat flour (I like to use white whole wheat flour, it has a milder flavor and texture but just the same benefits of regular whole wheat flour.)
1/2 cup wheat bran
2 Tbsp vital wheat gluten
1 tsp salt
1 egg
2 teaspoons canola oil
rolled oats for sprinkling on top

Don't be afraid of yeast! Seriously, baking bread is so easy! First you need to "proof" the yeast. Pour the warm water into the bowl of your stand mixer then add the sugar. Sprinkle the yeast on top and allow to stand for 10 minutes. This is going to be your "sponge" for the dough. (If you don't have a stand mixer, that is perfectly fine!  Just use a regular bowl and do the kneading with your hands.  A mixer isn't necessary, just makes things a little easier and faster.)

Meanwhile, mix the dry ingredients in a separate bowl.

After ten minutes are up, add the canola oil and egg to the bowl of the stand mixer. Using the dough hook, turn the mixer on low and mix.  Add in 1 1/2 cups of the dry ingredients and mix until thoroughly combined. Cover and let rest 1 hour.

Add the remaining dry ingredients and knead for 5 minutes. At tis time your flour may be way too sticky to do anything with. Add a little bit of whole wheat flour at a time up to one additional cup until you get a consistency that is able to be handled.

Line two baking sheets with parchment paper or a Silpat.

Divide dough into 16 equal portions. It is recommended to weighed the entire ball of dough to figure out the weight of each bun, but since I do not yet own a food scale, I just eyeball it.  Good enough for me!

Roll each portion of dough in your hands to form a ball, and then flatten it between your palms.
Place it on the baking sheet and press down, working the dough into a thin 5-inch round.

dough resting before going into the oven

Brush the tops with water and then sprinkle with rolled oats. Lightly press down to help them stick. Adding the oats isn't necessary, but it does make them look pretty. Sometimes I add the oats, sometimes I am just lazy and skip them.

Preheat oven to 350 degrees. Allow the buns to rest for 30 minutes on the baking sheets so they can double in bulk.  After this time you can choose to "dock" the buns.  This means poking small holes into the dough.  They actually have a special tool for this called creatively enough, a Dough Docker.  But a fork or the small end of a chop stick works just as well.  What docking does is prevents air bubbles from forming, keeping them nice and thin.  I have forgotten to dock them at times and never had any issues with bubbles.  But I must say, docking does make them look prettier! After resting, bake for 10-12 minutes.  Do NOT over bake.  You want the sandwich thins to be soft and light and only very lightly golden brown.  10 1/2 minutes of baking time is perfect for my oven.  Just be sure to keep an eye on them.

Let cool completely before slicing with a bread knife.

see how the buns are just very lightly brown- this is perfect!  

Each bun has 108 Calories; 1g Fat; 5g Protein; 20g Carbohydrate; 4g Dietary Fiber; 13mg Cholesterol.

here is a side view so you can see the thickness of the buns after baking


I shared my recipe at
 A Little Nosh
adapted from food.com

Friday, July 15, 2011

Fridays, Feasting With Friends- Featuring Rebecca DiLiberto

"One of the delights of life is eating with friends, second to that is talking about eating. And, for an unsurpassed double whammy, there is talking about eating while you are eating with friends."
~Laurie Colwin 'Home Cooking'


Rebecca DiLiberto
"my favorite race picture of brandon and I before the CLE ten miler"

Rebecca is the blogger behind the local Cleveland blog Peace, Love and Bagels "Adventures of a self proclaimed foodie running a pr in the marathon of life".  Her blog is a fun glimpse into the happenings of her busy life.  Along with all sorts of running stuff- marathons, training, etc. (I so, so admire all you out there that call running a fun hobby!)  She also shares lots of awesome recipes- ever want to make your own yogurt? Or how about kombucha?!  (I have to admit I never even knew what this stuff was until reading her post, and now I am dying to make my own!)  I just love all of the wonderful, healthy food her blog has to offer.  So fun!

I met Becca at a recent OBA gathering, and it was immediately evident what a kind soul she is.  It is such fun meeting other local writers!  If you are an Ohio Blogger and haven't yet joined the Ohio Blogging Association, be sure to sign up right away!  There are Local Chapters all over the state so you are sure to find one near where you live.  It is a great place to be inspired for new material, learn new tips and tricks, and of course meet other bloggers that live near you!

Thanks Becca for the wonderful interview and a fantastic recipe!  I am a regular bread baker, so it was especially exciting getting one I hadn't tried before!  I'm totally baking it this weekend!  So without further adu, I give you Rebecca DiLiberto...

What is your favorite thing to cook?
In the winter, bean "chili con beer" in the slow cooker. Since I found out about making chili with beer, I don't do it any other way. It adds some incredible depth to the chili's flavor! In the summertime, I love to make grilled pizza. I usually come home from work, start the crust and go on with my afternoon activities. By the time I'm finished, my crust has risen and is ready to be magically morphed into a pizza!

How about your least favorite thing to cook?
I can't even think of anything, because if I don't want to make it...I just won't! That's actually why I initially stopped eating meat, because I was just too lazy to cook it.

What is your favorite local restaurant and what is one you are dying to try out?
To be honest, I don't eat out very often. I am big on going out for brunch though, and I just went to the Inn on Coventry and also Tommy's (in Coventry) and really enjoyed a delicious late morning breakfast at both places. I am dying (and I mean, dying) to check out Root Cafe in Lakewood.

Music and food go together so beautifully. You are hosting a dinner party, what would be on your playlist?
Xavier Rudd, Jason Mraz and ALO. Oh, and let's not forget Zac Brown Band. Oh, and Dave Matthews. I love music, there is really too much to narrow down. I'd probably plug in my iPod and just let it shuffle. Here's a little know fact: my favorite band of all time is Blink 182 (please don't make fun of me!)

What would you choose to be your last meal on earth?
Absolutely anything that Heidi Swanson dreams up. I own two of her cookbooks, have tried many of her recipes and have NEVER been disappointed by them. They've always been show stoppers! If you haven't heard of her, or tried any of her recipes I strongly suggest you stop by her blog, 101 Cookbooks or buy one of her cookbooks. Seriously. Go!

What are you currently reading?
I'm in the middle of two books right now; The Count of Monte Cristo and a book called Time, Sex and Power. It's an incredibly interesting scientific exploration into how women came to have almost complete control over the evolution of humans. If you're up for some learning, definitely grab it.

What is your favorite Kitchen Gadget?
I don't know if this can be considered a "gadget" but my cast iron pot (with a cast iron top that can become a skillet). I do just about everything with it, including baking bread. Coming in at a close second place would be my pizza stone. I never cook pizza without it.

Do you have a signature go-to dish?
Probably veggie stir-fry. I've made it for several dinner parties and it's great because it's quick and easy to make in large quantities. I usually serve my stir-fry with soba noodles, for that extra asian

What is your favorite thing about the Cleveland area?
Honestly, I don't think I can narrow down a favorite. The metroparks are amazing, I love that there is a national park and farmlands not 40 minutes from the city. I think Cleveland has a LOT of potential to really grow and I cannot wait to see it all happen. Last but not least, I think the people here are really special. I know a lot of people have a very negative view of this area, but I really want to help turn that "idea" around.

Do you have a favorite meal from your childhood and do you cook it today?
I remember going to this deli solely for the purpose of eating a black and white cookie. To this day, they're hands down my favorite. Unfortunately I haven't had the energy to find a good recipe and make them myself yet. If anyone has a recipe, I would love to try it though!

Top 3 Movies of all time?
I usually don't like to commit to a favorite movie, because what if a new one comes out that becomes my favorite? (Call it fear of committment or indecisiveness, but I like to think I'm just being dynamic). Currently, my favorite movie is Despicable Me "I said a dart gun, not a fart gun!!"

What was your happiest moment in life?
That's easy. The minute that I met Brandon, there was a very distinct feeling that I knew we were meant to be together...that was at the Dave Matthews concert at Blossom last year (exactly one year ago, actually.) It became a pivotal moment in my life because I knew that I was about to make big changes in order to really start living my life. I don't think I ever really believed in "love at first sight" until it happened to me, but it's a real phenomenon! Haha, I know that sounds absolutely cheesy. I'm okay with saying totally cheesy things when it comes to our relationship, because they're 100% true.

Where do you do your grocery shopping?
The farmer's market as much as possible. Otherwise Earth Fare, Whole Foods and Giant Eagle. One of my goals for the year was to minimize my reliance on grocery stores and really truly begin to eat seasonally. That's much easier said than done, but I think I've taken some great steps to reach that goal.

What is your favorite guilty pleasure when it comes to food?
Copious amounts popcorn. Seriously, I can eat a jumbo bag of popcorn from the movie theater in less than one movie. Generally I pop my own in my air popper rather than microwaved popcorn (which wouldn't be nearly enough for me!)

Can you tell me about what you are most proud of?
Moving by myself to a state where I knew virtually no one and creating a wonderful, happy life for myself! It took some time to get comfortable here in Ohio, but I have been able to really embrace life here and I love it!

Do you have Culinary Resolutions that you would like to accomplish this year?
Now that I brought it up earlier, I really want to make black and white cookies! I always like to try new cooking techniques, so my goal is usually to find a few new techniques to try and include in my cooking arsenal.

One word that best describes you is: Happy!
"(this picture) is from the Brad Paisley concert last year that got so rainy there was no possible way to stay dry...so we just rolled with it :) probably my favorite picture EVER."

And now can you share a favorite recipe?
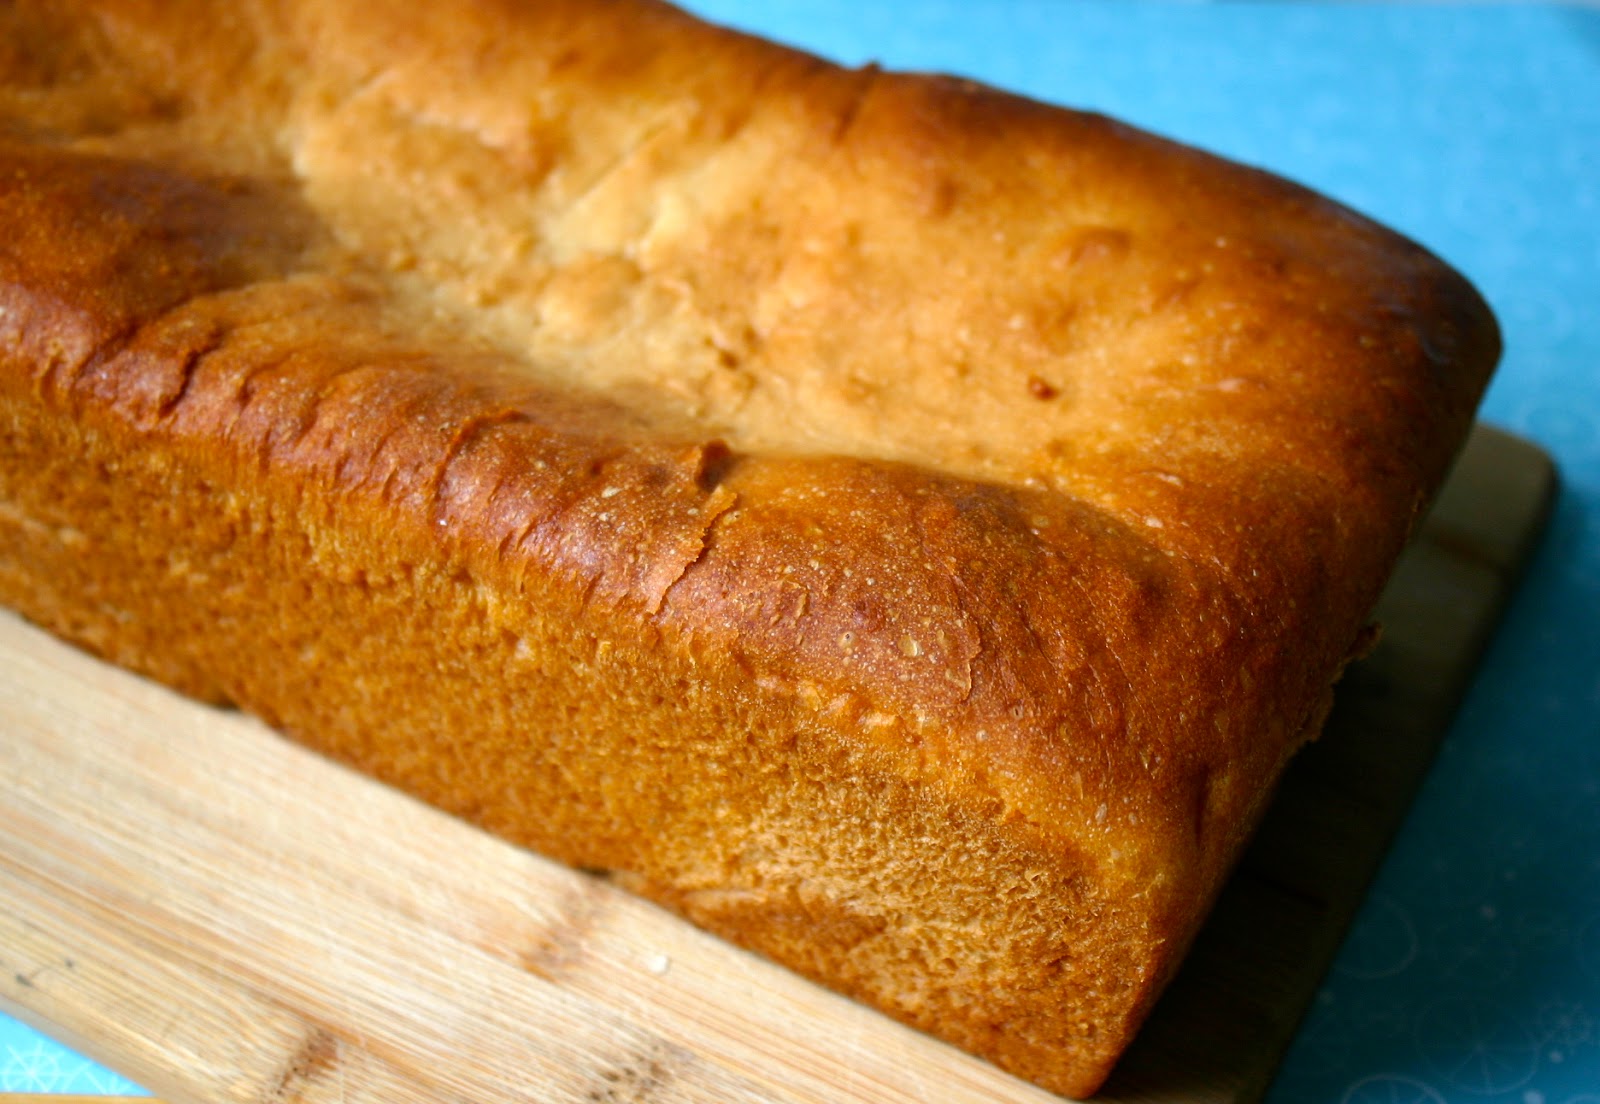
Ok, I'm choosing this recipe because I absolutely LOVE making my own bread, but I kind of suck at doing it the traditional way. We stopped buying store bought bread a while ago because this bread always comes out so good! There is nothing better than fresh made toast for breakfast in the morning, or to make a sandwich out of. The best part is...no kneading!! It's easy and all it requires is about 10 minutes of prep and a little advance planning (since you have to make it the night before).


Crusty No Knead Bread
3 cups wheat flour (or a mixture of wheat and spelt, or really any mixture you want that equals 3 cups)
1 3/4 teaspoons salt
1/2 teaspoon yeast
1 1/2 cups water
any seasonings (see below)

In a large mixing bowl, whisk together flour, salt, any mix-ins and yeast. Add water and mix until a shaggy mixture forms. Cover bowl with plastic wrap and set aside for 12 - 18 hours. Overnight works great. Heat oven to 450 degrees. When the oven has reached 450 degrees place a cast iron pot with a lid in the oven and heat the pot for 30 minutes. Meanwhile, pour dough onto a heavily floured surface and shape into a ball. Cover with plastic wrap and let set while the pot is heating. Remove hot pot from the oven and drop in the dough. Cover and return to oven for 30 minutes. After 30 minutes remove the lid and bake an additional 15 minutes. Remove bread from oven and place on a cooling rack to cool.

Seasoning ideas: Fresh rosemary and lemon zest, Pepper jack cheese, Jalapeno cheddar, Raisin walnut cinnamon, Pumpkin sunflower seed poppy seed, Sharp cheddar, Rosemary lemon Gruyere, Lemon thyme Asiago, Asiago, Mixed herb with rosemary, chives and thyme...there are infinite ways to season this bread, just have fun with it!

Thursday, April 21, 2011

Rapid Italian Onion and Herb Bread- Bread Machine Recipe

Look at all those pretty little herbs and onions speckled all over the loaf!

Print this Recipe

Rapid Italian Onion and Herb Bread- Bread Machine Recipe
1 1/3 cups water
3 Tablespoons powdered milk
1 1/2 teaspoons salt
3 Tablespoons sugar
3 Tablespoons butter
3 3/4 cups white flour
1 1/2 teaspoons dried basil
1 1/2 teaspoons dried thyme
1 1/2 teaspoons dried oregano
2 Tablespoons dried onion (I used Tastefully Simple's Onion Onion.  This stuff is amazing!)
2 teaspoons yeast

Add ingredients in the order listed into the baking pan.  Insert baking pan into the oven chamber, twist to secure.  Close lid.  Select: Rapid Bake Setting. Select "regular" or "dark" crust, depending on personal taste. Press Start- There will be a 5-minute preheat delay before mixing begins.

Using oven mitts, remove bread when completion beeps sound.  Cool on a wire rack before slicing.


I baked this bread at 8:00 at night, and goodness it got everyone hungry!  This bread turned out amazing. While it was baking, the house smelled so heavenly, like a pizza shop.  It slices beautifully, with minimal crumb, and it is very soft.  This makes for the perfect butter bread, but it is also great for sandwiches and easy garlic toast.  I am so thrilled with this recipe.  It is a new favorite in our house.

look how tall this baby is!


*recipe for the large Black and Decker machine.  If you need conversions for another machine, please contact me!

Friday, April 8, 2011

Irish Soda Bread

I know this recipe is totally out of date, being that St. Patrick's Day has already come and gone.  But I loved this recipe and I don't want it to get lost in the shuffle!   I am going to make this again soon, but I want to try doing a savory version with herbs and cheese.

I'm not Irish, not even close.  But I do look forward to St. Patricks Day dinner at my mom and dad's house every year.  She does the full feast- corned beef and cabbage, rye bread, boiled potatoes- the works.  It makes the whole house smell amazing!  Everyone looks forward to when my dad starts cutting the corned beef so we can casually walk by to take a look.... and snitch a bitzky bite on the way.  This year I wanted to try my hand at baking some Irish Soda Bread to add to the dinner.  It is a favorite of mine, but never made it myself.  I followed a basic recipe and it turned out delicious.  Only slightly sweet from the raisins, and a little bit dense, it made for the perfect accompaniment to sop up all the wonderful juices from dinner.


print this recipe

Irish Soda Bread

4 to 4 1/2 cups flour
2 Tbsp sugar
1 teaspoon salt
1 teaspoon baking soda
4 Tbsp butter
1 cup raisins
1 large egg, lightly beaten
1 3/4 cups buttermilk

Preheat oven to 425°. Whisk together 4 cups of flour, the sugar, salt, and baking soda into a large mixing bowl.

Using your fingers (or two knives or a pastry cutter), work the butter into the flour mixture until it gets nice and grainy, stir in the raisins.

Create a well in the center of the flour mixture and add the buttermilk and egg.  Mix with a wooden spoon or rubber spatula until it is too difficult to stir.  Lightly cover your hands in flour, and carefully knead the dough until it forms a ball.  If it is too sticky, add a bit more flour.  Try not to over knead or it will become tough.  Transfer the dough to a lightly floured counter and shape into a round ball.  The dough should be sticky and kinda rough looking.  That is ok!  You don't want to add too much flour or work it too much.

Transfer the dough to a lightly greased baking sheet.  With a serrated knife, make the traditional "X" in the center of the bread.  Bake for 35-45 minutes, or until golden brown and the bottom sounds hollow when tapped.  Insert a cake tester, or toothpick into the center.  If it comes out clean it is done.  Allow to cool on the baking sheet for 5-10 minutes and then transfer to a wire rack to cool a bit more.  Serve warm with lots of yummy butter!

Tuesday, February 8, 2011

Eggless Chocolate Chip Banana Bread


I am really beginning to feel the restlessness of being cooped up inside due to so much snow. I have an (almost) four year old little boy that needs to run around like he needs air to breath, and in a house the size of mine it isn't very possible.  Last night I decided I needed to get out of the house, even if it meant the library.  But guess what- of course my car is stuck in the driveway due to all the ice and snow.  Looks like I am stuck in the house yet again.  Well if I can't leave I may as well bake. 


Are there any particular items you are sure to keep in your house?  Frozen ripe banana's are a must for me.  I love them for a quick pick-me-up smoothy or my other favorite- banana bread.  It is so homey, delicious and makes the house smell heavenly.  One problem- I was all out of eggs!! What's a girl to do?  Find a recipe for an eggless one of course.  


The recipe that I began with is from here, but I decided to use unsalted butter instead of shortening.  I baked my bread in 3 small loaf pans instead of one large one because I wanted to be able to put some away in the freezer to pull out later for a nice treat.  This bread is so lovely!  Almost too delicious- when I tasted my first slice I seriously could have gone back and eaten the entire thing in one go!  I had to hurry up and wrap up the rest before I was too tempted to give in.  This recipe is an absolute keeper.  I don't know that I will ever have to look for a better one.  


Eggless Chocolate Chip Banana Bread
1/3 cup white sugar
1/3 cup brown sugar
1/3 cup butter, softened
2 cups all-purpose flour
2 teaspoons baking powder
1/4 teaspoon baking soda
1/4 teaspoon salt
1 cup mashed ripe bananas (about 3 banana's)
1 cup chocolate chips

Note: This recipe does NOT contain eggs or milk.

In a large bowl, cream sugar and butter for about 5 minutes (mixture does not get smooth). Combine flour, baking powder, baking soda and salt; add to creamed mixture alternately with bananas, beating after each addition (the batter will be thick). Spoon into a greased 9-in. x 5-in. x 3-in. loaf pan (I used three 5.75 x 3 in loaf pans). Bake at 350 degrees F for 40-45 minutes or until bread tests done with a toothpick. Cool in pan for 10 minutes before removing to a wire rack.


LinkWithin

Related Posts with Thumbnails