Showing posts with label Appetizers. Show all posts

Thursday, October 12, 2017

Seven Layer Greek Dip


Seven Layer Dip- when you hear this name, probably the first recipe you think of is the delicious gooey goodness of refried beans, guacamole, salsa and sour cream topped with all the fixin's. But everyone brings the Mexican version to parties... how about changing it up Mediterranean style next time? Here I layer creamy hummus, bright and zippy Greek yogurt sauce similar to Tzatziki, garden tomatoes, cucumbers, feta cheese and Kalamata olives for a fresh and unexpected spin on a traditional party favorite. This recipe has become a go-to of mine to bring to parties and get-together's with friends.  It is ALWAYS a huge hit and the recipe is always requested.  In fact I bought this appetizer to a recent neighborhood Recipe and Wine Night party and won 1st Place for best Appetizer! Its great served with fresh pita bread, a veggie tray, crackers or pita chips. And if you happen to have leftovers, roll them inside a pita with some crunchy lettuce for a delicious wrap.

While you could totally buy a tub of hummus and pre-made Tzatziki at the store, I love making my own for this app. Hummus is one of those recipes that is SO EASY that after making it the first time you will wonder why you ever bought it pre-made at the store. The ingredients are inexpensive, you can easily change the flavors by what you happen to have in your fridge and all you do is literally dump all the ingredients into a food processor or blender, push a button and DONE.  Simple as that! I am going to share with you my favorite Hummus recipe if you wish to give it a whirl! But either way, store bought or homemade, this Seven Layer Greek Dip is sure to be a huge hit with all your up and coming holiday parties!


Seven Layer Greek Dip

1/2 English cucumber, quartered and chopped
1 pint cherry tomatoes, quartered
1/2 cup feta cheese, crumbled
1/3 cup sliced Kalamata or black olives
3 Tablespoons finely chopped red onion
a few sprigs fresh dill, stems removed

For the Hummus
2 (15 ounce) cans of garbanzo beans (chickpeas), juices from one can reserved
1/3 cup tahini
1/3 cup lemon juice (roughly the juice of two and half lemons)
3-4 cloves garlic
1/4 tsp salt
1/4 tsp crushed red chili flakes
pinch cumin


Combine in food processor or blender the garbanzo beans, tahini, 1/4 cup lemon juice, garlic, salt, red chili flakes and cumin.  Bend until smooth.  Taste and add more lemon juice to suit your taster.  We prefer  it more on the lemony side.  It will be quite thick at this point.  Slowly add in some of the reserved garbanzo bean juice to thin it out.  Blend again.  Add more of the juice, blend and taste. Repeat until you reach the right consistency.  You won't need all the juice just enough to get it creamy!!  The texture should be smooth and creamy and not too thick.

For the Greek Yogurt Sauce
1 1/3 cups thick plain Greek yogurt, like Fage
1-2 garlic cloves, finely minced (I love a lot of garlic flavor, so I use 2 cloves)
2 tablespoons extra virgin olive oil
1/2 teaspoon salt
1 Tablespoon fresh dill, minced
1 Tablespoon fresh parley, minced

Combine all Greek Yogurt Sauce ingredients in a medium sized bowl and set aside. If you prefer a more mild flavor, you can make this up to a day in advance stored in the fridge.  The longer it sits in the fridge, the less "bite" the garlic will have.

Putting it all Together

On a large platter or 8x8 pan, evenly spread the hummus. Next, careful not to smear together with the hummus, evenly spread the Greek Yogurt Sauce on top of the Hummus creating your second layer. Top with cucumbers, tomatoes, feta cheese, olives, and red onion.  Sprinkle minced fresh dill over the top (kitchen scissors work great for snipping dill evenly over the layered dip!)

Serve immediately with pita bread cut into wedges, fresh veggies, crackers or pita chips.


Thursday, November 7, 2013

Herby Chicken Salad


Summer may be over, but that doesn't mean your herb gardens are all done!  Here in Ohio I am usually lucky enough to keep most of my herbs (even under the snow) until February or March!  I always hope they will survive year round since it is soooo close, but we always seem to get a crazy ice storm close to spring that knocks them out.  But since they hang on so long, be sure to use them to their fullest!  This chicken salad is so vibrant and fresh tasting due to the brightness of the fresh herbs.  I love it! You could use dried herbs, but it wont be quite the same- so snip, snip, snip while you still can!
 
This recipe is wonderful as a sandwich, add a scoop to a leafy salad in place of dressing, or even as an appetizer with crackers..... or like me, just with a fork right out of the dish.
 
Allowing it to sit in the refrigerator for at least an hour before serving will really bring all of the flavors together and make the herby flavor pop. But if you just can't wait, that's ok too.  It will still be scrumptious.   


Herby Chicken Salad
2 cups chopped skinless, boneless rotisserie chicken breast
1/4 cup mayonnaise
1 tablespoon fresh lemon juice
1/8 teaspoon kosher salt
fresh ground black pepper, to taste
3 Tablespoons chopped fresh herbs, such as dill, flat leaf parsley, chives, rosemary
1/4 cup chopped celery
1/4 cup finely chopped red onion

In a medium sized bowl, whisk together the mayonnaise, lemon juice, salt, pepper, and herbs.
In a large bowl combine the chicken, celery, and red onion.  Pour the dressing onto the chicken mixture and stir to coat.  Chill until ready to serve.


Monday, November 4, 2013

Cheesy Quinoa Bites

So it isn't a huge secret that I am not all that crazy about quinoa.  I want to like it, I really do!  It is so crazy good for you, it is supposed to aid in migraine health, and your body burns it as fast as you eat it.  But for the most part, it just isn't one of my favorite things.  That is until I discovered these guys!  A blog I love,  So Very Blessed, created these little gems and oh man are they delicious!! They are crispy on the outside, creamy on the inside and JAMPACKED with flavor! What I really love about this recipe, is how customizable it is.  You can switch around the ingredients for totally different flavors- add pepperoni and mozzarella cheese and now you have quinoa pizza bites, use ham, diced chicken and Swiss and voila! you have Cordon Bleu bites.  A bit of corn, black beans, chilies and cilantro and now they are Southwestern!  These cheesy ones I feel are the "base recipe", and from there the sky's the limit!   Be sure you check out So Very Blessed to see all the many flavor combinations she has come up with!  I've made each and every one and we LOVE them all!  The kids can't get enough of them either, making it even better.  They make an awesome snack, appetizer or side dish. I've even served them alongside a salad for a satisfying dinner.  No matter how you serve them, they will get gobbled up as fast as lightening!

I normally make the quinoa bites in my mini muffin pan, but this last time, I had extra mixture left over so I made a few patties in my muffin-top pan and they were fantastic! They would make a great "burger".  In these pictures I had a used a quinoa/brown rice blend because that was what the market happened to have at the time, and they were just as yummy. 


Cheesy Quinoa Bites
Recipe courtesy So Very Blessed

Makes: ~ 28 bites

Ingredients
2 cups cooked quinoa (I cook my quinoa in low sodium chicken broth)
2 large eggs
1 cup shredded carrot
2 stalks green onion, diced
2 cloves garlic, minced
1/4 cup chopped fresh cilantro
1/2 cup grated Parmesan cheese
2 Tbs all-purpose flour
1/2 tsp seasoning salt
1/4 tsp freshly ground pepper

Instructions
1.Preheat oven to 350 degrees.
2.Mix together quinoa, carrot, egg, green onion, garlic, cilantro, cheese, flour, salt and pepper.
3.Distribute mixture into a (well!) greased mini muffin tin, filling each cup to the top (1 heaping Tbs each).
4.Bake for 15-20 minutes.


We are big dippers in our house- the more sauces the better! Ha!  Our favorites are honey mustard dressing (pictured), BBQ sauce, frank's hot sauce, ranch/blue cheese dressing and for the pizza bites, spaghetti sauce of course!

Monday, January 14, 2013

Creamy Salsa Chicken in the Slow Cooker


Hi friends!  Here is another great crock pot recipe to add to your weekly rotation.  It is awesomely delicious and, just what makes crock pot recipes so popular, it comes together in under 10 minutes.  It will make your kids crazy happy to eat dinner and if you serve it at a party, I can guarantee it a huge hit.   What I love most about it is how versatile it is.   We love it tossed in a salad with rice for homemade burrito bowls, wrap the chicken in tortillas for a delicious taco, or when served alongside tortilla chips it  makes a great dip for parties.

When I was making Creamy Salsa Chicken this last time I found an awesome product, Greek Cream Cheese. It is 1/2 the fat of regular cream cheese, 2x the protein and full of all those wonderful live active cultures.  I gave it a whirl and loved it!  I hope it wasn't a fluke finding it in the store because it was so great.  Definitely right up our alley.  I'm not being paid to promote this stuff- i just love it and wanted to share!  Using the greek cream cheese even made this a healthy dish, total bonus.  But everything in moderation is really the key, right?!

On a side note, guess who is invited to be on television again! New Day Cleveland invited me to share my recipe for Tortellini Soup on January 22nd at 10:00am on channel Fox 8! What a cool way to start my new year :)  Time to go dress shopping!


Creamy Salsa Chicken in the Slow Cooker

3-lbs boneless skinless Chicken (either breasts or thighs is fine)
1 (15 ounce) can whole kernel corn, drained
1 (15 1/2 ounce) can black beans, drained
1 (15 ounce) jar chunky salsa 
1 medium onion chopped
1 (8 ounce) block of cream cheese 

Spray the inside of the slow cooker with nonstick cooking spray.  Place chicken in the bottom of the slow cooker and top with the drained corn, black beans and chopped onions.  Pour the salsa on top.  Cook on HIGH for 4 hours or LOW for 6.  One hour before it is finished cooking, carefully pull the chicken out of the slow cooker and shred.  Put the chicken back into the slow cooker and gently stir to combine.  Place the block of cream cheese on top of the mixture and replace the lid.  After 30 minutes stir the cream cheese into the chicken mixture until fully combined.   

This recipe is so versatile! It is delicious served over rice, wrapped in a tortilla, topped onto a salad or even as a dip with chips.  Enjoy! 


Sunday, April 15, 2012

Hummus


Hummus is a wonderful Mediterannean dip made from blending garbanzo beans (also known as chickpeas), tahini and spices until smooth and creamy.  It is so delicious, super kid friendly and a big hit at parties.  The best part- it comes together in seconds!!  You are done with the entire recipe in a matter of 5 minutes.  This one is a nice traditional recipe, but you could easily vary the flavor by adding in a handful of kalamata olives, roasted garlic in place of the raw, chives or roasted red peppers to the food processor.  Roasted red peppers give it a lovely reddish color.  There is so much you could do to make it fun and different each and every time.

It is most commonly used as a dip, but it is awesome for a sandwich spread.  I love it on my veggie burgers even!  Our dinner this evening was a big spread of raw carrots, cucumber spears, grape tomatoes, pita bread wedges, pita chips, feta cheese, a garlic and herb cheese and rotisserie chicken.  It was so colorful, light yet satisfying and everyone loved it.  When I serve vegetables this way my son will always take tons and eat them before anything else!  Offer color and variety and let them choose.  You will be surprised at how well they actually eat!!

I tried a new technique today when making a batch of my homemade Hummus. Peeling the soft skins off of the chickpeas (yes, every single one!) before blending. I heard from an Arabic friend that this is how their family has always done it. Supposed to make it creamier. I was curious after never doing it this way so I figured why not! Good thing I have a 5 yr old to help out :) It did seem a bit creamier but in the end I don't think I would go to the trouble- there are a lot of chickpeas in 2 (15 ounce) cans!! My 5 minute recipe turned into a 25 minute recipe this way. lol. It was a fun experiment, and Jackson loved helping- at least for the first can until he got bored! In the end, do it if you have extra time on your hands. Otherwise, I just wouldn't bother.


Hummus
2 (15 ounce) cans of garbanzo beans (chickpeas), juices from one can reserved
1/3 cup tahini
1/3 cup lemon juice (roughly the juice of two and half lemons)
3-4 cloves garlic
1/4 tsp salt
1/4 tsp crushed red chili flakes
pinch cumin

for garnish
olive oil for drizzling
a sprinkling of paprkia
fresh chives or parsley, chopped

for dipping (any assortment of the following)
various raw vegetables, sliced (carrots, bell peppers, cucumbers, whole cherry/grape tomatoes, etc.)
pita bread or naan
pita chips
bagel chips
olives and porcini peppers are nice on the side as well

Combine in food processor or blender the garbanzo beans, tahini, 1/4 cup lemon juice, garlic, salt, red chili flakes and cumin.  Bend until smooth.  Taste and add more lemon juice to suit your taste.  We prefer  it more on the lemony side.  It will be quite thick at this point.  Slowly add in some of the reserved garbanzo bean juice to thin it out.  Blend again.  Add more of the juice, blend and taste.  Repeat until you reach the right consistency.  You won't need all the juice just enough to get it creamy!!  The texture should be smooth and creamy and not too thick.

Transfer to a serving dish and drizzle with olive oil.  Sprinkle with paprika and fresh herbs.  Serve alongside various dippers and enjoy!

Friday, October 28, 2011

Fridays, Feasting With Friends- Featuring Kristian Campana

"One of the delights of life is eating with friends, second to that is talking about eating. And, for an unsurpassed double whammy, there is talking about eating while you are eating with friends." ~Laurie Colwin 'Home Cooking' 

Kristian Campana

Here's the scenerio: the weekend is upon us, the weather looks promising and goodness, wouldn't it be fun to have something FUN to do?!  Well, look no further then Ohio Festivals:Exploring Ohio's Festivals one funnel cake at a time and Adventures of a Trapped 300 Pound Man: Entertaining my inner obesity through food, Ohio festivals and fun! These two blogs are really all you need to find out all that is happening throughout the beautiful state of Ohio.  To say that Kristian loves festivals would seriously be an understatement- He has taken festival hopping to a whole new level!  But wow, does he live a fun life!  Kristian travels all over the state in search of the wackiest, most delicious, and just plain entertaining festivals Ohio has to offer.  Follow along on his journey vicariously or print off the festival schedule, hop in the car and see for yourself- there is a lot of fun waiting to be had!

Oh and be sure to give your congrats to Kristian, he is a newlywed!  Last weekend, he married the love of his life, Julia and they are having the time of their lives celebrating in style on their honeymoon.  Congratulations Kristian!  I am so happy for the two of you!

Also, thank you so, so, so much for your recipe of the Mozzarepas!  Every time I go to New York City I absolutely have to get one of these things at their weekend flea markets.  They are my favorite! Serious Yum! Now I can make them myself here at home- I am super excited!  Yay!

What is your favorite thing to cook?
Medleys of any sort...it could be some concoction where I mix pork, sweet potato and apple. Or it can be an omelet filled with refrigerator leftovers. This also includes pasta sauces consisting of various ingredients (I don't make traditional red sauce) and sushi as well.

How about your least favorite thing to cook?
Fish dishes. And I love fish. But it has to be cooked just right and I get nervous about over/under cooking it.

What is your favorite local restaurant and what is one you are dying to try out?
Favorite - I absolutely love Pacific East. And since it's an hour drive from me, it's always a special treat.
A second restaurant a little closer to home would be India Garden in Lakewood.

To Try: I'd really like to try L'Albatros

Music and food go together so beautifully. You are hosting a dinner party, what would be on your playlist?
Hmm...I'd want nice melodies that didn't get too loud so that we could still talk. I think I'd go with something like Zero 7, Air, Joan as Police Woman, and Cat Power.


What would you choose to be your last meal on earth?
A fine assortment of sushi, baked scallops topped with a steamed egg custard I used to get in Columbus, raw oysters, and maybe some coconut shrimp.

For dessert, I'd be happy with a snoogle and a corner piece of cake from Kiedrowski's bakery (Amherst). Maybe even a well-frosted sugar cookie.

What are you currently reading?
Lately, I've just been reading food blogs and astrological websites. I've been getting pretty good at reading charts and figuring present aspects. Maybe I'll pick up a side job.

What is your favorite Kitchen Gadget?
Although I don't use it too often, I love the double boiler for making custards and ice cream. It has saved me a lot of unnecessary stress.

Do you have a signature go-to dish?
I make green bean salads a lot in the summertime. I'll pickle thinly sliced cucumbers before adding them for extra flavor.

I also make sushi or mozzarepas (corn pancake sandwiches filled with melted cheese) for pot lucks or parties.

What is your favorite thing about the Cleveland area?
Its history of immigration. It affects our restaurants, grocery stores and supplies tons of great ethnic festivals. It helped make me who I am.

Do you have a favorite meal from your childhood and do you cook it today?
There's a scalloped potato and ham casserole that I absolutely loved. I haven't thought about it in a long time, but it really sounds good now and it's easy to make.

Top 3 Movies of all time?
Matrix
Amelie
Tampopo

From left to right: Getting ready for the meatball eating contest at the Dean Martin Festival, Pawpaw Contest judge photo with the giant pawpaw, and the Dublin Irish Festival

What was your happiest moment in life?
There are actually a few moments that stand out:
1.) making a wish at a Japanese temple to find my soulmate
2.) learning that, before he died, a college professor got to read my letter and loved it
3.) driving down Route 2 during a fall overcast day and realizing that things were going to be OK
4.) Getting my first reply from the tons of letters I sent to Italy to find family - it changed my life forever.
5.) being with my girlfriend and family at my 100th festival last year and really feeling like I accomplished something
6.) learning that my wish in 1.) came true

I guess I'm just a happy guy!

Where do you do your grocery shopping?
I'm all over the place. Overall, I go to Giant Eagle, but I'll try to go to Marc's for cheaper produce and certain groceries and maybe Heinen's for fish and some things. If I can make it to some local farm market, then that's even better.

What is your favorite guilty pleasure when it comes to food?
I'm such a sucker for potato chips. I can't even keep them in the house.

Can you tell me about what you are most proud of?
Reconnecting my family's Italian heritage, the entire Ohio Festivals Project and the children's book I wrote and illustrated.

Do you have Culinary Resolutions that you would like to accomplish this year?
I think I would like to make grape ice cream (not sorbet). I had some in Geneva once at their Grape Festival and it was like a grape creamsicle. I loved it.

One word that best describes you is:
Effervescent
the newlyweds! 

And now can you please share one of your favorite recipes? 


Mozzarepas (or Arepas with Mozzerella cheese)
1 cup milk
5 tablespoons butter
1 cup freshly boiled corn on the cob (2 cobs)
1 1/4 finely ground yellow corn meal
1/2 cup flour
1/4 teaspoon salt
1/2 cup sugar
1 1/4 cup shredded mozzarella cheese
Mozzarella or Provolone (sliced)

After boiling 2 cobs, use knife to cut corn off and then grind in blender. You should have a nice pulp. Mix the yellow cornmeal (pass through coffee grinder to make finer if necessary), flour, sugar, salt and shredded mozzarella and mix well.  Add the corn pulp to the mixture and stir to combine well.

Bring milk to a boil as you add the butter (be careful not to burn milk).

Make a well of the mixture in the bowl and gradually add the hot milk mixture while mixing.

Get to a good pancake batter consistency. If you end up not needing to add the rest of the milk, so be it. If it's too thick, then add more milk.

Heat a lightly buttered griddle or pan and spoon batter to make small pancakes. Flip when golden brown.

you can add the cheese once it flips and then add the second pancake when done. Or you can just cook them all, make sandwiches with the cheese and nuke them in the microwave to melt the cheese.

Monday, October 24, 2011

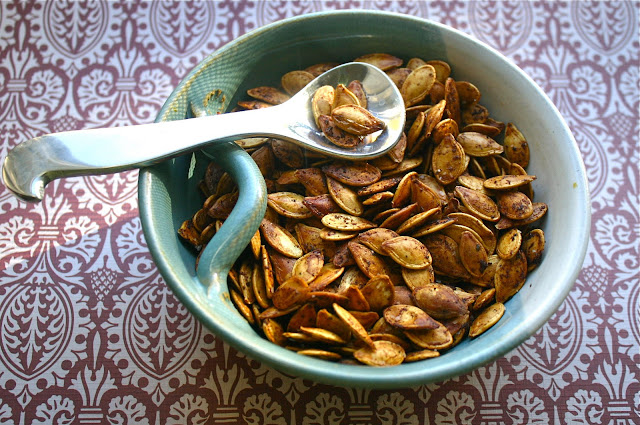
Roasted Pumpkin Seeds- Two Ways, Savory and Sweet


Roasted Pumpkin Seeds are one of my favorite snacks this time of year.  One taste makes all the work of separating seeds from the pulp completely worth it.  I have tried lots of recipes over the years, but this is probably my favorite.  A bit salty, a bit garlicky, and with just a hint of heat from the Worcestershire sauce and seriously so, so good.  They are awesome just by the handful, but also taste yummy sprinkled on soups and salads or anywhere you would like a bit of a crunch.

I have also added a nice Cinnamon Sugar version.  You soak the seeds in apple cider, bringing out the sweetness of the pumpkin flavor.  By tossing it with a buttery, cinnamon sugar topping, the heat from the oven makes the sugars caramelize, giving them an almost candy coating.  I love salty and sweet snacks together, so if you have enough seeds to make both flavors do it and serve them side by side.


Roasted Pumpkin Seeds
2 cups pumpkin seeds, cleaned and rinsed
1 1/2 tablespoons melted butter OR olive oil
1/2 teaspoon salt (I like using corse salt)
1/2 teaspoon garlic salt
1/8 teaspoon garlic powder
2 teaspoons Worcestershire Sauce
1/8 teaspoon cracked black pepper (about 20 grinds from the pepper mill)

Preheat oven to 275 degrees.

Seperate the seeds from the pulp of the pumpkin.  Don't worry about getting all of the pumpkin strands off, it adds extra flavor to the roasted seeds.  I just love when I get a seed with pumpkin still attached- yum!  You just want the seeds clean enough so you can easily toss them.  Once rinsed, lightly dry and set aside.

In a large mixing bowl, add the melted butter, Worcestershire Sauce, salt, pepper, garlic salt, and garlic powder and whisk until well blended.  Add the pumpkin seeds and toss, throughly coating in the butter mixture.  Spread pumpkin seeds in a single layer onto a silpat or parchment paper lined baking sheet.  Bake for 1 hour, checking them often and tossing occasionally, until butter topping has dried and the pumpkin seeds are golden brown.

Remove from the oven and allow to cool and dry-out the rest of the way on the cookie sheet on top of the stove.  Store in an airtight container.


Cinnamon-Sugar Apple Cider Pumpkin Seeds
2 cups pumpkin seeds, cleaned and rinsed
1 1/2 cups apple cider
1 1/2 tablespoons melted butter OR olive oil
1/8 teaspoon salt
1 tablespoon brown sugar
1 teaspoon cinnamon
1/8 teaspoon nutmeg

Preheat oven to 275 degrees.

Pour the apple cider in a medium sauce pan and bring to a boil.  Add the pumpkin seeds and boil on medium heat for 10 minutes. Drain the seeds and pour them in a large mixing bowl.

Pour the melted butter or olive oil into the bowl, along with the salt, brown sugar, cinnamon, and nutmeg.  Mix well to coat and spread pumpkin seed in a single layer onto a silpat or parchment paper lined baking sheet.  Bake for 1 hour, checking them often and tossing occasionally, until butter topping has dried and the pumpkin seeds are golden brown.

Remove from the oven and allow to cool and dry-out the rest of the way on the cookie sheet on top of the stove.  Enjoy!

Store in an air-tight container.


Thursday, June 16, 2011

Warm Layered Mexican Dip


Any fun plans for Father's Day this weekend?  We will be picnicking with the family, of course!  Me and the boys are looking forward to letting daddy and the grandpa's know how loved they are.  Raising two young men myself just solidifies my grateful heart for being raised by an amazing father.  And watching my own husband be the example of a good man makes my heart break wide open every single day.  I am a lucky girl- so, so blessed!  

This dip is a yummy choice to take along to any picnic's you may be attending this summer.  it is a definite crowd pleaser- who doesn't love a good mexican dip?!  And trust me, this is a great one!


print this recipe

Warm Layered Mexican Dip
1 can refried beans
8 oz softened cream cheese
1 pouch taco seasoning
1/2 can black beans, rinsed and drained
1 ear of corn, cooked and kernels removed (or 1/2 can whole kernel corn, drained)
1 cup salsa
2 cups shredded cheese (I used a combo of cheddar and mozzarella)
fresh cilantro for garnish

In a small bowl, combine the creamed cheese and taco seasoning well with a fork.  Warm in the microwave for about 30 seconds and set aside.  In a medium sized bowl, combine the black beans, corn and salsa.

Spread the refried beans evenly on the bottom of a round pie plate or an 8x8.  Top with the taco-cream cheese mixture and next layer the corn, black bean and salsa mixture.  Sprinkle shredded cheese evenly over top of layered dip.  Bake in a preheated 350 degree oven for 10 minutes, or until cheese melts.  Garnish with cilantro and serve with your favorite tortilla chips.


I linked up my recipe here:
 A Little Nosh

Thursday, June 9, 2011

Eggy Sandwich topped with a Spicy Black Bean and Tomato Guacamole


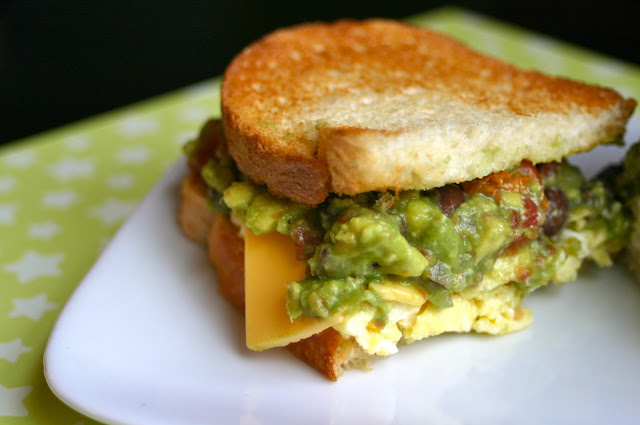
OMG. I just had one of the most delicious egg sandwiches. Ever. Scrambled egg topped with a spicy black bean and tomato guacamole, a slice of mild cheddar cheese, served on lightly toasted Italian bread. This was one of the best ideas I've had in a long time. I SO had to share!!  Go make this tonight- it will make a fantastic dinner!


Eggy Sandwich topped with a Spicy Black Bean and Tomato Guacamole
Makes 4 sandwiches

For the sandwich:
6 eggs
6 tablespoons milk
salt and fresh ground black pepper to taste
4 slices mild cheddar cheese
8 slices Italian bread, or any other soft yet crusty bread
freshly prepared spicy black bean and tomato guacamole (recipe follows)
1 tablespoon butter, plus a bit more to spread on toasted bread

In a large mixing bowl, vigorously whisk the eggs and milk together for about 2 minutes. This will make sure your eggs are light, fluffy and super yummy. The American Egg Board describes well beaten eggs as being "frothy and evenly colored". It takes about 2 minutes to get them like this. Everyone will ask you how you got your eggs so fluffy and pretty looking!

In a nonstick frying pan melt 1 tablespoon butter until the very last of it is just liquifying. Pour in the eggs. Do not scramble right away. Just as they are beginning to set, using a spatula or a flat wooden spoon, push eggs toward center while tilting skillet to distribute the runny parts. Season with salt and pepper. Once cooked remove from heat.

While eggs are cooking, toast and butter your bread. Evenly distribute the eggs across 4 slices of buttered bread. Add one slice of cheese to the top of each egg. Dollop with a good amount of guacamole (I LOVE guacamole, so I used a lot. It was messy, but sooooo good!) Add the remaining slices of toasted bread, slice in half and enjoy!


Spicy Black Bean and Tomato Guacamole
1 Haas Avocado, roughly mashed
1 tomato, chopped
1 jalapeno, diced
1/2 medium red onion, chopped
the juice of half of one lime
1/2 can of black beans, drained and rinsed
a few dashes Tobasco Sauce
sea salt and freshly ground black pepper to taste

Combine all ingredients except the black beans and with a fork, roughly mash to combine.  Stir in the black beans.  Squeeze a little more lime juice on top to stop the oxidation process and keep the beautiful bright green color.

tip: If tomatoes aren't in season and are looking a little too "pink" for your liking, a can of diced tomatoes with green chili's is a great substitute for the tomato and jalapeno pepper (I really like the Ro*tel brand). You may wish to omit the Tobasco Sauce as well , as these can have a god kick to them . Be sure to taste the guac first to get the spiciness it to your liking.

Thursday, June 2, 2011

Simply Southwest Egg Rolls

Ok, so these are super yummy!  It was such a fun twist on Mexican food.  This egg roll recipe is from the Tastefully Simple website where they have lots of fun recipes to use along with their products.  The items used in this particular recipe were the Simply Southwest Seasoning & Rub, their Corn, Black Bean Salsa and the same Hoppin' Jalapeño & Bacon Dip Mix that is in my giveaway.  This was definitely a favorite recipe of all the ones I have tried so far from their website.


The Simply Southwest Egg Rolls are very simple to make- took me probably no more then 20 minutes to prepare, plus the time to bake or fry.  I decided to try both methods.  Frying obviously was delicious- what isn't yummy fried?  But in my quest to loose my "baby weight" I also wanted to see if baking would produce still the nice "crunch" you are looking for with an egg roll and reduce some of the added fat that frying can add. The baked ones were definitely great, but I did have a problem with the cheese oozing out of many of them.  I probably overloaded my egg rolls, considering that the recipe states that it makes 15 rolls and I only got 12. This I am sure had a lot to do with my oozing.  Other then that, I don't feel we missed out on anything that the fried ones had.  It takes a smidge longer, but I can live with that if it means a healthier option.  I will definitely make them again and will choose the baking method (less mess, less added fat).


Simply Southwest Egg Rolls
Submitted by Rosemary (MN) HQ Resident Chef

Ingredients
1 lb. boneless, skinless chicken breasts, cut into small dice
2 tsp. olive oil
2-3 tsp. Simply Southwest™ Seasoning & Rub or Fiesta Party Dip Mix
1 cup Corn, Black Bean Salsa
1 1/2 cups finely shredded Cheddar cheese
16 oz. package egg roll wraps
Vegetable oil
Prepared Hoppin' Jalapeño & Bacon™ Dip Mix

Directions
Sauté chicken in olive oil and Simply Southwest Seasoning™ & Rub or Fiesta Party Dip Mix™ until chicken is no longer pink; cool. Add next 2 ingredients to cooled chicken. On work surface, place one egg roll wrap with a corner pointing toward you. Place 1/4 cup filling on egg roll wrap, roll egg roll skin over filling. Fold in sides, wet inside edge of egg roll skin with water; press to seal like an envelope. Heat 1/2 inch vegetable oil in frying pan over medium heat. Fry egg rolls in hot oil until browned on all sides and heated through. Slice egg rolls in half; serve hot with prepared Hoppin' Jalapeno & Bacon Dip. Can be made ahead and reheated by baking at 400° for 15 minutes or until hot and crisp. Makes 15 egg rolls.

**Added note: if you want to bake instead of fry, line baking sheet with a silpat or parchment paper and arrange egg rolls on top.  Bake for 15-20 minutes, turning once halfway through.


Don't forget to enter for a chance to win this party pack from Tastefully Simple!  Click {here} to enter the giveaway! Drawing ends on June 6th, so hurry up!


For ordering information, please contact Melissa Kroft, Independent Consultant ID# 0060063 at www.tastefullysimple.com/web/mkroft or email her at melissakroft@sbcglobal.net. She will be more then happy to hook you up with all of your needs or set you up with a local consultant in your area.

Monday, March 7, 2011

Potato Puffs

These cute little guys are the perfect little bite, super yummy and thoroughly addicting!  Go ahead and double this recipe because they will seriously fly off the plate.  My husband and 4 year old couldn't get enough of these guys.  We all agreed that we could eat a lot of them!

Print this Recipe

Potato Puffs
2 large baking potatoes
1 egg
1/4 cup ham, chopped
2 scallions, chopped
handful shredded cheese of your choice (I used cheddar)
salt and pepper to taste

bake potatoes in oven until fork tender, about 45 minutes.  You can also "bake" them in the microwave using your Baked Potato setting if you don't have 45 minutes.  Scoop out the potato from the skins and discard skins (or save them and make Potato Skins!)


Add one egg to the potato and mix thoroughly.  Add remaining ingredients and stir to combine.  Grease mini muffin cups with Nonstick Cooking Spray, and scoop about a tablespoon of mixture into each cup. Sprinkle a little bit of more cheese onto each bite.  Bake at 350 degrees until nicely puffed, about 15-20 minutes.  Makes about 12-15 puffs.


**Don't forget to enter my Giveaway for a free cookbook Best of the Best Vol. 11: The Best Recipes from the 25 Best Cookbooks of the Year by the editors of Food and Wine Magazine and a vintage inspired apron!  Click {here} to enter! **

Tuesday, March 1, 2011

A Crowd Pleaser- Herbed Cream Cheese Stuffed South African Peppadew Peppers


South African Peppadew Peppers stuffed with Cream Cheese are a definite favorite appetizer of mine. It is so very easy, involves no cooking and always flies off the plate at parties. If you aren't familiar with these cute little peppers, run out and get some tonight! They are a bit sweet, have a touch of spice and when stuffed with cool cream cheese they are a wonderful treat. You can find them in most olive bars at your local grocery store and bottled in specialty markets (I've seen the bottled varity at Whole Foods).  Whenever I have made these as an appetizer for parties they are always one of the first to go, so be sure to make extra- plus it is impossible not to snack on a few while you are preparing them!

Herbed Cream Cheese Stuffed South African Peppadew Peppers
1 jar or pint of Peppadew Peppers (about 30)
5-6 oz cream cheese, softened
2 Tablespoons fresh herbs, finely chopped (basil or chives are nice), optional

Drain the Peppadew's and set aside.  Don't throw away the juices!  It is a wonderful for dipping crusty bread into, so save it for later.  Mix the cream cheese and herbs, reserving a bit of the fresh herbs for a garnish. Very carefully, using a small spoon, fill the peppadew peppers with the cream cheese mixture.  Arrange on platter, garnish with remaining herbs and serve.

You can also use goat cheese for this appetizer, but I prefer the milder flavor of the cream cheese.

Thursday, January 27, 2011

Stuffed Anaheim Peppers


Stuffed Anaheim Peppers
3 tablespoons cooking oil
1 onion, chopped
1/2 pound ground meat or sausage
2 garlic cloves, minced
8 ounces cream cheese
1/3 cup freshly chopped parsley leaves, reserve some for garnish
1 tablespoon hot sauce
1/4 cup bread crumbs
6-8 anaheim peppers (banana peppers can also be used, but you will need more. I used a combination of the two)
salt and fresh ground black pepper to taste
1 teaspoon grill seasoning
1/2 teaspoon dried oregano (or 1 tsp fresh)
marinara sauce and parmesan cheese for serving

Preheat oven to 400 degrees F.

In a saute pan over medium-high heat add the oil. Once heated add onion and saute for about 8 minutes. Add meat and garlic and saute until meat is browned.  Season with oregano and grill seasoning.  Add cream cheese and stir until melted. Take off heat and stir in parsley, hot sauce and bread crumbs. Salt and pepper to taste.  Let cool.

Slice peppers in half long-ways and remove all seeds and ribs.  Stuff peppers with meat and cheese mixture and bake for 20-30 minutes or grill until char develops.   Plate and top with warm marinara sauce and grated parmesan cheese.  Garnish with reserved parsley.  Enjoy!


These were a total play-around dish that I am so happy turned out the way that it did.  This filling was super yummy and would also work wonderfully stuffed inside tomatoes, zucchini, or large bell peppers.   I think they would also be cute as jalapeño poppers for a party appetizer.  The extra spice would be delicious.   These peppers tasted exactly how I had hoped they would and will easily become a staple in our household.

Wednesday, January 19, 2011

Sesame Shrimp Toasts

Remember my addiction to Chinese Take-Out, especially the appetizers?  Well I decided to try my hand at another one- Sesame Shrimp Toasts.  These little guys are sooo delicious; creamy, crunchy, and golden brown.  They are incredibly addictive and for the flavor you get you would think they were difficult to make.  But oh my goodness, simple as pie!  (Probably easier actually!)


Sesame Shrimp Toasts
8 oz raw shrimp, shelled and deveined (do not use cooked shrimp because they will not stick to the bread while frying)
2 Tbsp shortening (I accidently used only one Tbsp and they worked fine.  Although I think the 2nd would help it adhere a bit stronger.  But I think I will still reduce the amount next time to make it a smidge healthier...although being that it is fried, what does a little more shortening matter?!!)
1 egg white, lightly beaten
1 tsp scallions, finely chopped
1/2 tsp finely chopped fresh ginger root (or 1/4 tsp ground)
1 Tbsp Chinese rice wine or dry sherry
1 tsp cornstarch
2 tsp water
salt and pepper
6 slices white bread, crusts removed
5/8 cup sesame seeds
peanut oil or canola oil, for frying

Place the shrimp and sortening on a cutting board and chop them together to form a paste.  Scrape into a bowl and stir in the egg white, scallions, ginger, and rice wine.  Mix the cornstarch and the water together until a smooth paste forms, then stir into the shrimp mixture and season with salt and pepper.

Spread the shrimp paste evenly over one side of each slice of bread.  Spread out the sesame seeds on a flat plate or parchment paper and gently press the spread side of each bread int othe seeds to coat.

Heat the peanut oil in a preheated wok or large skillet.  Add half the slices of bread, spread-side down, and cook for 2-3 minutes, or until golden brown.  Remove with a slotted spoon and drain on paper towels.  Continue cooking the remaining slices of bread.  Cut each slice into fingers and serve immediately.

Saturday, September 18, 2010

The Crab Rangoonies

One of my favorite guilty pleasures when it comes to food is easily Chinese Take-Out, most specifically all of the wonderfully delicious appetizers.  The potstickers, egg rolls, shrimp toasts, and my most favorite- Crab Rangoon.  Ok, I know that none of these items fall under the remotely healthy menu.  But I can't help it, they are GOOD!  So in my attempt to have them be something I could eat more often, I have decided to start trying to make this stuff myself.  I can cross the potstickers off my list and now after Friday night, I can add crab rangoons.  This was another Hungry Girl recipe, so the nutritional stats are amazing.  Plus they were not only super healthy, but they were incredibly easy to make. Awesome!  Now I can eat wayyyyy more of them at one time.....right??


The Crab Rangoonies
Ingredients:
1/4 cup fat-free cream cheese, room temperature
2 wedges The Laughing Cow Light Original Swiss cheese
4 oz. imitation crabmeat, flaked
1 tsp. low-sodium/lite soy sauce
1/2 tsp. chopped garlic
2 scallions, finely chopped
16 small square wonton wrappers (often stocked near the tofu in the fridge section of the market)
Optional: sweet & sour sauce or Chinese-style hot mustard, for dipping

Directions:
Preheat oven to 375 degrees.

To make your filling, combine all ingredients except wonton wrappers in a bowl, breaking up the cheese wedges as you add them. Mix until uniform. Set aside. Spray a baking sheet with nonstick spray and set that aside as well.

Lay two wrappers flat on a clean, dry surface. Spoon a heaping 1/2 tbsp. of filling into the center of each wrapper. Moisten all four edges of each wrapper by dabbing your fingers in water and going over the edges smoothly. Fold the bottom left corner of each wrapper to meet the top right corner, forming a triangle and enclosing the filling. Press firmly on the edges to seal. Repeat with all remaining wrappers and filling, gently placing each rangoon flat on the baking sheet.

Spray the tops of the wontons with nonstick spray. Bake in the oven for about 12 minutes, carefully flipping halfway through, until golden brown. Allow to cool slightly.

If you like, dip your rangoonies in some sweet & sour sauce or hot mustard!

MAKES 4 SERVINGS
PER SERVING (4 "crab rangoonies"): 140 calories, 1.5g fat, 618mg sodium, 20g carbs, 1g fiber, 2g sugars, 9g protein -- POINTS® value 3*

Tuesday, August 10, 2010

Cooking with Herbs- Crostini and Pasta with Fresh Herbs

Last night Bonnie and Dawn came over to my house for our monthly Cooking with Friends night in.  Since my herb garden is in full abundance right now we went with the theme Cooking with Herbs.  There is so much that you can do with fresh herbs, and honestly we only just scratched the surface!  But our dinner was delicious and absolutely bursting with herbs!  Bonnie chose to make a pasta that incorporated the use of a bunch of herbs, that really showcased their flavor.  They were easily the star of the show.  It was so yummy and one I will totally be making again and again.  I think the addition of some chopped garden tomatoes would be lovely too.  

I went with a mixed variety of Crostini, some hot and some cold, all using different fresh herbs to show a lot of versatility in one basic little dish.  They all turned out delicious and we had a tough time deciding on a favorite.  But two stood out a little more then the rest- the Roasted Garlic Topping and also the Asiago Cheese and Onion Topping.  These two packed a ton of flavor in just very simple ingredients.   I was thrilled with the outcome of all the crostini and will definitely be making them again. What a perfect appetizer for a dinner party!  ....Although I doubt I will be waiting until a party to make these again- they are too good!  

from left to right: Roasted Garlic with Parmesan Cheese, Basil Pesto with Buffalo Mozzarella and Bruschetta Tomatoes,  Asiago Cheese and Onion Topping

Basic Crostini
1 french bread baguette, sliced thin on the diagonal (about 1/4-inch thick)
3 tablespoons olive oil
3 tablespoons unsalted butter

Preheat oven to 300 degrees.
Place butter and olive oil in a small sauce pan over low heat and stir until butter is melted.  Brush both sides of the bread slices with the mixture and place on a baking sheet.  Bake in preheated oven, turning once, until golden brown and slightly crisp, about 10 minutes.  Allow crostini to cool, then place in an airtight container until ready to use.

Classic Fresh Tomato Bruschetta Topping
4 tomatoes, seeded and chopped
3 garlic cloves, minced
1/2 cup fresh basil, coarsely chopped
salt and fresh ground black pepper, to taste
healthy drizzle extra virgin olive oil
shaved Parmesan Cheese

Combine all ingredients in a bowl and set aside, unrefrigerated for at least 30 minutes.  Place onto toasted crostini and top with slices of shaved Parmesan Cheese.

Classic Fresh Tomato Bruschetta Crostini 

Roasted Garlic Topping
from Outer Banks The Bountiful Coastal Carolina Cookbook by Chyrel B. Austin
3 heads of garlic
1/2 cup olive oil
3 tablespoons unsalted butter
1/2 teaspoon fresh ground black pepper
3 tablespoons chopped fresh chives

Preheat oven to 400 degrees.  Peel garlic cloves and place in a small oven proof dish.  Pour oilve oil over the cloves; oil should cover the garlic cloves completely.  Cover the dish tightly with a double thickness of foil.  Place on the center shelf of oven and bake until cloves are tender.  Remove with a slotted spoon and drain.  Reserve the oil.  Place the garlic cloves and 1 tablespoon of the reserved oil in a food processor and process until pureed.  Season with pepper, transfer to airtight container and refrigerate up to 2 days.

To serve, spread each crostini with a teaspoon of the roasted garlic mixture.  place on a baking sheet and bake at 350 degrees until crostini are warm, about 5 minutes.  Sprinkle with chopped chives and serve warm.

Asiago Cheese and Onion Topping
2-3 tablespoons extra virgin olive oil
2 yellow or white onions, very thinly sliced (about 3 cups)
1 teaspoon dried thyme (we used fresh, so it would be 1 tablespoon instead)
Salt and freshly ground black pepper
2 tablespoons Dijon mustard
2 cups grated Asiago cheese

Preheat oven to 425 degrees F. In a large skillet, heat oil over medium-high heat; add onions. Let onions cook at least 3 minutes before stirring (they should start to brown before you move them around). Continue to cook, stirring only occasionally, about 20 minutes, until onions are well browned. Add thyme and season with salt and pepper.

Spread bread slices with a little mustard. Divide onion mixture evenly over bread slices then top each with cheese.

Place on a foil-lined baking sheet; bake 10 minutes or until cheese is melted.

Basil Pesto

Basil Pesto
2 cups packed fresh basil leaves
2 cloves garlic
1/4 cup pine nuts, tosasted
2/3 cup extra-virgin olive oil, divided
Kosher salt and freshly ground black pepper, to taste
1 cup freshly grated Parmesan cheese

Combine the basil, garlic, and pine nuts in a food processor and pulse until coarsely chopped. Add 1/2 cup of the oil and process until fully incorporated and smooth. Season with salt and pepper.

If using immediately, add all the remaining oil and pulse until smooth. Next add the cheese right into the food processor and just blended for a quick couple of seconds to incorporate.

If freezing, transfer to an air-tight container and drizzle remaining oil over the top. Freeze for up to 3 months. Thaw and stir in cheese.

*for the crostini, I spread the pesto lightly onto the toast, topped them with slices of fresh buffalo mozzarella cheese and a spoonful of the Classic Bruschetta Topping.

Shrimp and Sausage with Asiago Cheese

Shrimp & Sausage with Asiago Cheese Topping
1 Tbsp extra virgin olive oil
1/2 medium onion, chopped
1/2 medium green pepper, chopped
1/2 lb. Italian hot or sweet sausage, casing removed
1/2 lb. raw shrimp, peeled and chopped
1 clove garlic, minced

1 teaspoon fresh chives, chopped
1 teaspoon fresh oregano, chopped
Salt and pepper to taste
1/2 cup coarsely grated Asiago cheese

Heat olive oil in large skillet over medium-high heat. Add onion and green pepper and cook, stirring, until onion is wilted about 3 minutes. Add sausage meat and cook, stirring to break up lumps until no longer raw, about 5 minutes. Add chopped shrimp and garlic, cooking just until shrimp turns pink. Remove from heat and adjust seasoning with salt and pepper, if necessary.

Preheat broiler. Place Basic Bruschetta slices on a baking sheet. Top with shrimp and sausage mixture. Sprinkle with cheese. Broil just until cheese melts (3-4 minutes). Do not let brown. Remove from oven, cut into 2-inch pieces and serve hot. Serves 4.

Pasta with Fresh Herbs

Pasta with Fresh Herbs
1/2 lb uncooked pasta
1/2 cup butter
4 cloves garlic, minced
3 tablespoons fresh basil, chopped
1 tablespoon fresh thyme, chopped
1 teaspoon dried marjoram (we used fresh since I am growing it! Make it 1 Tablespoon if using fresh.  Note:if you can't find Marjoram you can use oregano instead. They are in the same family.)
1 teaspoon ground savory (fresh here again- 1 tablespoon)
salt and fresh ground black pepper to taste
2 tablespoons sliced black olives (we added more because we all love olives)

Cook pasta acording to package directions.  Meanwhile, melt the butter over medium heat.  Stir in the garlic and cook for a couple of minutes.  Stir in the herbs.

Drain the pasta and transfer to a large bowl.  Add the butter mixture and toss to coat.  Season with salt and pepper and sprinkle with black olives.  Garnish with sprigs of fresh herbs and freshly grated parmesan cheese.

The big, wonderful bowl of pasta- yum!


*I didn't make this one last night, just ran out of time and bread!  But I want to share the recipe for future use because it sounds wonderful!
Roasted Red Pepper Pesto Topping
Adapted slightly from Williams Sonoma 

2 red bell peppers, roasted, peeled, seeded and
coarsely chopped
2 Tb. slivered almonds or toasted pine nuts
3 Tbs. grated Parmigiano-Reggiano cheese
1/4 c finely chopped fresh flat-leaf parsley
1 tsp fresh lemon juice
Pinch of cayenne pepper
Salt and freshly ground black pepper, to taste
4 oz. goat cheese 

Preheat the oven to 350°. Place the red peppers on a baking sheet and rub them with olive oil. Bake for approx 40-45 minutes, turning every 10 minutes. Let them cool and then, seed, peel and chop them.

In the bowl of a food processor or using a hand blender, combine the red peppers, the remaining garlic clove, nuts, cheese, 3 Tbs of the parsley, lemon juice, 2 tsp olive oil and the cayenne pepper. Pulse until a coarse puree forms. Season with salt and black pepper.

Reduce the oven to 350°F.

With the crostini in a single layer on a baking sheet, spread about 2 tsp of the goat cheese on each crostini. Bake until the cheese is slightly soft and the crostini are warm, about 5 minutes. Transfer to a platter and top each with about 1 Tbs of the red pepper pesto. Sprinkle with the remaining 1 Tbs. parsley.

LinkWithin

Related Posts with Thumbnails