Showing posts with label Salad. Show all posts

Saturday, September 30, 2017

Insalata Caprese, Tomato and Buffalo Mozzarella Salad


While studying abroad in London during college I took a holiday to Paris for the weekend. I got in late and was STARVING. After checking into my hotel I decided to go wander around and find a place to get a bite to eat. Paris seems to never sleep and there were so many amazing sites and smells all around me, but a cozy little pizza place called my name. After traveling in a foreign country, here I felt at home. This restaurant, of all places, was where I had Insalata Caprese, or Tomato Mozzarella Salad, for the first time. A classic Italian salad while in Paris, France! No better place really, it created a special memory that I'll never forget. What's even better is that it is SO EASY to recreate, and has become a summertime staple in our home.

Insalata Caprese

3-4 large Tomatoes, thickly sliced
2 large balls of Fresh Buffalo Mozzarella, thickly sliced
1 bunch fresh basil leaves, leaves stripped from the stems
Coarse Sea Salt and Fresh Ground Black Pepper, to taste
Extra Virgin Olive Oil
Balsamic Glaze

Alternate thick slices of fresh Tomato (look for nice big ones!), Buffalo Mozzarella and Basil leaves around a large platter. Season generously with coarse sea salt and fresh cracked black pepper. Drizzle with Extra Virgin Olive Oil and a Balsamic Glaze. And then dig in!


This salad goes with just about anything. We equally love it alongside a juicy steak as with nice dippy eggs at breakfast. Sooooo good. While the tomatoes are still showing up in your CSA bag and at roadside stands, be sure to give this recipe a try! You'll see it's the perfect kiss of summer.


And here's a little tip.  Instead of buying the expensive basil in the plastic clam shell packs in the produce department (that seem to go bad way before you have time to use them all!) buy the fresh cut stems.  Then when you get home, place them in a glass or mason jar of water on your windowsill. You can pinch off the leaves as you need it when cooking and after time, your basil will start to take root! Eventually you can plant them in a pot for a kitchen cutting garden or in your back yard!


Thursday, November 7, 2013

Herby Chicken Salad


Summer may be over, but that doesn't mean your herb gardens are all done!  Here in Ohio I am usually lucky enough to keep most of my herbs (even under the snow) until February or March!  I always hope they will survive year round since it is soooo close, but we always seem to get a crazy ice storm close to spring that knocks them out.  But since they hang on so long, be sure to use them to their fullest!  This chicken salad is so vibrant and fresh tasting due to the brightness of the fresh herbs.  I love it! You could use dried herbs, but it wont be quite the same- so snip, snip, snip while you still can!
 
This recipe is wonderful as a sandwich, add a scoop to a leafy salad in place of dressing, or even as an appetizer with crackers..... or like me, just with a fork right out of the dish.
 
Allowing it to sit in the refrigerator for at least an hour before serving will really bring all of the flavors together and make the herby flavor pop. But if you just can't wait, that's ok too.  It will still be scrumptious.   


Herby Chicken Salad
2 cups chopped skinless, boneless rotisserie chicken breast
1/4 cup mayonnaise
1 tablespoon fresh lemon juice
1/8 teaspoon kosher salt
fresh ground black pepper, to taste
3 Tablespoons chopped fresh herbs, such as dill, flat leaf parsley, chives, rosemary
1/4 cup chopped celery
1/4 cup finely chopped red onion

In a medium sized bowl, whisk together the mayonnaise, lemon juice, salt, pepper, and herbs.
In a large bowl combine the chicken, celery, and red onion.  Pour the dressing onto the chicken mixture and stir to coat.  Chill until ready to serve.


Wednesday, July 18, 2012

Farfalle Pasta Salad with Sweet Peas and Dill


This pasta salad is the perfect accompaniment to any and every summer meal.  It is different from the pasta salads you see everywhere and has a huge addicting quality making people want to have more and more. This is my sister's recipe and I have absolutely fallen in love with it.  I always hope for leftovers because I can never get enough!  Even though we tend to have it for family parties as a side dish, this would make a wonderful light dinner as is or with some grilled chicken or tuna tossed in.  Seriously, so, so, so good!  You will LOVE it, trust me.


Farfalle Pasta Salad with Sweet Peas and Dill

1 (16-oz) box Farfalle Pasta (any thick noodle would work well, but these bow ties look so pretty!)
1 cup sweet peas
1-1.5 cups)  mayo
dijon mustard
lots of fresh dill, chopped
kosher salt and ground black pepper to taste

Cook pasta according to directions on box.  Allow to cool.  Combine the peas with the pasta and add enough mayo to coat, but not so much to make it to be super saucy.  This isn't a sloppy, saucy, mayo-rich salad, just enough for great flavor and to evenly coat.  Add a good squeeze of dijon, about 2 tablespoons or so and stir. Add a ton of chopped dill, and season to taste with salt and a bit of ground black pepper and stir to throughly combine. Allow to chill before serving.


This recipe is featured on This and That and  http://www.foodiefriendsfriday.com Linky Party

Tuesday, February 28, 2012

Thai Style Peanut Pulled Chicken in the slow cooker served with an Asian Slaw


I know, another slow cooker recipe! But I can't help it! This is the season for cozy meals, and cozy meals that cook themselves... need I really say more? This recipe I have been developing for a little while now. And it is finally ready to be shared with all of you. It combines so many of my favorite things in one dish:

pulled chicken
Asian Flavors
my beloved peanut butter (Mmmmmm)
crunchy slaw to balance the creamy chicken
and lots of cilantro- which is optional. But I highly recommend it!!!

These two recipes go hand in hand together and balance the flavors of one another perfectly.  A match made in Heaven, really.  And goodness are they versatile!!  They taste delicious pretty much any way you heart moves you!  In the photograph above, you see them all wrapped up together in a flour tortilla. Super good, and perfect for a lunch on the go. But we also enjoyed them stacked onto sandwich thins, pilled onto a nice crisp salad, and tossed with udon noodles, or over a bed of basmanti rice.  One day of cooking with endless options. I love recipes like that!


Thai Style Peanut Pulled Chicken in the Slow Cooker

3 lbs of boneless, skinless chicken thighs, breasts or a combination of the two
1 medium onion, halved and quartered
torn cilantro leaves and crushed peanuts for garnish

for the sauce
1/2 cup smooth peanut butter
1/4 cup soy sauce
1/3 cup chicken stock (or warm water)
2 tablespoons fresh ginger, chopped
3 cloves garlic, minced
2 tablespoons rice vinegar
1 1/2 teaspoons honey
1 teaspoon chili flakes

Puree all ingredients of the sauce in a blender for two minutes, or until smooth.  Set off to the side.

Place the onions in the bottom of the slow cooker and lay the chicken on top.  Pour the prepared sauce over the top of the chicken.  Place the lid back on and cook on high 3-4 hours on HIGH or 6-8 on LOW.

About an hour to 40 minutes before your final cooking time*, very carefully, because the chicken will be hot, remove the meat from the slow cooker and place on a large cutting board. Using two forks, shred the chicken by pulling away from each other. The meat should be very tender by this point. Place the shredded chicken back into the slow cooker, stir well and continue to cook for that additional 30 minutes to an hour. This will make the chicken nice and juicy because it will soak up some of the peanut sauce.

*I have found that if I cook the chicken on high, at two hours into the cooking time is when I remove the chicken and shred it. Then replace it and cook for that additional 30 minutes to an hour. At this point the chicken is cooked, you just want the chicken to get nice and saucy.

You could also choose to just chunk the chicken if you are serving the meat over rice or tossed with noodles.  If doing so, I have found that it is good to cut up the chicken at this time instead of initially.  It retains the juiciness of the meat this way.

Once ready to serve, remove from crock pot and garnish with lots of cilanto and crushed peanuts.  Be sure to serve alongside extra peanuts and chopped cilantro if your family is anything like mine!  These two components truly bring out and enhance the flavors of the dish.

Don't forget the Asian Slaw!


Asian Slaw

1 bag of shredded cabbage, preferably added veggie variety (it has lots of carrots and red cabbage mixed in)
1 english cucumber, sliced into matchsticks
1 carrot (about 1 cup), sliced into matchsticks
1 cup bean sprouts
2 tablespoons sesame seeds

For the Dressing
1/4 cup rice vinegar
1/3 cup soy sauce
2 Tablespoons fish sauce (this can be omitted if you don't have any on hand)
4 Tbsp sesame oil
3 Tbsp olive oil
1 garlic clove, minced
1 tsp grated fresh ginger or 1/2 tsp ground
salt and freshly ground black pepper

To make the dressing, combine all the ingredients except the olive oil in a small bowl with a pinch of salt. Slowly while mixing with a whisk, add in your olive oil to emulsify. Taste and readjust seasoning as needed.  Add your salt and pepper.

Combine all the veggies in a big bowl and pour the dressing on top.  Add the sesame seeds.  Mix with a big spoon.  Taste and adjust seasoning as needed.  Put in the fridge until ready to be used.


To make the Wrapped sandwich pictured above
Place on large lettuce leaf on top of your flour tortilla.  Spread chicken over the lettuce and tortilla, leaving about 1/3 of the tortilla bare. Top it with asian slaw and a lot of cilantro leaves.  Wrap tightly, jelly roll style, from the chicken side to the bare part of the tortilla.  With the seam side down, cut the wrapped sandwich in half on a diagonal.  Wrap in parchment or plastic wrap until ready to be eaten.

Sunday, December 11, 2011

Israeli Couscous with Tomatoes and Artichokes

This is a delicious as a side dish or light lunch.  Traditional couscous is something I am not all that crazy about.  I enjoy it in a tabbouleh, but other then that, no thanks.  Israeli couscous is NOTHING like the other kind.  It is perfect little round pearls of pasta.  It is tender, has a lovely texture- not at all grainy, much unlike how I tend to think of with regular couscous.  It has a great mouth-feel, slightly creamy, but not at all mushy. The lemon and artichokes in this recipe really brighten the dish adding just the right amount of acid to really make it pop.  

The first day I made this recipe I served it as a warm side dish alongside grilled chicken breasts.  It was satisfying and everyone enjoyed it.  Especially the baby!  He was a huge fan; it was too funny watching him gobble it up.  The next day I enjoyed this cold, right out of the fridge and I loved it even more!  After having an opportunity for the couscous to soak up all the lemon juice and herbs, the flavors were really enhanced.  This would make a great Take-Along recipe for any party being as it stands up to any temperature.  


Israeli Couscous with Tomatoes and Artichokes 
4 servings

1/2 cup extra virgin olive oil
1 cup Israeli (Pearl) Couscous
1 1/4 cup chicken stock
1 can quartered artichoke hearts
1 large tomato, chopped
1 red onion, finely chopped
1 cup shredded mozzarella
1 cup fresh basil and oregano, chopped
1 lemon
1/2 teaspoon corse salt
Black pepper, to taste

Heat a tablespoon of oil in a large skillet over medium-high heat. Add the couscous and stir until it turns a deep golden brown and smells toasted.

Add 1 1/2 cups of chicken stock and a pinch of salt and bring to a boil. Lower the heat to a simmer and cook, stirring often, until all the stock has been absorbed, 10 to 14 minutes. Pour into a large bowl and cool.

Meanwhile drain artichokes.  Divide the can in half.  One half of the can, slice the quartered artichokes in half. Chop the remaining artichokes.  Set aside.

Add one tablespoon of olive oil to the skillet and add the onions.  Sauté until they begin to soften and turn translucent.  Remove from heat.

Stir the remaining olive oil into the couscous. Add the oregano and basil, garlic, onion, artichokes, tomatoes and the finely grated zest of one lemon. Season to taste with salt and pepper. Add the juice of the lemon. Delicious eaten right away warm, or place in the refrigerator to chill before serving.  If chilled first, fluff with fork before serving.

Tuesday, October 18, 2011

Greek Orzo with Feta

I have a new favorite orzo recipe, and this is it.  Bonnie made it for our girls Greek Night dinner this month.  It is refreshing and seriously addicting.  It tasted wonderful warm the day it was made and I thoroughly enjoyed it the following day cold out of the fridge.  It would make a great potluck and a surefire family favorite.   


Greek Orzo with Feta 
1/4 cup olive oil
1/2 cup fresh squeezed lemon juice
2 ripe tomatoes, seeded and diced
1 red bell pepper, chopped
1 red onion, chopped
2 cloves garlic, minced
1 teaspoon finely chopped fresh oregano
1 (8 ounce) package crumbled feta cheese
1/2 pound dried orzo pasta
1 cup chopped fresh parsley

Stir together olive oil, lemon juice, olives, tomatoes, red pepper, red onion, garlic, oregano, and feta cheese in a large bowl. Let stand at room temperature for 1 hour.

Bring a large pot of lightly salted water to a boil. Add the orzo and cook for 8 to 10 minutes or until al dente; drain and toss the tomato mixture. Sprinkle with chopped parsley to serve.

Wednesday, June 15, 2011

Greek Pasta Salad with a Roasted Tomato Vinaigrette


I love a nice chilled pasta salad for a summer lunch and they are obviously the perfect side dish for any picnic or BBQ.  But I am not always all that crazy about those that are doused in mayo.  Talk about wasted calories! I would much rather have an extra glass of sangria then mayo-laden pasta salad.  This is a lovely alternative. Totally guilt free and absolutely bursting with flavor.  I used my sister's Roasted Tomato Salad Dressing and it went perfect with the feta and olives.  So yummy!  And actually I felt that the salad tasted even better the next day after all of the flavors got to hang out with each other a bit.  If I was making this for a party, I would definitely put it together the night before.


print this recipe

Greek Pasta Salad with a Roasted Tomato Vinaigrette 

For the vinaigrette:
Roasted Tomato Dressing
Container of cherry or grape tomatoes
Small red onion (I used 3 chopped green onions, since that is what I had on hand.  Any onion would work really)
1/2 cup Extra Virgin Olive Oil
1 tablespoon Dijon Mustard
1 1/2-2 tablespoons Balsamic Vinegar
Salt & freshly ground black Pepper

Preheat oven to 400.  Empty and entire container of tomatoes on a baking pan. Drizzle the tomatoes with olive oil, salt & pepper. Roast in the oven until they start to split, about 15 min. While roasting, mince a small red onion & put in large bowl. Take roasted tomatoes and juice from the pan and put in bowl with the onions. Mash the tomatoes with potato masher or fork. Stir in dijon mustard and balsamic vinegar. In a slow steady stream, stir in olive oil while stirring with a whisk or a fork.  Stir until well blended, add salt & pepper to taste.

For the pasta salad:
1/2 box cavatappi pasta, cooked according to directions on box (or another ridged pasta; penne, fusilli or gremili would be nice)
2 stalks of celery, chopped
1 green bell pepper, chopped
1 english cucumber, sliced into rings and then cut into fourths
1 can black olives, sliced into rings
1 block feta, crumbled
a bunch of fresh parsley, chopped

Cook pasta to al-dente, according to directions printed on the box.  Drain and rinse with cold water to stop the cooking process.  Set aside to allow to cool down.  This is a good time to make up your vinaigrette.  Once your vinaigrette is made, combine all ingredients for the salad in a large bowl.  Pour dressing on top and mix well.  Chill for at least 2 hours to allow flavors to combine.

I have a hard time waiting to eat this yumminess, but I have to admit it tastes best chilled.

You could definitely add cooked chicken or shrimp to make this more of main course.  It would be delicious!

Thursday, March 24, 2011

Tuna Melt

This is almost a knife and fork sandwich; it is gooey, messy, but seriously finger licking good.  The addition of the red wine vinegar really completes the full flavor of the tuna salad.  It keeps it tasting fresh and bright. Don't leave it out!


Print this Recipe

Tuna Melt
recipe adapted from allrecipes

2 (6 ounce) cans solid white tuna in water, drained  ("solid light tuna" doesn't mean healthier!  Please don't make that mistake!)
1/4 cup mayonnaise, plus a little more for spreading on muffins
1/4 cup celery, diced
1/4 cup onion, finely chopped
1 1/2 teaspoons red wine vinegar
salt and freshly ground black pepper, to taste
2 english muffins, split
2 slices cheese of your choice, (I used American) broken in half
tomato slices and lettuce for garnish

Preheat the oven broiler.

In a bowl, combine the tuna, mayonnaise, celery, onion, and vinegar. Season to taste with salt and pepper.

Place the english muffins on a baking sheet, and broil 1 minute, until lightly toasted.  Remove from the oven and spread 2 halves with the tuna salad.  Place 1 cheese slice on top of the tuna salad, layer with a tomato slice and top with remaining cheese slices.

Return the tuna salad topped muffins to the preheated oven, and broil 3 to 5 minutes, until cheese is melted. Meanwhile, spread mayonnaise onto the two reserved halves of english muffins.  Once finish broiling, remove from oven, top with the lettuce and remaining halves of english muffins.  Serve with a nice bowl of Gourmet Tomato or Loaded Potato Soup.  Enjoy!


Find my recipe and more at Foodista.com!

Tuna Melt

Monday, February 28, 2011

A Simple Staple- Tuna Salad Sandwiches

I almost feel silly making a post about something as simple as tuna salad.  But honestly sometimes it is the little things that make all the difference. This one is yummy!


6 oz. can good quality water-packed tuna, drained and flaked
1/2 cup diced celery
1/4 cup diced red onion
1/4 cup mayonnaise
1-2 Tablespoons dijon mustard
salt and ground black pepper to taste

For on your sandwich
radishes, thinly sliced (about 2-3)
alfalfa sprouts
romaine lettuce
(cucumbers thinly sliced and tomatoes are also good additions)

Place first 6 ingredients in a bowl and mix well to combine.  Onto some nice quality bread, lightly spread one side with a bit of mayonnaise.  Divide the tuna salad mixture amongst half of the slices of bread and layer with the radishes, alfalfa sprouts and romaine lettuce.  Top with remaining slices of bread, press together lightly, and serve.   Pairs beautifully with a bowl of Gourmet Tomato Soup.

Saturday, September 4, 2010

Shirley's Antipasto Salad


Shirley's Antipasto Salad
1 box spiral pasta, cooked, drained and chilled
1 can baby corn, sliced into chunks
1 jar marinaded artichokes, cut into chunks, add the juice from the jar into the bowl
1 jar whole pimentos, cut into chunks
1 can of stuffed green olives (mine were stuffed with anchovies)
3/4 block of colby jack cheese, cut into bite sized chunks
1 summer sausage, cut into chunks
1 celery stalk sliced
1 sm carrot julienned

Mix all together in a bowl. Now, you can do the dressing one of two ways. Shirley doesn't use Italian dressing, she uses red wine vinegar and olive oil and spices, salt & pepper. I used a little of both to make mine, with some Adobo seasoning. I think it tastes just as good as hers. Chill and enjoy! I found it's better to make in the morning or night before to let the flavors come together.


This recipe is courtesy of my sister's friend Shirley.  Bonnie went to visit her in Chicago and came home raving about this pasta salad.  She said that it was colorful, so full of flavor and the perfect side dish for any meal.  She said I just had to try it!  This week I finally did, and she was right.  It has just the right amount of dressing, not to over power everything else and I loved the crunch the celery and carrots added.  This would be a great dish to bring to your Labor Day picnic on Monday- it is sure to be a hit.  Thanks Bon (and Shirley too!)

Wednesday, September 1, 2010

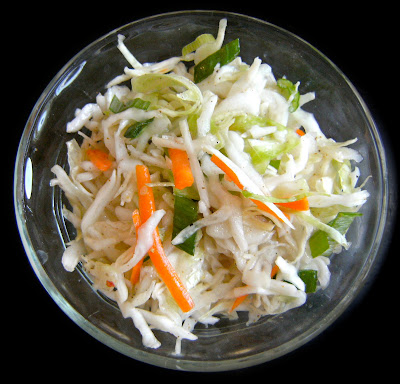
Oil and Vinegar Slaw


Tonight for dinner I made our favorite Hawaiian BBQ Pulled Chicken Sandwiches.  We love these with a good tangy slaw on top of the sandwich to give some nice crunch and a bit of texture.  I have never been 100% crazy about a mayo-based slaw.  Some are delicious and others are just yuck.  More often then not I feel like they are on the yuck-side.  It seems like they are just full of soggy mayo and not enough actual flavor.  So when I saw this recipe from Rachael Ray for a Oil and Vinegar Slaw I was immediately intrigued.  I love a good vinegar slaw but had never made one on my own.  This one was very simple, using ingredients that are always in your pantry and packed a ton of flavor.  It was the perfect accompaniment for the tangy chicken sandwiches.  We both gave this recipe a thumbs up, definite do again.

Oil and Vinegar Slaw
taken from Rachael Ray's 30 Minute Meals Show "Endless Summer"

1/4 cup red wine vinegar
2 tablespoons sugar
2 tablespoons peanut or vegetable oil, eyeball it
1 sack, 16 ounces, shredded cabbage mix for slaw salads
1 teaspoon celery salt
Salt and pepper to taste
*I also added one green onion, chopped

Mix vinegar and sugar. Add oil. Add cabbage to dressing and season with salt and pepper. Toss with fingers to combine. Adjust seasoning. Let stand 20 minutes. Re-toss and serve.

Thursday, August 5, 2010

Sweet and Sour Cucumber Salad with Fresh Dill

We have so many cucumbers coming from the garden it is time to start getting creative!  I have my stand by, Creamy Cucumber Salad that I love.  But I wanted to try out something a little different.  While browsing Epicurious I stumbled upon a cucumber salad from Bon Appétit that doesn't use sour cream.  It looked yummy and took a nice twist on the recipe I am used to.  I made a few alterations to accommodate what I had in my pantry and loved the outcome!  It is crisp, a little sweet, a little sour and a perfect summer side dish.


Sweet and Sour Cucumber Salad with Fresh Dill
2 English cucumbers or 4 garden cucumbers, thinly sliced
1 Tbsp coarse ground kosher salt
1/2 cup apple cider vinegar
3 T brown sugar
1/2 tsp. fresh ground black pepper
1/4 cup chopped fresh dill
fresh chives, chopped

Cut ends of cucumbers, but do not peel. Since I was using quite large garden cucumbers I decided to deseed them to avoid too much moisture.  This step isn't necessary, but a helpful hint.  Slice into thin slices.  I love using my mandolin for this type of thing, but you can also thinly slice the cucumbers by hand.

Put cucumbers in a colander placed in the sink and sprinkle with 1 tablespoon, coarsely ground kosher salt. Stir so all the cucumbers have salt on them. Let cucumbers sit and release water for at least 15 minutes but up to an hour.  The longer they sit the more moisture will be released.

While cucumbers are draining, combine apple cider vinegar, brown sugar, fresh ground black pepper, chopped dill and chives.

Drain cucumbers, pressing to remove the last bit of moisture.  Pat dry.  (Most of the salt should have been washed off by the water that was released.)  Pour dressing over cucumbers and stir to combine. Refrigerate cucumbers with dressing for at least 15 minutes, Serve cold.


**Side note**
I had these today, two days after making them and they totally took on a pickle-like flavor.  They would be so prefect like this topped onto a cheeseburger or any sandwich for that matter!  

Wednesday, August 4, 2010

Egg Salad


Egg Salad
6 hard boiled eggs, finely chopped
1/4-1/3 cup mayonnaise
2 tablespoons minced onions (I prefer red onion. It gives a nice hint of color)
2 tablespoons minced celery
salt and fresh ground black pepper, to taste
pinch of curry powder (this MAKES the salad, so don't leave it out- trust me!!)
fresh dill and fresh chives, chopped


Combine all ingredients and refrigerate until cold.


Enjoy as a dip with crisp, fresh vegetables or served on a sandwich.

Saturday, July 31, 2010

Cold Udon Noodle Salad

Ever since I read about this Cold Udon Noodle Salad on Jess's blog, My Own Bell Jar, I have been absolutely dying to try it.  It looked so refreshing and light.  Plus it will satisfy my Thai taste-buds in a big way.  I am such a sucker for Thai Peanut Sauce and noodles.  She tells about a basic recipe she made up, so I used it as my inspiration and flew with it.  It turned out so amazing, I can not stop eating it!!!  I think I quite possibly have a new addiction!  It is hands down one of my new favorite foods.  Thank you so much Jess for this wonderful recipe!  I am in love :)

Today I did a lot of shortcuts.  I wanted a fast dish that I didn't need to think about too much.  I let my grocery store be my friend today.  This version of my recipe will show you this route.  Next time I will adapt it to be completely from scratch.


Click {here} for the Thai Peanut Sauce from scratch.


Print this Recipe

Cold Udon Noodle Salad
1 Package Thick Udon Noodles, cooked according to package directions, then chilled
1/2 jar Thai Peanut Sauce or follow the directions {here} for a homemade version
1 Tbsp Soy Sauce
1 Tbsp Fish Sauce
1 Tbsp Sesame Oil
1/2 Tbsp Rice Wine Vinegar
3 cloves garlic, minced
Red Chili Flakes, to taste
The meat from one prepared rotisserie chicken, sliced thin
2 cups carrots sticks, julienned (I bought the bag in the produce aisle all prepped for me already)
2 cups cucumber, julienned
2 cups cabbage, shredded (again, I used the coleslaw bag in the produce department)
4 green onions sliced
2 cups Sugar Snap Peas (these didn't look good at the store, so I didn't add them this time)
2 cups bean sprouts (can you believe my grocery store was out of both fresh and canned?!  So I had to omit this item, but it will totally be added next time)
2 Tbsp Sesame Seeds, toasted

In a large pot of lightly salted boiling water, cook the udon noodles for about 5-7 minutes or until tender. Drain and rinse the noodles under cold running water and let cool.

Using a DRY large frying pan, heat the sesame seeds on Medium heat, shaking the pan occasionally.  Remove from pan when they darken and turn fragrant (about 3-5 minutes).  Do not allow to burn!

Whisk to combine the Peanut Sauce, Soy Sauce, Fish Sauce, Sesame Oil, Rice Wine Vinegar, garlic and red chili flakes until well mixed. Combine the cooked noodles, chicken, cucumber, sprouts, carrot, green onions, sugar snap peas and toasted sesame seeds, reserving some of the veggies and sesame seeds for garnish. Pour the Peanut Dressing over the salad. Stir until well coated.

Serve chilled, garnished with the reserved veggies and sesame seeds.


When I first made the recipe, I had added only 1 cup of each of the veggies.  But after eating it, I decide I would like to have more of them mixed in.  So yesterday I added an additional cup of each vegetable.  This totally did the trick and I will make it like this from now on.  The recipe above reflects the additional cup.


This dish is just as great the next day, so don't be afraid of making "too much".  It is awesome as leftovers!  Jess said that her husband Curtis even heated up his second serving and really enjoyed it this way too.  He said it was different, but just as good.  I will have to give it a try warm when I eat another bowl of it today!

Sunday, July 18, 2010

Tuna Niçoise Salad

This weekend was full of beautiful ladies, gifts and delicious food for the celebration of my friend Lane's wedding shower.  I wanted to bring a nice salad for lunch and thought that a Tuna Niçoise would be the perfect elegant choice for such a party. The Niçoise is very similar to the American Cobb Salad, where each ingredient is placed separately on the platter.  The only main difference is that it uses tuna, potatoes and green beans where the chicken, avocado and bacon would be. Traditionally in Nice, France (where the salad originated from), the Niçoise Salad is served with canned tuna that has been packed in oil and then drained.  More and more recently it is common to see grilled tuna as well.  For my own ease of preparation, I went the traditional route and used high quality canned tuna.  Once all presented on the platter, the salad looks incredibly impressive, but it is actually quite simple to prepare.  It is colorful, full of flavor and the perfect dish to serve for any summer party.

Tuna Niçoise Salad

Salad
4 cans high quality Tuna packed in oil, drained
1 lb baby red skinned or fingerling potatoes, scrubbed and halved (or quartered if too large)
3/4 lb green beans, ends trimmed
8 oz cherry tomatoes, halved
6 hard boiled eggs, peeled and quartered in wedges
2 heads Romaine or Bibb lettuce, washed, well dried, and chopped into 1" pieces
1/4 cup red onion, thinly sliced
salt and freshly ground black pepper
2 Tbsp capers
1/4 cup niçoise olives (I used an assortment of marinated olives)
several anchovies (optional)

Vinaigrette
1/2 cup lemon juice
3/4 cup extra-virgin olive oil
1 medium shallot, minced
1 Tbsp fresh thyme leaves, minced
2 Tbsp fresh basil leaves, minced
2 teaspoons fresh oregano leaves, minced
1 teaspoon Dijon mustard
Salt and freshly ground black pepper

Combine lemon juice, shallot, thyme, basil, oregano, and mustard in medium bowl. Slowly whisk while pouring the olive oil in a steady stream to emulsify.  Season to taste with salt and pepper and set aside.

Bring potatoes and 4 quarts cold water to boil in a large pot. Add 1 tablespoon salt and cook until potatoes are tender, 5 to 8 minutes. Transfer potatoes to a medium bowl with a slotted spoon (do not discard boiling water). Lightly coat warm potatoes with vinaigrette; set aside.

While potatoes are cooking, toss lettuce with 1/4 cup vinaigrette in large bowl until coated. Arrange bed of lettuce on a serving platter (I used two serving platters, so everything would fit nicely on each). Mound tuna in center of lettuce. Arrange reserved potatoes in a mound on the lettuce.


Return water to boil and add green beans. Cook until tender but crisp, 3 to 5 minutes. Drain beans, transfer to reserved ice water, and let stand until just cool, about 30 seconds; dry beans well. Toss beans in 3 tablespoons vinaigrette and salt and pepper to taste; arrange in a mound on the lettuce. Next arrange the cherry tomatoes in another mound on your lettuce. Place the hard boiled eggs around the outside of the salad and lightly drizzle them with the vinaigrette.  Sprinkle entire salad with the red onion, olives and capers. Place the anchovies (if using) on the top of the salad. I bought anchovies that were rolled around capers. They looked very pretty on the plate and I felt they were much less intimidating served this way.

Serve Immediately.

Saturday, July 3, 2010

Grilled Corn, Black Bean and Tomato Salad


Grilled Corn, Black Bean and Tomato Salad
4 ears of grilled corn, kernels cut off (you can use frozen or canned, but the grilled tastes best!)
1 can (15 oz) black beans, drained and rinsed
2 cups edamame
1 pint cherry or grape tomatoes, quartered
3/4 cup chopped red onion
2-4 tablespoons fresh cilantro, chopped (or Italian Parsley if you are not a cilantro fan)
1/2 cup Ranch Dressing (homemade or store-bought. I like the flavor of Buttermilk Ranch for this salad)
a few shakes of hot sauce, to taste
Kosher Salt and Fresh Ground pepper, to taste

Combine all ingredients. Serve chilled or at room temperature. 


This is salad is perfect for all that grilled corn you just made!  Two or three chopped avocado's can be a very nice substitution for the edamame as well.  They both taste great in this salad.  I used the edamame this time since we will be outside and they hold up just a bit better for outdoor picnics.  This salad is so versatile. It is great as a topping for chicken, wrapped into a flour tortilla, mixed with a green salad, or even to dip tortilla chips in as a salsa. Yum!  When I made it today, I also added a bit of Southwest Seasoning Salt for a bit more of a punch.  So play around to adjust the salad to suit your taste- or your pantry!

Have a FUN (and safe!) 4th of July!  Happy Birthday America!

Saturday, April 24, 2010

Strawberry Pretzel Salad

"If the divine creator has taken pains to give us delicious and exquisite things to eat, the least we can do is prepare them well and serve them with ceremony."
~Fernand Point

Bonnie, Kathleen and my mom at Miss Molly's Tea Room for Afternoon Tea, 
one of our favorite "ceremonies"


This is one of my favorite salads that Miss Molly serves.  It is so light and refreshing- I just love it!  This isn't Miss Molly's actual recipe, but it is Paula Dean's so I am sure it is fantastic!  This is on my To-Make list and I didn't want to loose it.  I think I will make it for my next family get together.  Yum!

Strawberry Pretzel Salad

2 cups crushed pretzels
3/4 cup melted butter
3 tablespoons sugar, plus 3/4 cup sugar
1 (8 oz) package cream cheese
1 (8 oz) container whipped topping
2 (3 oz ) packages strawberry jello mix
2 cups boiling water
2 (10 oz) packages frozen strawberries
1 (8 oz) can crushed pineapple
whipped topping or whipped cream, to garnish

Directions
Preheat oven to 400 degrees
For the crust, mix the pretzels, butter and 3 tablespoons of sugar.  Press the mixture into a 9x13 inch pan and bake for 7 minutes.  Set aside and allow to cool. 

In a mixing bowl, beat together the cream cheese and 3/4 cup of sugar.  Fold in the whipped topping and spread over the cooled crust.  Refrigerate until well chilled.  

In a small bowl, dissolve the jello in the boiling water and allow to cool slightly.  Add the strawberries and pineapple, and pour over the cream cheese mixture.  Refridgerate until serving time.  

To serve, cut slices and serve with a dollop of whipped topping.  

Friday, April 2, 2010

Fridays, Feasting With Friends- Featuring Medeana Hobar

One of the delights of life is eating with friends, second to that is talking about eating. And, for an unsurpassed double whammy, there is talking about eating while you are eating with friends.” 
~Laurie Colwin'Home Cooking'

For today's segment of Friday's Feasting with Friends I would like to introduce you to my friend Medeana.  She is full of life, joy and brings sunshine wherever she goes.  I honestly don't think I have ever met a more uplifting and positive person then I did with Medeana.  I met Medeana through my sister, and am so thrilled with the friendship that I have developing with her myself.  She is my first "vegan" friend, and I always love hearing about the amazing and wonderful things her family enjoys at each meal.  Sometimes they might sound a bit strange, but all of them I would love to give a taste and see for myself.  (So Medeana, if you ever have any leftovers you are more then welcome to send them my way *grin*.)  Her family lives on an Organic Farm (lucky girl!!!) and she is a self-proclaimed Tree-hugger (some of my favorite kinds of people!)  She is just an all around fun girl, and will guarantee to make you feel at ease and in turn make you laugh until your sides hurt.  

Medeana Hobar
Medeana, just before her very first ride on the subway, NYC


What is your favorite thing to cook? Soups!!!

How about your least favorite thing to cook? Really dont like to cook! My hubby is my personal chef!!!

What is your favorite local restaurant and what is one you are dying to try out? My Fav resturaunt is Wild Mango! LOVE IT!!!! I have been dying to hit Luckys cafe for brunch! Thay have LOTS of veggie choices!

You are hosting a dinner party, what would be on your playlist?Bruschetta, hummous, veggies, salad, soup. Vegan cheesecake

What would you choose to be your last meal on earth? Tofu curry noodle soup from Wild Mango!!!!!!
What are you currently reading? Skinny Bitch

What is your favorite Kitchen Gadget? Vita Mix

Do you have a signature go-to dish? my leftover surprises!!

What is your favorite thing about Cleveland? My family and friends!

Do you have a favorite meal from your childhood and do you still cook it now as an adult? Unbeef stew!

Top 3 Movies of all time? 300, Gone with the wind, Ghandi

Where do you do your grocery shopping? Natures Bin, all over Cleveland @ my accounts!

What is your favorite guilty pleasure when it comes to food?Chocolate


Do you have Culinary Resolutions that you would like to accomplish this year? Eat more Raw foods less cooked

OK, you are a huge fan of this stuff called E3Live. Can you tell me what this stuff is and what it can do for me? E3live is an amzing Blue green algae that provides lots of vitamins and nutrients! Live essential fatty acids help to turn your Brainon!!! WWW. E3live.com has a lot more info! I take it to keep me healthy and feeling happy! Works awesome for depression! The best part is its guaranteed!!!

One word what describes you is: unique
enjoying a hot chocolate at Serendipity Restaurant, NYC


Soy Delicioous Pasta Salad
1 lb cooked pasta
1/2 cup diced leek
2 Tablespoons dill
1 1/2-2 cups veganaise
1/2 teaspoon blackpepper
1/4 tsp salt
1/2 tsp garlic powder
1 Tablespoon VINEGAR
1 package steamed edemame beans

Mix all together thoroughly! Serve chilled!! Yum!


Thank you so much Medeana for doing this interview for me!!  I can't wait to try out your pasta salad, especially since the weather is just right for a picnic!  

Tuesday, March 2, 2010

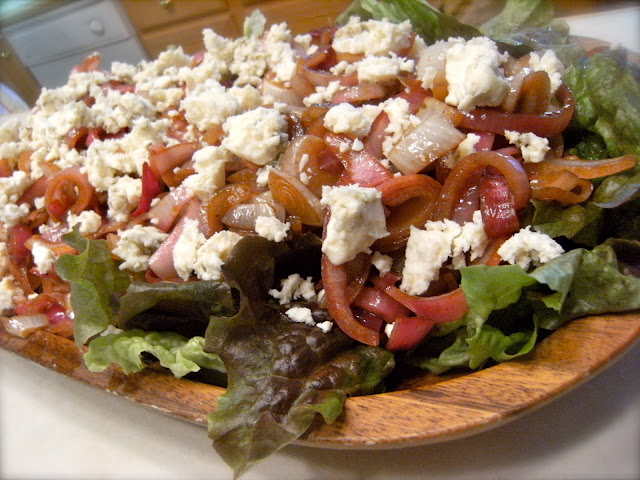
Red Lettuce with Balsamic Onions Salad

The first time I tasted this wonderful salad was on Christmas Day when my mother-in-law, Sandy made this to go along with our dinner.  Being as I have an obsession with sauteed onions, it was love at first sight.  Top the salad with some creamy, buttery blue cheese and it is a little taste of Heaven.  I could easily eat this salad every single day and not even begin to tire of it.  It has easily turned into one of my top favorite recipes of all time- and to think, it is a salad.  Not that I don't love salads, I really do.  But I haven't yet met one that would rank up there with lobster, a good steak, pad thai, or a rare, juicy cheeseburger.  That is until this one.  Many thanks Sandy for turning me onto this little gem!  We all agreed that this salad would be wonderful topped with grilled flank steak.  I am totally trying it that way the next time I make it.


3 small red onions
1/4 cup plus 2 tablespoons good balsamic vinegar
1 cup good olive oil
1 1/2 teaspoons kosher salt
1 teaspoon freshly ground black pepper
6 tablespoons minced shallots (2 large)
2 teaspoons Dijon mustard
1/4 cup good red wine vinegar
2 heads, red leaf, washed and spun dry, and torn into pieces
container of good quality blue cheese

Preheat oven to 375 degrees.

Cut the onions in half and slice into 1/4 inch think, place on baking sheet and toss with:
1/4 cup balsamic vinegar, 1/4 cup olive oil, 1 teaspoon salt and 1/2 teaspoon pepper.

Bake 12-15 minutes, until onions are tender.  Remove from oven and toss with 2 more tablespoons of balsamic vinegar and cool to room temperature.  

Whisk together the shallots, mustard, red wine vinegar, 1/2 teaspoon salt and 1/2 teaspoon pepper in a small bowl.  While whisking, add 3/4 cup olive oil until emulsified. 

Too assemble, spread lettuce out onto a large platter, top with onions and crumble blue cheese on top.  Serve the dressing on the side.  


**this recipe was altered slightly from Ina Garten's original recipe.

LinkWithin

Related Posts with Thumbnails