This past weekend I participated in a Spring Shopping Extravaganza. There was something like 24 different vendors, fun island music and a full cupcake bar with over 300 cupcakes! My friend Dana from Uppercase Living put together the whole thing. She did such a fantastic job!
Dana and her beautiful table. Go check out her site right now! Such cute stuff!
This was the first event that My Retro Kitchen took part in, and I am so glad I went! It was such a fun day. I made some new friends, did lots of networking and of course shopping and eating lots of cupcakes! Thanks to the Extravaganza you are going to be seeing lots of fun giveaways in the upcoming future. Yay!
I wanted to do something a little different and definitely fun for the cupcakes My Retro Kitchen was providing. While brainstorming I thought back to the Cake Bites I made for Jackson's birthday party. These were so much fun and a total hit. What could I do to turn these into cupcakes? Top them on a Resee's Cup of course!
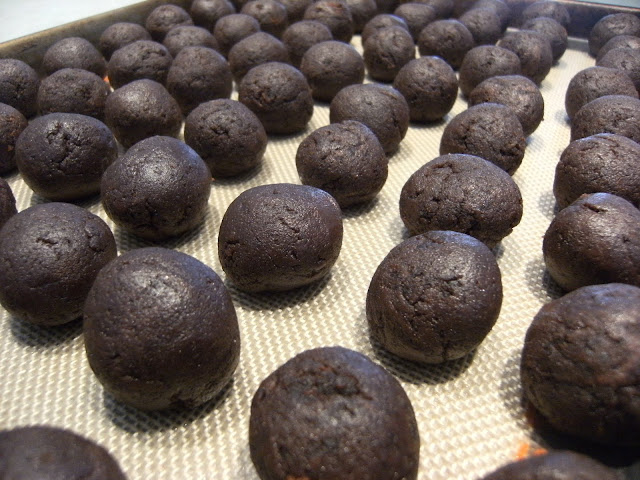
The whole process, once you get the hang of it is pretty simple. The first five or six I dipped looked a little wonkey. But after that it was pretty quick and they looked great. First you take a box of cake mix and bake as directed for a 9x13 pan. After you bake the cake, let cool completely. Once cool, crumble into a large bowl and mix with about 3/4 of a tub or store bought cream cheese frosting. Use the back of a large spoon or your fingers. This can get a bit messy, but no biggie. That is part of the fun in baking, right?! Roll mixture into quarter-sized balls and place on a baking sheet that has been lined with waxed paper or a Silpat. You should get anywhere between 50-65.
Chill for several hours in the fridge or about 15-20 minutes in the freezer. Be sure not to freeze, you just want them to get super cold. The colder the better. Meanwhile, unwrap your Resee's Cups. Be sure you have had them in the fridge getting nice and hard and cold. They can get a bit melty with all the handling otherwise. Take the cream cheese frosting you have left and smear a little bit onto the top of your Resee's Cups. This is going to be the "glue" to hold the cake balls and the candy together. Gently press the two together and put back into the fridge.
Once chilled well, take them back out and gently press the cake ball together with the candy to "seal" the edges and create a cupcake-like look. This will insure that the cakeball doesn't fall off the Resee's Cup during the dipping process. Then put back in the fridge to chill again. I had two trays I was working with. I found it easiest, since I only had room in my freezer for one tray, always keep the one I wasn't working on in the freezer. That way they would get nice and cold quickly. Making it easier to work and a nice pace and not have to wait around between each step.
Once the pressed cupcake bites are nice and cold it is dipping time! Melt your chocolate or candy melts in the microwave or double boiler according to package directions. Since you don't have a nice long lollipop stick to hold onto, I found it easiest to use a small glass bowl and melt a little bit of candy melts at a time. They dip easiest when the chocolate is nice and hot. The small bowl made it possible for me to dip the whole top into the melted chocolate and carefully rotate them to get the chocolate all the way up to the edge of the Resee's Cup creating a "cupcake". While the chocolate is still hot on the dipped cupcake bite, it is time to decorate. I used a combination of m&m's, sprinkles and remember those candy buttons on the long strip of paper.... yeah, these.
Be creative. Anything small and cute will work! Gently press the candies into the warm chocolate and replace onto your cookie sheet in the fridge to harden. I found it easiest to keep the cookie sheet of the cupcake bites I was working on in the fridge and just take out one at a time. This would keep them nice and cold and insure the candymelts hardened smoothly.
My pretty cupcake tower at the Spring Shopping Extravaganza
Once they are completely cool, they can be stored in an airtight container for a few days on the counter or even longer in the fridge.
YUM!
Print this RecipeIngredients
1 box of chocolate cake mix
1 tub cream cheese frosting
2 bags of Resee's Cups (I used one bag of regular and one bag of dark chocolate)
1 bag of candy melts, color and flavor of your choice OR a brick of almond bark
an assortment of candy or decorating sprinkles- be creative! I used Candy Buttons, M&M's and sprinkles
mini cupcake papers, if using (optional)
I joined these linky parties! Go check them out too!


