Showing posts with label Seasonal Favorites: Autumn. Show all posts

Tuesday, November 15, 2016

Rustic Beef Stew with Butternut Squash, Sweet Potatoes and Cabbage


This has been the most beautiful Autumn here in Ohio.  It is the middle of November and I am sitting outside watching the boys play as I type, no jackets needed. I am sure it won't  be lasting but I am enjoying every second of it while I can!  I know I have been a stranger around here for some time, but life has FINALLY begun to settle down.  Between my broken leg, pregnancy, a new baby and moving into a new home I have felt like I could hardly catch my breath. It was a whirlwind for sure! Well this year both Jackson and Owen are in school full time leaving me with just one little guy running around.  I forgot how easy having one child was- or actually it was probably never easy when I only had one. But now in comparison to three, one is a piece of cake... at least most of the time. Haha! We have settled into a routine of storybooks, daily hikes in our woods, and lots of make believe.  I have been enjoying my days with Aaron so much. It has been wonderful having this one on one time together, just me and him.  He is such a joy!  But now it is also time for me to get back into doing those things I enjoyed in my spare time way back when I actually HAD free time. And that includes blogging again!  I have missed it so much and am beyond excited about reviving My Retro Kitchen!

This recipe came about on accident (but isn't that how some of the best recipes are created?!) I started out prepping the makings of my favorite stew, browning meat, chopping veggies, when I realized the bag of potatoes I thought I had in the pantry were actually used a few nights before.  Aaron was napping so there was no running out to the store, I needed to make due with what I did have on hand- a couple of sweet potatoes and a butternut squash. And as a matter of fact, they sounded delicious!

This recipe not only turned out fantastic but I knew it would be the perfect recipe to bring My Retro Kitchen back to life again.  I was dying to share it with all of you! It is hearty, satisfying and a perfect meal on these crisp fall evenings.  Be sure to serve it with some warm, crusty bread and lots of butter. You're going to want it to sop up the delicious broth. Enjoy!


Rustic Beef Stew with Butternut Squash, Sweet Potatoes and Cabbage

2 tablespoons olive oil
2 onions, chopped
4 large carrots, 2 diced and 2 cut into 3/4-inch
 chunks
4 celery stalks, 2 diced and 2 cut crosswise into 3/4-inch slices
2 sweet potatoes or yams, peeled and cut into 1 1/2-inch chunks
3 cups butternut squash, peeled and cut into 1 1/2-inch chunks
1/2 head of cabbage (about 6 cups), halved and then sliced into strips
2 lbs beef, cut into 2-inch chunks (chuck steak or bottom round works well)
coarse salt and freshly ground black pepper
1/4 cup all-purpose flour
1 tablespoon butter
4 garlic cloves, minced
3 fresh sprigs of thyme, or 1/2 teaspoon dried thyme
1 bay leaf
1/2 cup red wine
8 cups beef or chicken stock

Sprinkle the meat with a generous amount of salt and pepper.  Place the meat into a gallon-sized plastic bag with the flour and seal shut.  Shake well to coat all the meat in the flour.  Heat a large dutch oven or other heavy-bottomed pot over medium-high heat. Coat the bottom of the pot with the olive oil and heat. Working in batches, add the beef to the pot, being careful not to overcrowd the pan. You want to brown the meat, not steam it!  Brown on all sides, about 8-10 minutes, then transfer to a plate.  Repeat until all the meat has been browned.

Add the butter to the pan and melt. Add the onions, garlic, diced carrots, and diced celery.  Cook on medium-low heat until just beginning to caramelize, about 10 minutes.  Stir in the tomato paste and the thyme sprigs and cook for 2 more minutes.

Turn the heat up to high and slowly pour in the red wine, scraping the bottom of the pan with a wooden or silicone spoon picking up all the wonderful browned bits stuck to the bottom. This will give your stew a nice, rich flavor.  Return the meat to the pan and add the broth to just cover the beef. Bring to a boil and then reduce the heat to low, cover and simmer for two hours.

Add the butternut squash, sweet potatoes, cabbage, carrot and celery chunks to the pot with the meat and cook until tender, about 30 minutes.  Remove the bayleaf and the stems of the thyme (or do as my mom would do while I was growing up.... keep them in and whoever got the bayleaf was the lucky one to do the dishes! Ha!) Taste the broth and add more salt if needed.

Serve with lots of crusty bread and butter to sop up all the delicious broth.


Tuesday, October 14, 2014

Raspberry Almond Brown Sugar Muffins


Wow, this pregnancy was a rough one for me in regards to wanting to do anything in the kitchen.  Just the mere thought of doing any sort of cooking or baking made my stomach turn.  I would do it because well, my family had to eat.  But it wasn't the wonderful, enjoyable hobby that I have had my whole life.  And unfortunately for that my blog posts suffered as well.  I am sorry and hope that you will all welcome me back with open arms! 
 
Now that our sweet Aaron is here, my aversion to all things "kitchen" are finally gone!  Halleluiah!  Last week as a part of International Babywearing Week we went to Rosby's Berry Farm and picked the most beautiful raspberry's!  
 
 
The harvest was bountiful and the berries sugary sweet.  I picked three quarts of them!   So today I celebrate with Raspberry Almond Brown Sugar Muffins.   These muffins are so amazing.  Seriously, they have the best of everything- sweet-tart raspberries and the crunch of the almonds and brown sugar topping make for the most perfect muffin. Being a nursing mom made it totally acceptable to have two this morning right?! 


Raspberry Almond Brown Sugar Muffins

2 cups all-purpose flour
1 teaspoon baking powder
1 teaspoon baking soda
1/4 cup shaved almonds
1/4 teaspoon salt
1 large egg
1 cup packed light-brown sugar
1/2 cup butter or margarine, melted
1 cup milk
2 teaspoons vanilla extract
1 cup raspberries (fresh or frozen)

Position the rack in the center of the oven and preheat to 400 degrees F. Lightly grease or line with paper baking cups (makes 12-18 muffins).

In a large bowl, blend together the flour, baking powder, baking soda, almonds, and salt.  In a medium bowl, beat the egg and brown sugar together until thick.  Beat in the butter, milk and vanilla extract.  Combine the two mixtures, blending until the dry ingredients are just moistened.  Gently stir in raspberries. 

Spoon the batter into the prepared muffin cups, filling each 3/4 full. Sprinkle the Streusel Topping (recipe follows) over the tops of the muffins.  Bake for 15-20 minutes, or until a cake tester or wooden toothpick come out clean.  Cool in the pan on a wire rack for 5-7 minutes.  Serve warm, or transfer to the rack to cool completely. 

For the Streusel Topping
1/2 cup all-purpose flour
1/4 cup brown sugar, packed
1/2 stick unsalted butter
1/2 teaspoon cinnamon

Combine all of the ingredients in a food processor and pulse until crumbly.  Alternately you can mash the ingredients with a fork.  Sprinkle over muffins immediately before baking.


Streusel Topping recipe courtesy about.com 

Thursday, January 30, 2014

Hearty Vegetable Beef Soup


My mom makes the best soup.  Seriously, she should go into business selling it- everyone would go crazy over it!  There isn't a soup that comes out of my mom's kitchen that isn't amazing.  Her Vegetable Beef Soup is a huge family favorite.  Super simple to make, but jam-packed full of flavor, it is comfort food at it's best.  This one is nice and hearty due to the large chunks of beef and loads of veggies.  My mom always serves the large chunks of meat on the side, giving you the option of putting some in the soup and the other enjoying with good mustard, making it a satisfying dinner with just a hunk of butter bread.

With the ridiculous Polar Vortex we have been experiencing here in the Midwest, this is exactly the kind of food you want to be eating.  Put the pot on the stove in the afternoon and just let it simmer away throughout the day.  By dinner it will fill your home with the most wonderful smells and make your kids and husbands asking for dinner the moment they walk in the door from work and school.  if you are unable to stay home to keep an eye on your pot of soup, a crock pot on low for the day works just as nicely.  A nice hot bowl of soup says "I Love You" in the most snuggly, delicious way.


Hearty Vegetable Beef Soup

2 32-oz Beef Stock (or 32-oz beef stock AND 2 tablespoons of beef bouillon dissolved into 4 cups of water)
1 beef chuck roast (1.5-2 lb) excess fat removed and cut into very large chunks
1 bay leaf
1 large onion, chopped
3 carrots, peeled and sliced into coins
3 stalks of celery, chopped
3 russet potatoes, peeled and cubed (about 1 cup)
1 cup corn (frozen or canned is fine)
(you may add any other veggies you like or have on hand, green beans, peas, cabbage, tomatoes...)
ketchup
Salt and fresh ground black pepper to taste

In a large stock pot combine the beef, stock, chopped onion and bay leaf and allow to simmer over medium high heat for 45 minutes. Add the rest of your veggies, and a good sized squirt of ketchup- I know crazy ingredient! But it rounds out the flavor of the soup perfectly.  You can also use 1 tablespoon of tomato paste, but trust me, ketchup is the secret ingredient!  Allow to simmer for at least an hour, stirring occasionally. 

Taste and season accordingly with salt, pepper and additional ketchup if desired.  The longer the soup simmers the more it will thicken.  I prefer a heartier soup, almost like a stew, making it a bit easer for my children to eat by themselves.   But if it reduces a little too much for your liking or if you prefer a thinner soup, add a bit more water until you get the desired consistency.

Serve the meat alongside the soup with a good mustard for dipping.  One of my boys likes his meat all on the side with loads of mustard and ketchup.  My other son likes his meat totally in his soup.  My husband and I like some in and some out!  Enjoy with crusty bread slathered in butter. 


Tuesday, October 23, 2012

Fall Harvest Recipe Round-Up!

Are you on a hunt for some wonderful Autumn treats for this Hauntingly Fun Halloween Weekend?!  I have assembled for you some of my most favorites, that will definitely be a hit at any party- and especially at your own dinner table!


Roasted Pumpkin Seeds
Both a Savory and a Sweet Version!


Pumpkin Favorites
From Left to Right, Top to Bottom:
Kolokithopita- Savory Greek Pumpkin Pie
Low Carb Spiced Pumpkin Bread
Yum Yum Brownie Muffins
Caramelized Onion Pumpkin and Ricotta Tortellini's with a Walnut and Sage Brown Butter Sauce


Apple Treats 
From Left to Right, Top to Bottom:
Apple Cream Cheese Quick Bread
Apple Dapple Cake
Traditional Apple Crisp
Apple Muffins with Cinnamon Sugar


Owl and Bat Cupcakes
And just incase you are looking for some fun ways to decorate your cupcakes for the Halloween Party, these are always a huge party hit!

Tuesday, October 16, 2012

Cinnamon Raisin Bread (Bread Machine)


Bread Machines are so perfect for those "I am in the mood for Cinnamon Raisin Bread moods" but you have loads of laundry to do, kids to play with, bed linens changed and a million and one other items on your To-Do List making it impossible to devote the time to baking.  Very much like a crock pots, you add the ingredients, turn it on and walk away!  3 hours later you have homemade bread!  I love mine and use it all the time- I am all about making my life easier from time to time!  If you don't have one, you can usually find them at garage sales and Salvation Army's for cheap.  Or you can do like I did and ask around and see if anyone has one sitting around unused taking up space they want to free up!  (They have no idea what they are missing out on!!) Here is a terrific recipe for Cinnamon Raisin Bread.  It doesn't have a "swirl" of cinnamon, but instead the cinnamon is infused throughout the entire loaf.  It is yummy and makes the house smell amazing.


Cinnamon Raisin Bread (Bread Machine)  
1 egg + water to equal 1 1/4 cups
2 Tablespoons powdered milk
1 1/4 teaspoon salt
2 Tablespoons brown sugar
2 Tablespoons butter
3 2/3 Cups All Purpose white flour
1 teaspoon cinnamon
1 1/4 teaspoons yeast

add ingredients:
1/2 cup Raisins (although I added 1 cup!  I like a lot of raisins in mine!)

1. Measure first 8 ingredients in the order listed into Baking Pan
2. Insert Baking Pan into oven chamber, twist to secure and close lid
3. Select: Sweet Bread Setting
4. Select "Regular" or "Dark" crust (I always choose the "regular" crust, I find the "dark" way too dark for my taste)
5. Press Start- there will be a 15 minute preheat delay before mixing begins
6. Add raisins when the "Add Ingredient" signal beeps
7. Using oven mits, remove bread when completion beep sounds.
8. Cool on a wire rack before slicing

Baking time: 3:50 hours and Makes a 2.0 lb loaf


Thursday, October 11, 2012

Chicken and Sun-Dried Tomatoes

This is a yummy slow cooker meal that is a nice change up from the every day.  There are only a handful of ingredients; the sun-dried tomatoes being the real star.  They go from hard and dry to soft, sweet yet slightly tart after hours of cooking in the crock pot.  The chicken is juicy and moist rounding it out and creating a warm and comforting meal.  Both of my kids gobbled it up no questions asked and even had it for lunch the next day just as willingly.  That has to say something, huh?!  5 Star Slow Cooker meal for sure.  We enjoyed it served over elbow macaroni and topped with snipped chives and freshly grated parmesan cheese.  


Chicken and Sun-Dried Tomatoes
3 lbs chicken, boneless, skinless breasts or thighs
1 medium onion, chopped
2 garlic cloves, minced
2 cups chicken stock
1 teaspoon dried basil
1/2 cup sun-dried tomatoes, cut into slivers

Don't forget to spray the inside of your slow cooker with non-stick cooking spray for easier clean-up!

Place the chicken in the bottom of the slow cooker.  Add the onion, garlic, chicken stock, and basil. Scatter sun-dried tomatoes over top and cover.  Cook for 4-6 hours on LOW or 2-3 on HIGH.  Serve over noodles or rice.


Monday, October 1, 2012

Broccoli Cheese Soup


Happy 1st day of October!  Autumn is officially here, and I welcome it with open arms!  Time to bust out the afghans, cozy sweatshirts and sweaters, and snuggle with those you love.  And it is also the time to warm your insides with a nice warm bowl of soup.  This broccoli Cheese soup will do just that.  The Tobasco Sauce in the soup is just used for flavor, not for heat.  If you want it spicy, I like serving the bottle on the side so others can add as they like.  This soup screams for crusty bread so don't forget it!

Broccoli Cheese Soup
1/2 stick of butter
1 medium onion, chopped
1 cup carrots, cut into matchsticks
1/4 cup flour
2 cups broccoli, chopped
1 cup half and half or whole milk
1 cup chicken stock
2 cups cheddar cheese, shredded
salt and fresh ground black pepper to taste
Tobasco Sauce, a few dashes to taste (I used about 12)

Melt the butter in a large stock pot over medium-high heat add the onion and carrots and cook until tender, about 5 minutes. Add the flour and allow to cook until absorbed, about 2 minutes more.

Slowly stir the half-and-half and chicken stock into the mixture, about 1/4 cup at a time allowing the mixture to thicken before adding more. Once all the liquid is added,
stir in the broccoli and cheddar cheese. Season with salt and pepper.

Reduce heat to medium-low. Stirring occasionally, allow the soup to simmer until the the cheese has melted completely, about 10 minutes. Add up to an additional 1 cup of water or chicken stock to reach your desired soup thickness.

If you like a thicker soup, remove 1/2 from pot, and puree with an immersion blender.  Once smooth return to pot and stir to combine.

Ladle into soup bowls and garnish with a sprinkle of cheddar cheese for a garnish. Serve with nice crusty bread to sop up every last bit of the soup!


Monday, August 13, 2012

Traditional Meatloaf


Meatloaf.  Comfort food at its best.  I just love it!  And for something so simple, people sure have lots of different recipes for it!  some use just beef, some add veal to the mix.  Others cover it in ketchup or BBQ sauce.  And other recipes call for diced veggies, like peppers, carrots or even corn and black beans to be added in.  Sometime you are directed to use oatmeal and other call for crackers or breadcrumbs.  And while all of these recipes are delicious, and trust me, I try every single one I find, This one is the most simple and to us the most delicious.  Sometimes just the most basic of things turn out to be the very best.

Be sure to follow the directions to remove the meatloaf from the roasting pan right away or otherwise it will begin to soak up all the greases that were removed during cooking- no one wants greasy meatloaf- yuck!  This recipe is taken from Trisha Yearwood's cookbook Georgia Cooking in an Oklahoma Kitchen, but honestly it probably most resembles all of our mom's- before recipes started to get complicated!

My pictures only show one loaf.  That is because, well, we just couldn't wait  and gobbled up the other one before I could photograph it!


Traditional Meatloaf
2 lbs lean ground beef
20 Saltine crackers
1 large egg, lightly beaten
1 medium onion, finely chopped
1/4 cup ketchup
1 Tablespoon yellow mustard
1 teaspoon salt
1/2 teaspoon pepper

Preheat oven to 350 degrees F.

Gently mix the beef, cracker crumbs, egg, ketchup, mustard, salt, pepper, and onion until blended.  Shape the mixture into 2 loaves and place side by side crosswise in a 9x13-inch pan.  Bake the loaves for 1 hour, or until they are browned.  Transfer to a platter immediately and allow the loaves to cool slightly and firm up before slicing.  Garnish if desired with fresh herbs.


recipe from Georgia Cooking in an Oklahoma Kitchen by Trisha Yearwood

Monday, May 21, 2012

Guest Poster Sara, from Finding the Time- OBA Blog Swap!

As promised earlier this morning, I'm happy to introduce you to Sara from Finding the Time.  I had the lucky opportunity to sit next to her at out last meet up and really enjoyed chatting with Sara and getting to know her "in person".  Thank you so much Sara for being a guest here today!  For a full listing of today's blog swap participants, please visit Poise in Parma.

Don't forget to follow me over to Sara's blog and read my guest post there! See you at Finding the Time!


Well hello, My Retro Kitchen readers! I’m Sara from Finding the Time! I’m excited to be here today thanks to the OBA Blog swap. I’ve been reading Amie’s blog since I met her at an OBA meet-up a few months ago and I’ve even tried a few of her recipes!

I’ll be honest; I’m not much of a cook. I was brought up going out to eat A LOT and my fast-paced life has me often cursing my lack of forethought when I come home from work with no plans for dinner. Luckily, if you visit my blog today, Amie has posted some tips for people like me! YAY! I hope you’ll stay around after reading her post. You’ll find a fun little mix of CLE pride, puppy love, DIY attempts and general silliness.

I do have a few “go to” recipes that make regular appearances on my dinner table. One such recipe I received at my bridal shower from a mom much like Amie! This crock-pot chili recipe is perfect for me because it requires only about 20 minutes of prep. After that you let the crock-pot do all the work! What could be better?!

Easy Chili
1 lb. ground beef
1 medium onion – chopped
1 package of McCormick Chili Seasoning
1 large can (21-28 oz) diced tomatoes
1 can (15-16 oz) tomato sauce
1 can (15-16 oz) black beans – rinsed
1 can (16 oz) mild chili beans
3 chopped carrots
1 can corn


I like to start by mixing all the canned ingredients (chili seasoning, diced tomatoes, tomato sauce, black mild chili beans corn) in the crock-pot on low heat. It gets things moving and makes me feel accomplished! BTW- you might notice that the photo above has pinto beans instead of mild chili beans. I used those this time because they were what I had. It definitely changed the taste so – live and learn - stick with the mild chili beans!!


Cook beef and onions in skillet while cooking carrots covered in water in microwave for 5 minutes.  Drain beef/onions and carrots and add both to crock-pot. Stir well.  Cook on low for 4-5 hours or high for 1-2 hours.  Done!


I love this recipe because it makes enough to last multiple days in my house (with myself and my husband who LOVES to eat). I’m not a huge fan of leftovers but chili is just so versatile! One day I’ll have it in a bowl with cheese and sour cream, the next on chili dogs and one final meal of chili mac (served over spaghetti). For me, the one condiment that the chili cannot be served without is hot sauce. It tastes good all the time!

Monday, November 21, 2011

Ohio Blogging Association Blog Swap! (With a Sugar Cookie Bar Recipe)

As a part of today's Ohio Blogging Association's Cleveland November Blog Swap, I'm happy to introduce you to Sarah from Cooker Girl. On this day, bloggers from around the Northeast Ohio area are guest posting on one another's blogs as a way to help to get to know each other in our blogging community. For a full listing of blog swap participants, please visit Poise in Parma today.

I am sharing one of my favorite recipes on Cooker Girl today so please visit me there as well!

Photobucket

--------------------------------------------------------------------------------

Hi, I'm Sarah from Cooker Girl.  I like to cook and I love to bake.  I created my food blog to keep track of recipes I've tried so I can go back to them later.  Most of the time they are adaptations of existing recipes, but there are some originals and family recipes that I've shared as well.  I hope you'll stop by sometime!


The holiday season is approaching, and for many people that means making and decorating cut-out sugar cookies.  It's a great project for the whole family, but they're time consuming.  For this reason, I only make cut-out cookies about once a year.

During the rest of the year, when you want the sugar cookie flavor (and frosting) without all the work, these bars are the perfect solution.  This recipe is made using a jelly roll pan, but it can easily be halved and baked in a 9x13 pan.

Sugar Cookie Bars
Adapted from Beantown Baker

1 cup (2 sticks) butter, room temperature
2 cups sugar
4 eggs
1 Tbsp vanilla
5 cups flour
1 tsp salt
1/2 tsp baking soda

Preheat oven to 375.

In a large bowl, whisk together the flour, salt and baking soda.  Set aside.

In a large mixing bowl, cream the butter and sugar together until light and fluffy. Add the eggs, one at a time, mixing after each egg. Add the vanilla and mix well. Add the flour mixture and mix until just combined.

Spread dough onto a greased 11x 17 jelly roll pan. Bake for 10-15 minutes until light golden brown, or until a toothpick comes out clean. Cool completely then frost.

Buttercream Frosting
1 cup (2 sticks) butter, room temperature
1 tsp vanilla
2 Tbsp milk
4 cups confectioners' sugar

In a large bowl, mix the butter, vanilla and milk with an electric mixer until fluffy. Gradually add the sugar, one cup at a time, beating well on medium speed. Scrape sides and bottom of bowl often. Keep mixing until all the sugar is incorporated and the frosting is white and fluffy.


A big thanks to Amie for letting me take over for the day!

Tuesday, November 1, 2011

Owl and Bat Cupcakes


Halloween is such a fun holiday.  I'm not so into the scary, creepy and gross side of things.  But I do love to dress up, taking the Littles out Trick or Treating and of course the fun party at my sister's afterwards.  There is always great "spooky" food (think Mac a Boney and Cheese, Ghoulash, Eyeballs- deviled eggs with olives, etc.).  This year I was incharge of dessert. Yum!


My little family all dressed up and ready to get our Trick or Treat on.
I decided to go as a 1950's Housewife, not much of a stretch, huh?!


Our Crew:
My sister the witch, her husband the Inmate, their two devilish daughters and baby Lion.  
My husband the um, OSU tailgater (er, no costume, bummer!) his 1950's housewife and our great protector Thor and his trusty lizard.  

It was super chilly so we had to bundle up.  As a kid I always hated having to cover my costume with a coat.  Still do now!  

When I was put in charge of dessert I knew I had to make these adorable owl cupcakes that have been floating around blogland.  I am not sure who thought of it "first", probably Martha Stewart.... anyways they are so easy, no intimidating ingredients (i.e. fondant) and super duper kid friendly- I mean who doesn't love Oreo's and M&Ms?!!  I also threw together a bat because right now my Jackson is obsessed with super hero's.  I thought he would get a kick out of a few of them mixed in.  And goodness was I right.  When he got home from preschool and eyed the cupcakes he points at the bat and says "Mommy, this is amazing!"  Right then and there I knew I just went up a few notches on the cool ladder....


Sure I made these for Halloween, but they would totally be cute for birthday parties (animal, woodland, super hero, etc.) as well.


Owl and Bat Cupcakes
for the cupcakes: 
1 box devils food cake (or your favorite cake mix)
3 eggs
1 1/2 cups water
1/2 cup canola or vegetable oil
18-24 cupcake liners

Prepare cupcakes according to box directions.  Allow to cool completely before decorating.

for the decorations: 
1 large package of Oreo cookies (You won't need them all, but it takes some practice to cut them.  You'll want extra)
1 bag of M&Ms (You only need the brown and the yellow, the rest is for you to snack on while baking) 1 toothpick
1 tub of your favorite chocolate frosting, homemade or store-bought
1 icing pen (I accidently bought a gel pen, but I kinda like how the details are subtle on the bats)

Smooth the chocolate frosting over the surface of the cupcakes.  Set aside.

To make the Owls:
Separate the Oreo cookies, keeping the white frosting intact.  These will be your eyes.  I found that giving them a gentle twist released them pretty well.  Have a butter knife on hand incase some frosting sticks to the opposite side.  It scraps off pretty neatly.  Then just press it back down where it goes and smooth out the crack with the knife or a finger.  Use your butter knife to very gently scrape the tops of the white frosting to remove the  brown cookie residue getting them as white as possible.  Gently press a brown M&M on the white frosting to make the iris of the eye.  If the frosting cracks a little just smooth it with your finger or the blunt edge of the knife.  If you run out of brown M&M's just use green or blue ones.  That would be cute too!  Set the eyes aside.

Now you want to cut the plain cookie tops in half to make the owls horns.  You can use a sharp knife, or what I found was that kitchen scissors worked nicely.  It is very difficult to cut the cookies in half without having one of the halves shatter.  No worries, you have a whole box right?!  (I used the imperfect ones to make the bat wings since I was trimming them up a bit with my scissors anyways.) Using your kitchen scissors, carefully clean up the edges to get the halves nice and smooth.  This was really easy to do.  I couldn't believe how will the scissors worked for this.

Now go get your cupcakes.  It is time to assemble!  I slightly smoothed out a flat section where the "eyes" were going to go to to give them a bit of support so they would sit somewhat nicely.  I thought they were going to slide off, but they surprisingly stuck rather well.  Now take two "horns".  On a slight angle, stick a point into the cupcake above-behind the eye.  Do this with both halves.  Take a little dollop of frosting and put it on the cupcake behind the horns to give them a little support so they don't fall over.  Take another little dollop of frosting and put it between the eyes below the horns to give a little "hair".  Take a toothpick and use it to make little points in the frosting creating the "hair".  Do the same thing with the toothpick over the surface of the rest of the cupcakes making them look a little fuzzy and cute.

Next take a yellow M&M, turn it up on its side and stick it in the cupcake between the eyes.  This is your beak.

Ta-da!  You just made an owl!

To make the Bats:
There are two options for the bat wings.  1)You can smooth out your cut Oreo cookie halves to make nice clean edges and sharp points like you did for the owl's horns.  2)Or you can carefully cut little points in the flat side to create the points on the bat wings.  If you don't cut the points, that is fine, just draw them in with the icing/gel pen.  If you want to go with option 1, using your kitchen scissors make small "v" shaped cuts on the flat edge of the cookie half.  I found it pretty easy to do.

Once cut, using the gel pen draw the shape of the bat wing on the decorative side of the cookie.  Carefully on an angle stick the corner of the bat wing just off center into the middle of the cupcake.  Do this again with the other side.

On the brown M&Ms, gently draw two small dots to make the eyes.  Place the "head" in between the bat wings.

And there you go- you just made a bat!


I linked up on Sweets For a Saturday #43. Come find some other delicious sweet things :)

Monday, October 24, 2011

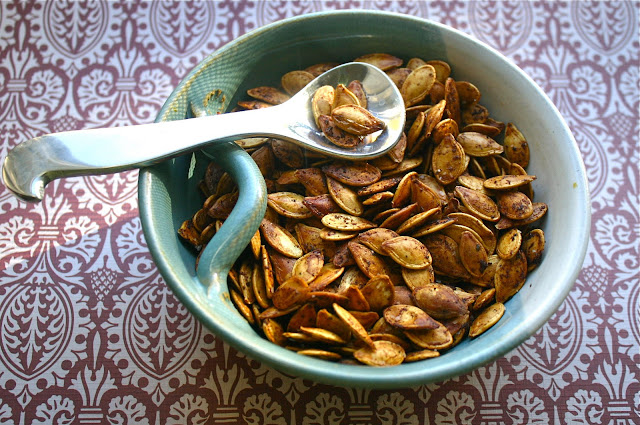
Roasted Pumpkin Seeds- Two Ways, Savory and Sweet


Roasted Pumpkin Seeds are one of my favorite snacks this time of year.  One taste makes all the work of separating seeds from the pulp completely worth it.  I have tried lots of recipes over the years, but this is probably my favorite.  A bit salty, a bit garlicky, and with just a hint of heat from the Worcestershire sauce and seriously so, so good.  They are awesome just by the handful, but also taste yummy sprinkled on soups and salads or anywhere you would like a bit of a crunch.

I have also added a nice Cinnamon Sugar version.  You soak the seeds in apple cider, bringing out the sweetness of the pumpkin flavor.  By tossing it with a buttery, cinnamon sugar topping, the heat from the oven makes the sugars caramelize, giving them an almost candy coating.  I love salty and sweet snacks together, so if you have enough seeds to make both flavors do it and serve them side by side.


Roasted Pumpkin Seeds
2 cups pumpkin seeds, cleaned and rinsed
1 1/2 tablespoons melted butter OR olive oil
1/2 teaspoon salt (I like using corse salt)
1/2 teaspoon garlic salt
1/8 teaspoon garlic powder
2 teaspoons Worcestershire Sauce
1/8 teaspoon cracked black pepper (about 20 grinds from the pepper mill)

Preheat oven to 275 degrees.

Seperate the seeds from the pulp of the pumpkin.  Don't worry about getting all of the pumpkin strands off, it adds extra flavor to the roasted seeds.  I just love when I get a seed with pumpkin still attached- yum!  You just want the seeds clean enough so you can easily toss them.  Once rinsed, lightly dry and set aside.

In a large mixing bowl, add the melted butter, Worcestershire Sauce, salt, pepper, garlic salt, and garlic powder and whisk until well blended.  Add the pumpkin seeds and toss, throughly coating in the butter mixture.  Spread pumpkin seeds in a single layer onto a silpat or parchment paper lined baking sheet.  Bake for 1 hour, checking them often and tossing occasionally, until butter topping has dried and the pumpkin seeds are golden brown.

Remove from the oven and allow to cool and dry-out the rest of the way on the cookie sheet on top of the stove.  Store in an airtight container.


Cinnamon-Sugar Apple Cider Pumpkin Seeds
2 cups pumpkin seeds, cleaned and rinsed
1 1/2 cups apple cider
1 1/2 tablespoons melted butter OR olive oil
1/8 teaspoon salt
1 tablespoon brown sugar
1 teaspoon cinnamon
1/8 teaspoon nutmeg

Preheat oven to 275 degrees.

Pour the apple cider in a medium sauce pan and bring to a boil.  Add the pumpkin seeds and boil on medium heat for 10 minutes. Drain the seeds and pour them in a large mixing bowl.

Pour the melted butter or olive oil into the bowl, along with the salt, brown sugar, cinnamon, and nutmeg.  Mix well to coat and spread pumpkin seed in a single layer onto a silpat or parchment paper lined baking sheet.  Bake for 1 hour, checking them often and tossing occasionally, until butter topping has dried and the pumpkin seeds are golden brown.

Remove from the oven and allow to cool and dry-out the rest of the way on the cookie sheet on top of the stove.  Enjoy!

Store in an air-tight container.


Saturday, October 22, 2011

Cinnamon Bun Muffins (Gluten Free, Low Carb)


I have been getting lots of requests for more Special Diet recipes (low carb, gluten free, vegan, etc.)  So this one is for you!  This recipe is low carb and gluten free due to the use of the almond meal.  The use of honey or maple syrup makes it low on the glycemic index as well, meaning that your body will break it down faster instead of storing the sugars like when using granulated white sugar does. 

But most importantly, they are SO, SO yummy!  These muffins have tons of cinnamon, making your home smell like heaven while baking.  The almond meal gives a nice nutty flavor that blends everything together beautifully.  Even if you aren't concerned about any special diets, you would still fully enjoy these muffins. Our whole family just loved them.  Thank you Comfy Belly for introducing us to this great recipe!


Cinnamon Bun Muffins (Gluten Free, Low Carb)
recipe courtesy Comfy Belly

1/2 cup of yogurt
1/4 cup of honey (or maple syrup)
2 eggs
2 1/2 cups of blanched almond flour
1/4 teaspoon of sea salt
1/2 teaspoon of baking soda

Cinnamon Topping Ingredients 
2 tablespoons of ground cinnamon
4 tablespoons of honey (or maple syrup)
2 tablespoons of unsalted butter, melted (ghee or coconut butter will work too)
1/4 cup of chopped walnuts (optional; or other nut)

Preheat oven to 310 degrees F.

Combine all the wet muffin ingredients into a bowl and blend well with a spoon. Add the dry muffin ingredients and blend well with a spoon. Place cupcake liners in a baking pan, and fill the liners halfway with batter.

Blend all the topping ingredients well. Add about a tablespoon of topping to the center of each muffin. Now put another scoop of batter on top of each muffin until the batter just about reaches the top. Add nuts now if your adding them to the top of the muffin. Evenly distribute the remaining topping over the top of each muffin. Optionally, use a toothpick to poke at the top of each muffin to allow some topping to drip into the batter.

Bake for about 25 minutes, or until a toothpick placed in the center of a muffin comes out clean and the tops are starting to brown. Cool and enjoy!

Store for a few days covered, or in the refrigerator for 2 weeks.


Don't forget to enter my 
by Avery Office Supplies for one lucky winner!  

click on the link to make your entry and to read all the details for this great prize!


I linked up on Sweets For a Saturday #43. Come find some other delicious sweet things :)

Tuesday, October 4, 2011

Kolokithopita- Savory Greek Pumpkin Pie


At our last girls' night in, we decided on a Greek Theme for dinner.  I've made plenty of Souvlaki's, hummus and pitas, kabobs, and all your traditional fare in the past.  So tonight I thought I would try something a little different.  Being that it is fall and I love all things pumpkin this recipe really stood out to me.  It is a pie, like the famous Spanakopita; a spinach and cheese pie layered between flaky phyllo pastry.  Only instead of spinach it uses the festive pumpkin!  It is called a "pumpkin pie", but it tastes nothing like the American counterpart.  It has a slight sweetness thanks to the pumpkin, but otherwise it is a very savory dish with the salty feta and ricotta cheeses, sautéed onion, and rice.  It was a lovely recipe and I am so glad I gave it a whirl!  You should too.


Kolokithopita- Savory Greek Pumpkin Pie
adapted slightly from Healthy Greek Recipes

1 medium to small pumpkin OR one can of pumpkin
1 large onion, chopped
1 and ½ cups milk (I prefer evaporated because is creamier)
1 cup short grain rice
2 whole eggs (substitute is ok too)
2 cups different cheeses (you can use feta, which is typical, but any other cheese will do it as long as it is a salty one.  I used one cup of feta and one cup of ricotta)
pepper to taste
1 tsp cinnamon
Either ½ box of Phyllo (pictured) or 1 whole box puff pastry

If using a whole pumpkin, cut in half, clean out the seeds and grate the pumpkin into a bowl.  Set aside. 

In large skillet sauté the onion until it begins to caramelize and turn brown. Add the pumpkin stirring occasionally over medium heat for about 20-30 minutes until it looks like paste. Add the milk and rice and stir for about ten more minutes. Add the eggs, cheeses cinnamon and pepper and mix throughly. Taste and adjust seasoning according to your liking.  Remove from heat and set aside.

Preheat the oven to 400 F.

If using puff pastry:
Brush olive oil at the bottom of a pan and roll out the first sheet of pastry on the bottom.  Spread the pumpkin and cheese mixture on top and layer with the second sheet of pastry. Brush the top with a little olive oil and put it in the oven. Bake for about 30 minutes or until the pastry becomes light gold. Allow to cool before you cut in squares.

If using phyllo dough:
Brush the pan with melted butter. Carefully layer the thin sheets of phyllo one on top of the other, brushing each sheet with the melted butter or olive oil before adding a new sheet of phyllo.  You want about half of the stack of phyllo layered on the bottom of the pan.  Spread the pumpkin and cheese mixture on top and repeat layering and buttering of the remaining sheets of phyllo dough until gone.  With a sharp knife carefully score the top few sheets of phyllo dough into squares where you will want to cut them apart.  This will keep the phyllo from shattering when you cut it after baking.  Bake for about 45 minutes to an hour or until the phyllo sheets are crisp and golden brown.


I linked up my recipe on Mom's Crazy Cooking!

Saturday, September 10, 2011

Fresh Corn Chowder


Toward the end of summer here in the midwest, the temperatures begin to get cooler and the hope of Autumn fills the air.  You can smell it in the breeze and feel the crispness in the evening.  We are surprised on our night time walks that dusk comes to us much earlier then just a few weeks ago, rushing home in the quickly darkening night.  I am in no hurry for winter, but oh goodness, Autumn could last months and months and months.  It could be year long and I would be one happy girl!  It is my favorite time of the year. I crave the juicy apples, winter squashes (especially pumpkins!) and the turning of the leaves.  There is just something so happy and joyous about fall.  It seems like there is just so much FUN to be had!  With the fall fests, yummy foods packed with cinnamon and sugar, and lot of maple!  Pulling the favorite comfy jeans out of the attic along with those cute boots, playing at the playgrounds for hours instead of squeezing a little time in between the hot sun.  Hayrides, family hikes, and not to mention Halloween and Thanksgiving- two wonderful family holidays.

This soup is the perfect introduction to Autumn.  You get to use the delicious sweet corn your local roadside stand is selling 20 ears for $2. And the thyme is in full abundance in the garden.  But you also get to have a nice pot of creamy, invitingly warm soup that gets you in the mood to snuggle on the couch with an afghan and a good book.  You get the best of both worlds in one delicious bowl.

The recipe calls for a crock pot, but a Dutch oven works nicely and quickly if you want to hurry the process along.  A simple stock pot is also fine, just increase your cooking time to about an hour to an hour and a half, checking the potatoes for tenderness.  They should turn nice and slightly creamy when the soup is done.


Fresh Corn Chowder
recipe adapted from Fix-It and Forget-It Lightly by Phyllis Pellman Good

4 large ears of fresh corn on the cob (1 lb bag of frozen corn can also be used in the cooler months)
1 large onion, chopped
1 celery rib, chopped
1 Tablespoon butter or margarine
1 1/2 cups of potatoes, cut into 1/2 inch cubes
2 cups water, divided
2 teaspoons chicken bouillon granules
1 Tablespoon fresh thyme, chopped (or 1 teaspoon dried)
1/4 teaspoon fresh ground black pepper
6 Tablespoons flour
3 cups fat-free milk

Combine 1 cup of water with the remaining ingredients except the flour and milk.  Cook in a crock pot on low for 6 hours, or until potatoes are tender.  You can also use a dutch oven or a heavy stock pot, cooking the chowder for about an hour to an hour and a half.

Once the potatoes are nice and tender, mix the flour and milk together and whisk until smooth.  Stir into the chowder very slowly, a little at a time until thickened.  Add in the additional 1 cup of water (or more) to achieve the thickness you prefer your chowder.  (I found one additional cup of water to be perfect). Serve with garlic toast or nice bread and butter.  This is a great "dunking" soup.

LinkWithin

Related Posts with Thumbnails